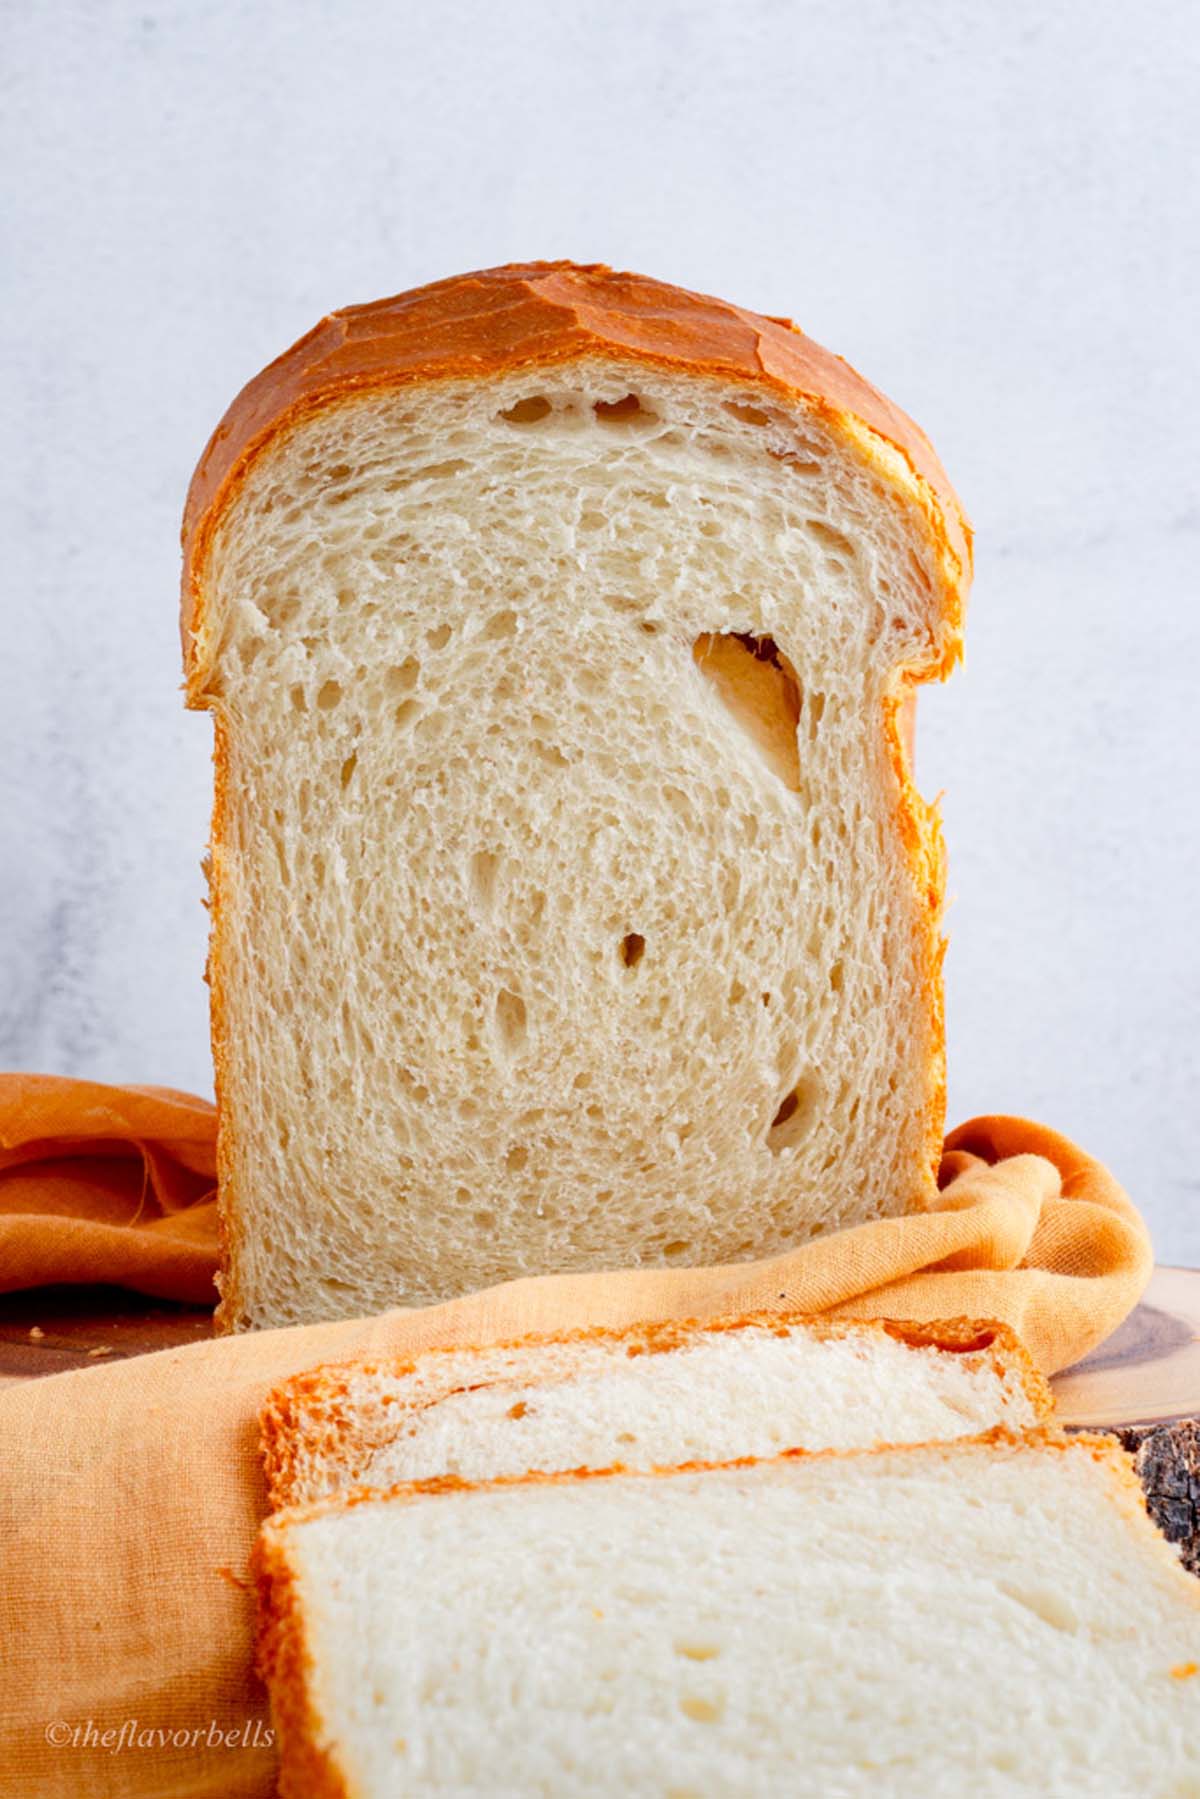
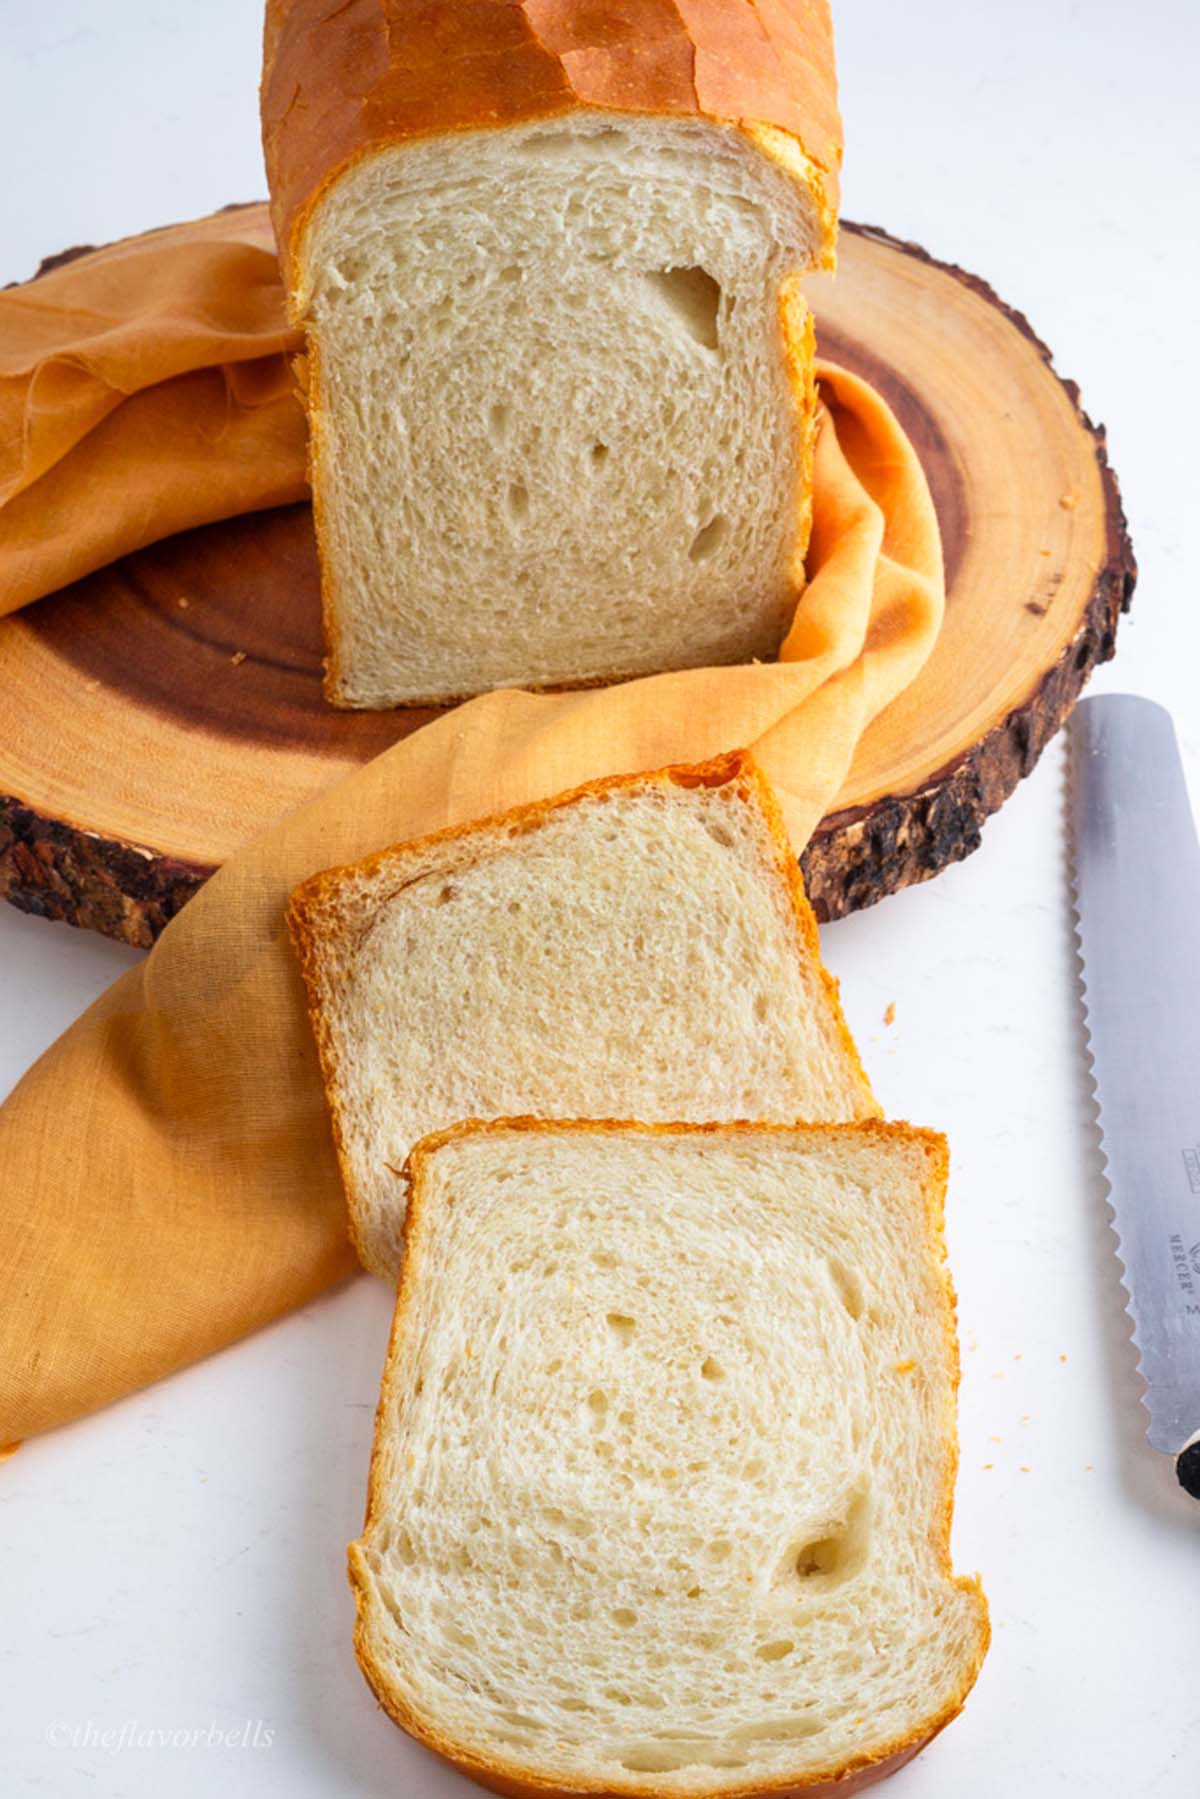
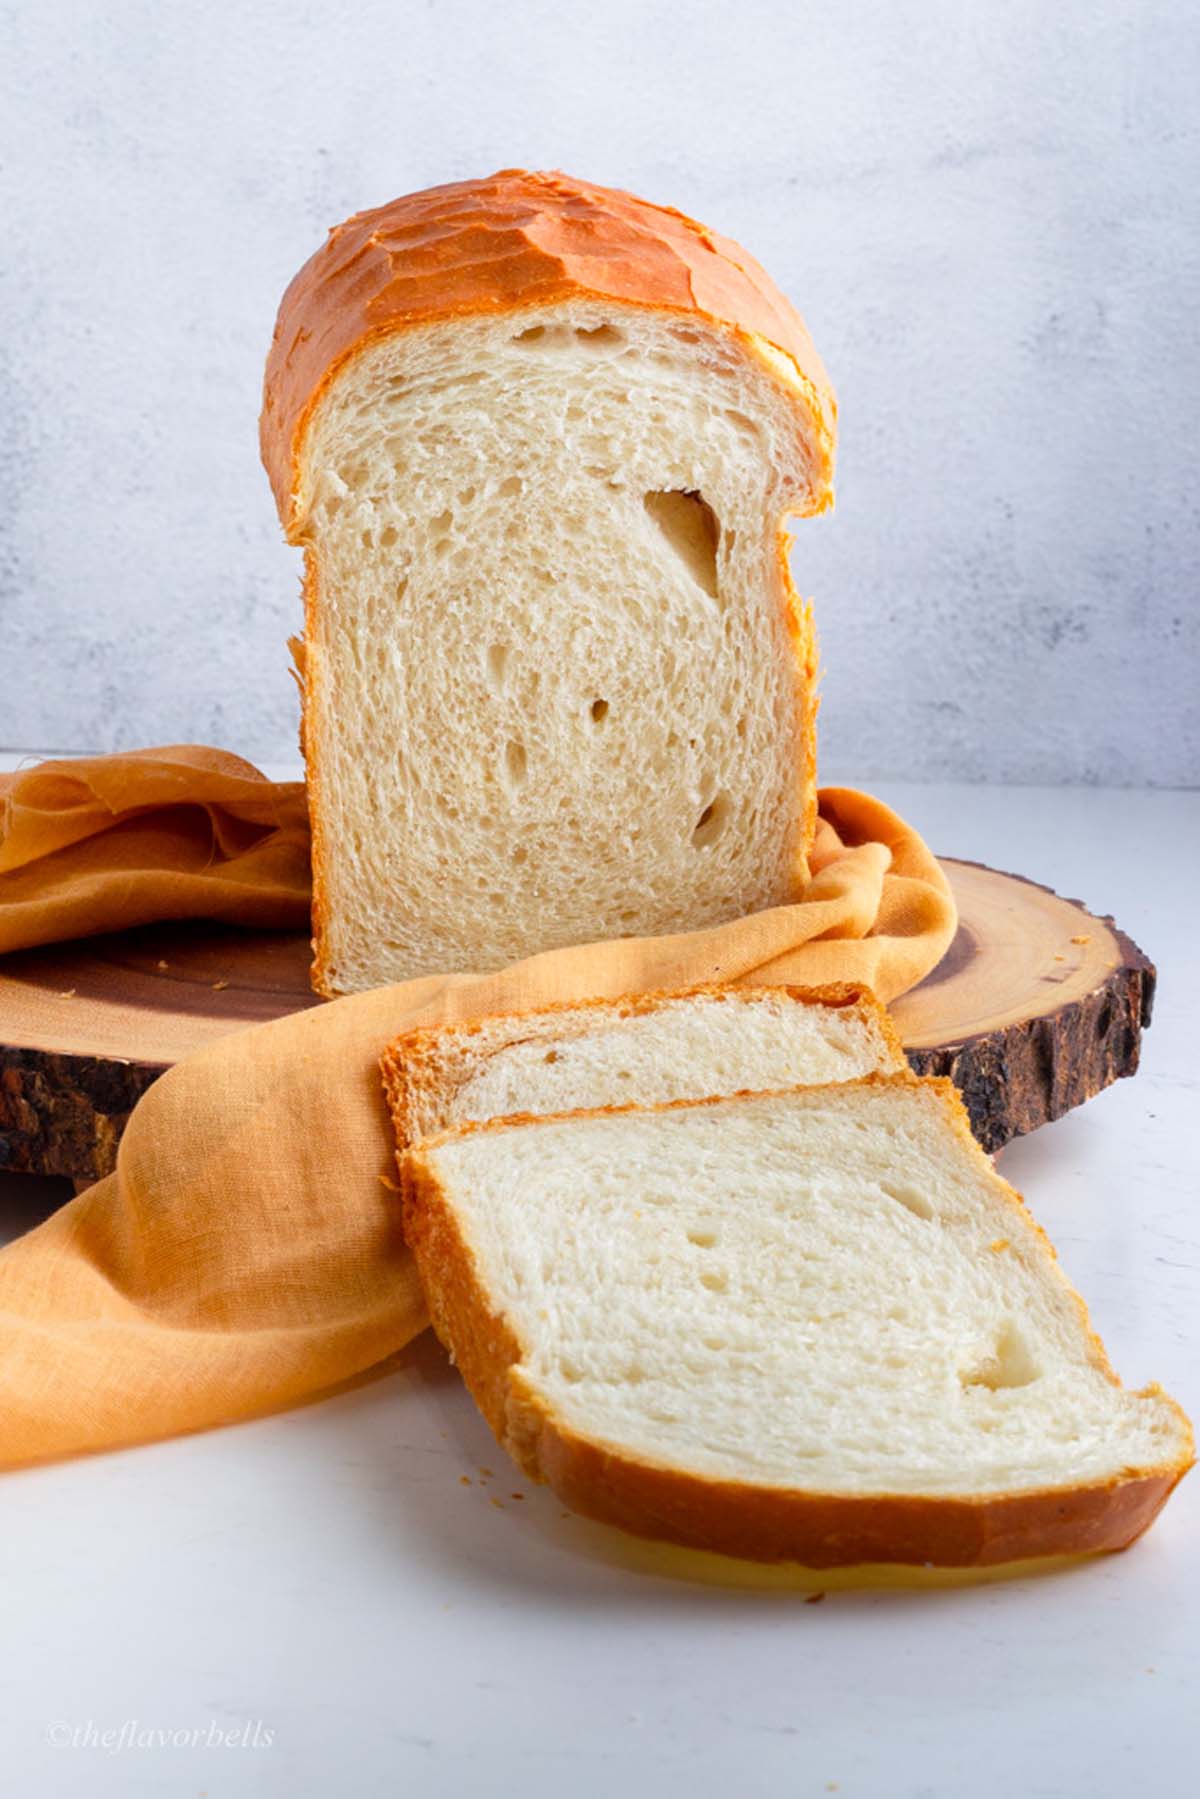
Nothing is more satisfying than turning sourdough discard into a soft, fluffy sandwich bread perfect for toast, grilled cheese, or your favorite deli fillings. This sourdough discard sandwich bread recipe is an absolute game-changer—it reduces waste while delivering a light yet flavorful loaf with just the right amount of chew.
Jump to:
If you’ve been wondering how to use up your discard without another batch of crackers or pancakes, this easy sourdough sandwich bread will quickly become your new go-to! It's a fantastic addition to your collection of sourdough recipes, offering a soft and versatile loaf with minimal effort. Unlike more time-intensive sourdough bakes, this recipe is quick and beginner-friendly, making it an excellent choice for anyone exploring discard sourdough recipes.
🧂Ingredient Notes & Substitutions
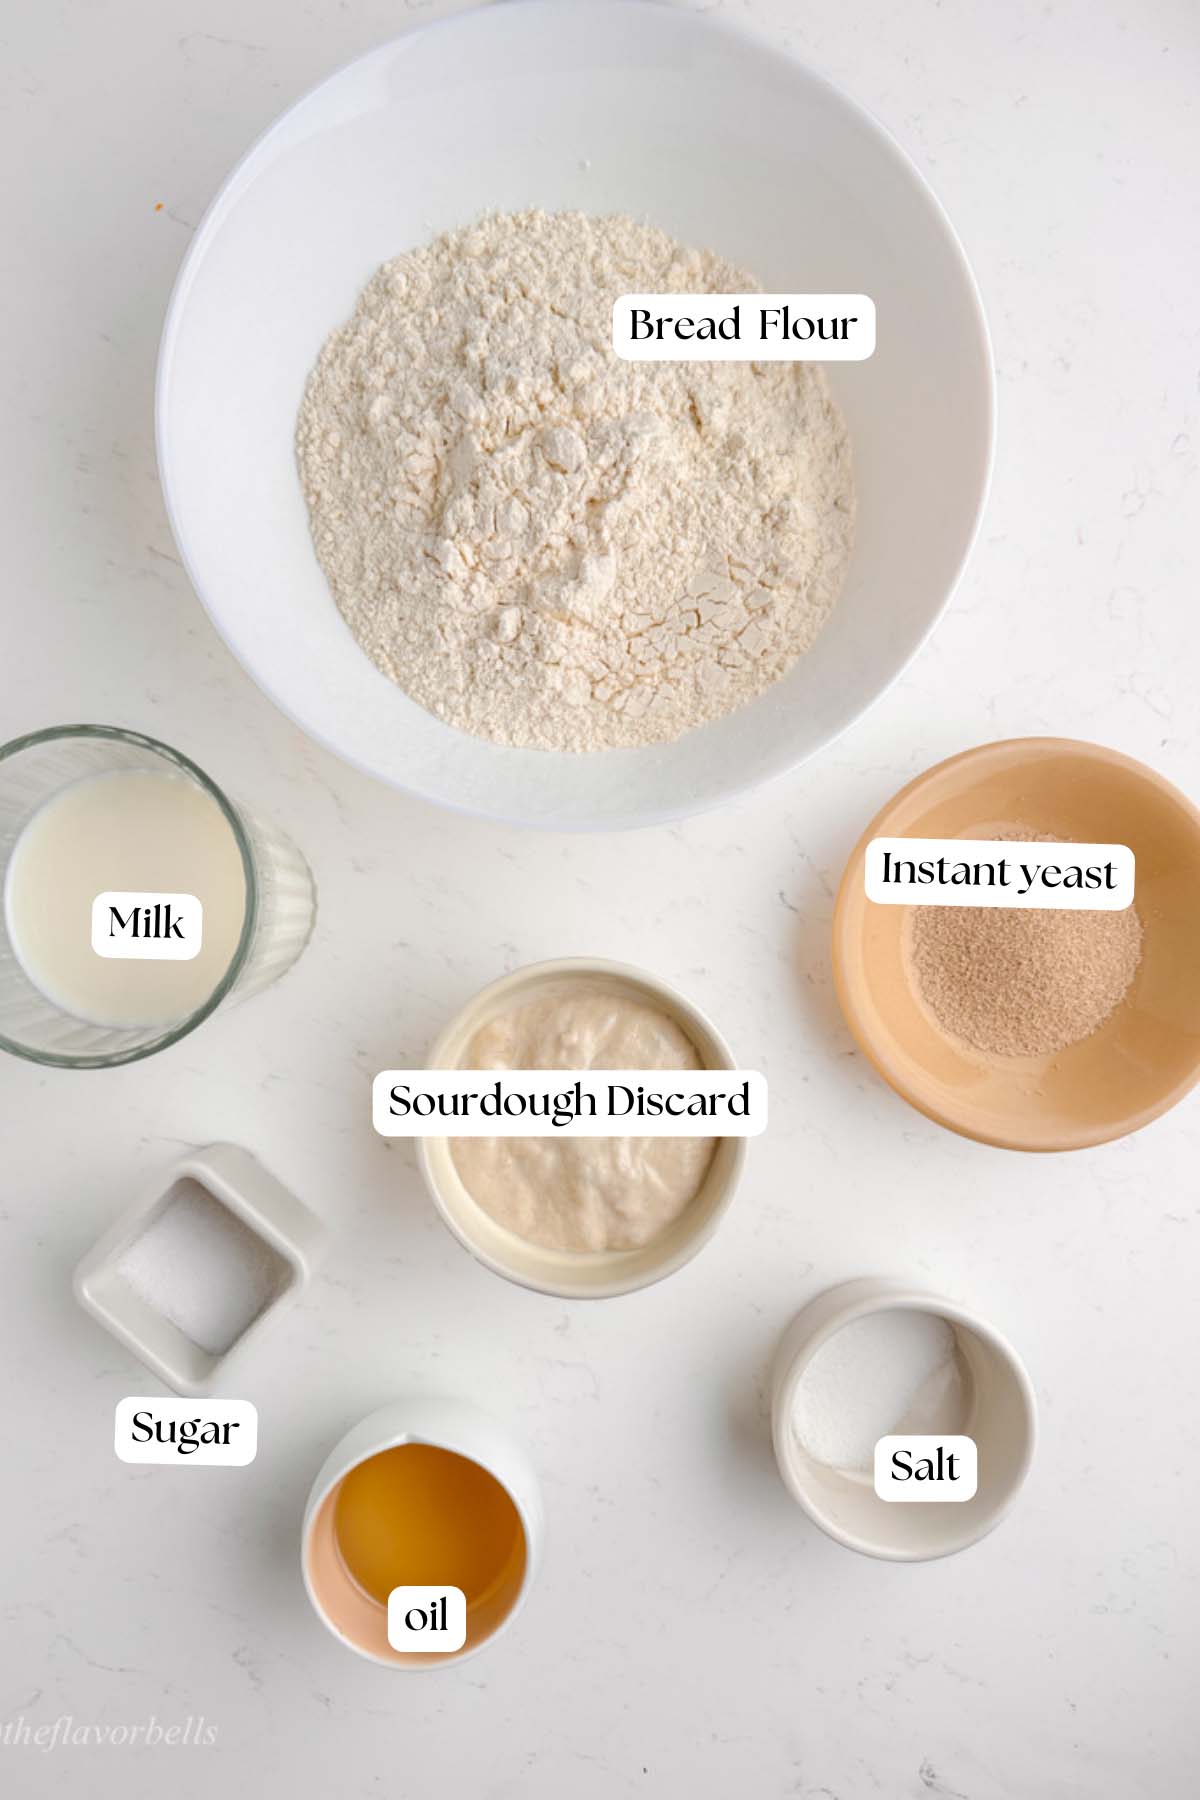
- Bread Flour vs. All-Purpose Flour – Bread flour gives this sourdough discard sandwich bread a better structure and chew due to its higher protein content. However, if you only have all-purpose flour, you can substitute it, but expect a slightly softer loaf with a bit less rise. Also, you can replace 15-20 percent of bread flour with whole wheat flour for a nutty undertone to this sourdough discard recipe.
- Sourdough Discard Variations – Any type of sourdough starter discard works, whether it’s from rye flour, whole wheat, or white flour starter. Just bring it to room temperature and mix in any hooch forming on the top. If your discard is very old and acidic, it may slightly impact the flavor, making it tangier. If you don’t have sourdough discard, you can replace it with an equal weight of flour and water, though you’ll miss out on that signature sourdough depth.
- Milk Alternatives – Whole milk adds richness, but you can swap it for plant-based milk like almond, oat, or soy if you prefer a dairy-free sourdough discard sandwich bread. Just keep in mind that non-dairy options may slightly alter the texture.
- Instant Yeast vs. Active Dry Yeast – In this sandwich loaf recipe, I am using instant yeast. If you are using active dry yeast instead of instant, proof it first in warm milk with a pinch of sugar before adding it to the dough. This ensures it activates properly and gives a good rise to your homemade sandwich bread.
- Sugar Options – Regular granulated sugar balances the flavors, but honey or maple syrup can be used instead for a subtle twist. Just reduce the liquid slightly if using a liquid sweetener.
- Oil Choices – Neutral oils like vegetable, canola, or sunflower oil work best, but you can also use melted butter or olive oil for a touch of extra flavor. If you prefer a softer and flavorful crumb, a bit of butter can make a big difference!
🔪 Instructions: Sourdough Discard Sandwich Bread Recipe
Step 1: Combining Ingredients
Start by adding the dry ingredients—bread flour, instant yeast, salt, and sugar—into the bowl of a stand mixer or a large mixing bowl. Use a whisk to mix everything well, ensuring the salt and yeast are evenly distributed throughout the flour. This step helps create a uniform dough structure and ensures even fermentation.
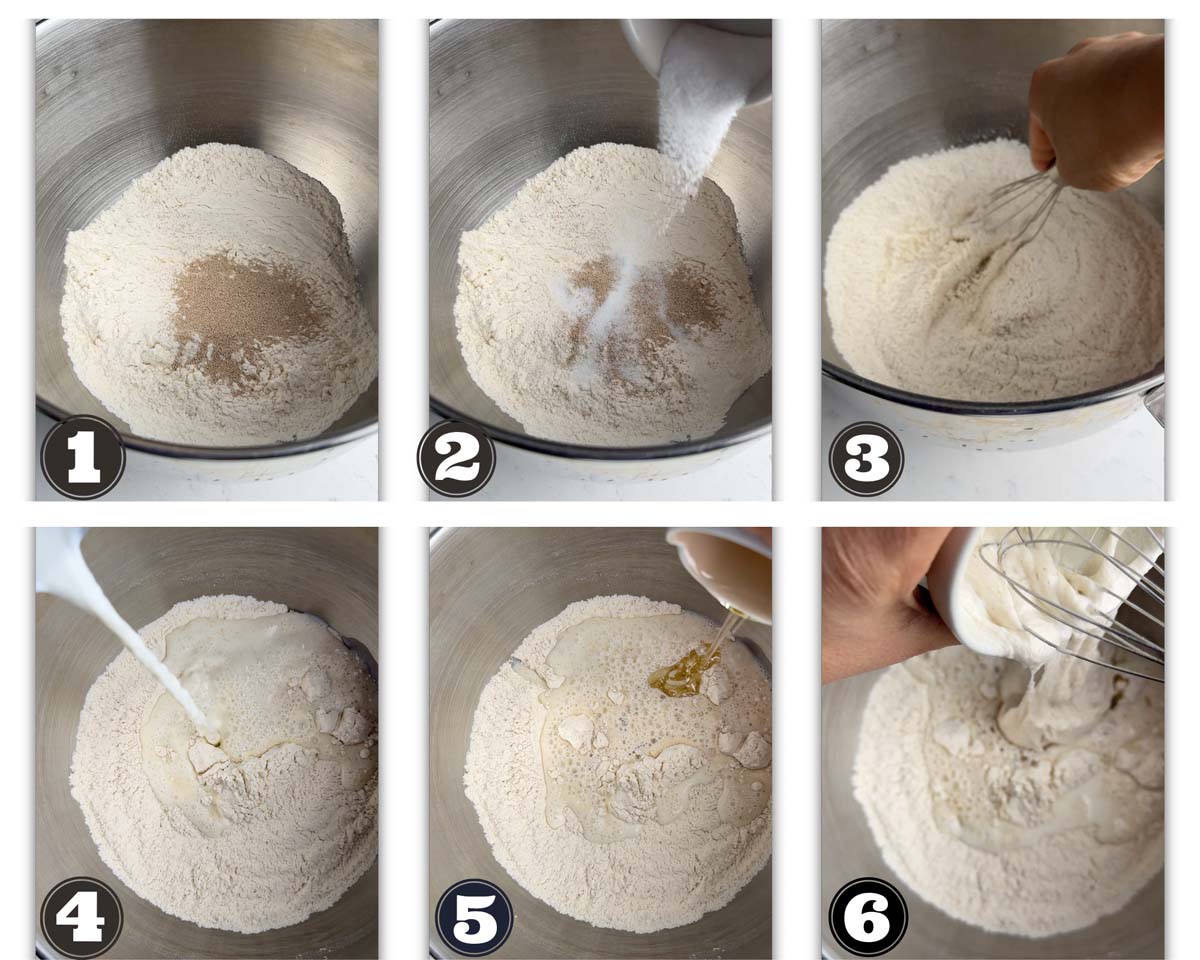
Next, add the wet ingredients—sourdough discard, milk, and oil. Stir everything together with a wooden spoon or dough whisk until a shaggy, sticky dough forms. At this stage, the dough won’t be smooth yet, but as you knead, it will develop elasticity and structure.
Step 2: Kneading the Dough
Let the stand mixer do the work! Using the dough hook attachment, begin mixing on low speed (speed 1 or mix on KitchenAid) until the ingredients start coming together into a shaggy dough. At this point, increase the speed to 2-3 and continue mixing until all the flour is incorporated, and the dough starts forming a rough ball. The dough will appear sticky initially but will come together gradually.
Knead the dough on medium speed for about 12-15 minutes, or until it becomes smooth, soft, and slightly tacky. You’ll notice the dough pulling away from the sides of the bowl but still sticking slightly to the bottom—that’s a good sign that it’s properly hydrated.
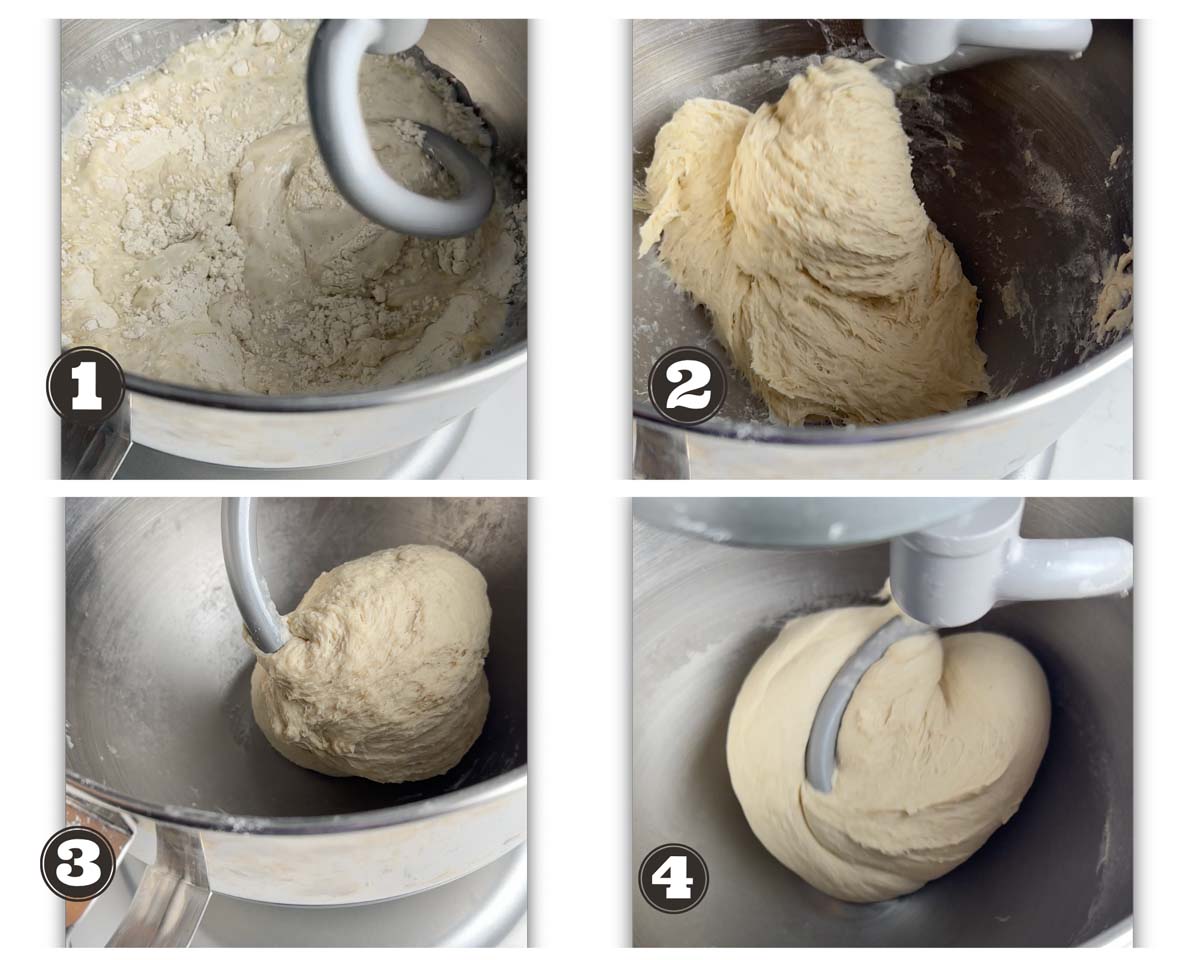
Now knead it at high speed for an additional 5-6 minutes or until it leaves the sides and base of the bowl and becomes fully supple and smooth.
Kneading by Hand? No Problem!
If you’re kneading by hand, turn the dough onto a lightly floured surface and use the stretch-and-fold technique to develop the gluten. Push the dough away with the heel of your hand, fold it over, and rotate. Repeat this motion for 15-20 minutes or until the dough becomes smooth and elastic. It should pass the windowpane test, meaning you can stretch a small piece thin enough to let light pass through without tearing.
Step 3: Bulk Fermentation
Once kneaded, place the dough into a lightly greased bowl, cover it with a damp towel or plastic wrap, and let it rise in a warm place (75-80°F/24-27°C) for about 60–90 minutes. The dough should become puffy and almost double in size. If your kitchen is cooler, bulk fermentation may take a bit longer—just be patient. If you gently press a floured finger into the dough and the indentation slowly springs back, it's ready for shaping.
Step 4: Shaping
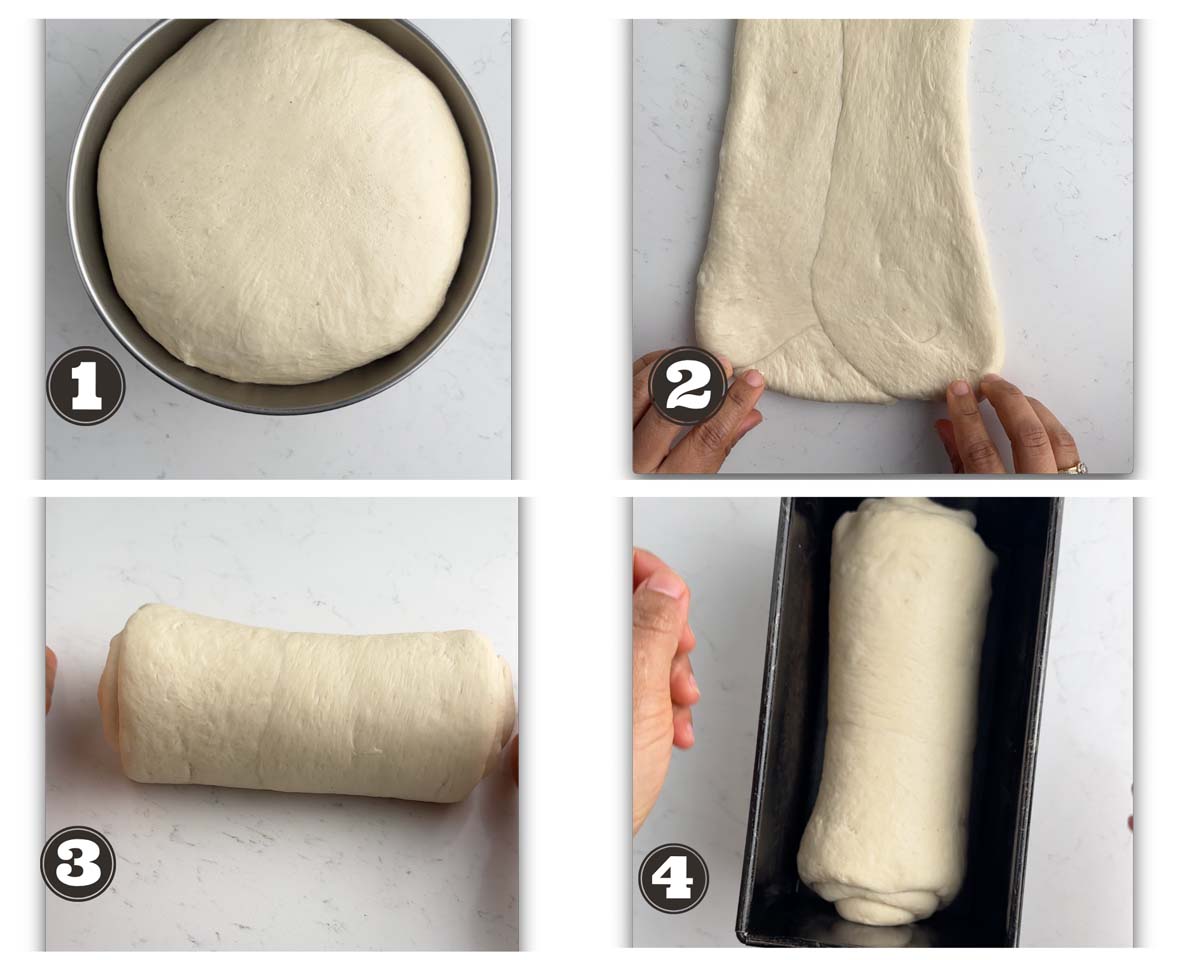
Turn the risen dough onto a lightly floured surface and gently deflate it by pressing it down. Flatten it into a rectangle with a width of about 8 inches, aligning it with the length of your loaf pan. If using an 8x4x4-inch Pullman pan or a 9x4-inch loaf pan, the shaping process remains the same. Starting from the short end, tightly roll the dough into a log, ensuring each roll is firm to create surface tension. Pinch the seam to seal it and tuck in the edges for a neat shape. Place the dough seam-side down into a greased pan (without the lid for Pullman), ensuring it sits evenly inside the pan for a uniform rise.
Step 5: Proofing
Cover the pan loosely with plastic wrap or a damp towel and let the dough proof for 45–60 minutes, or until it rises about 1 inch above the rim at the center. The final proofing time depends on room temperature—warmer environments may need less time, while cooler ones need more. To check readiness, gently press the dough with your finger; it should slowly spring back but still leave a slight indentation. If it bounces back immediately, it needs more time.
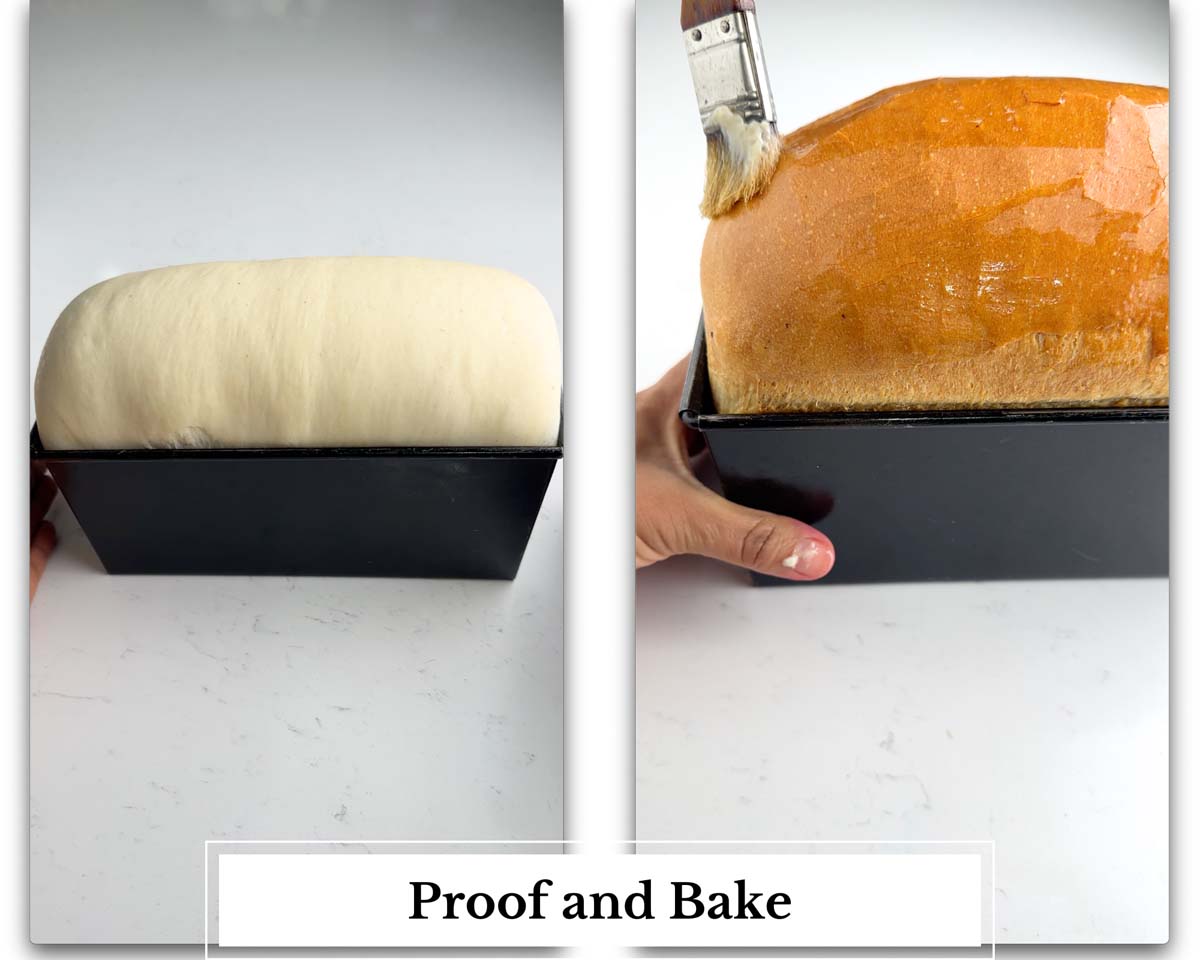
Step 6: Baking
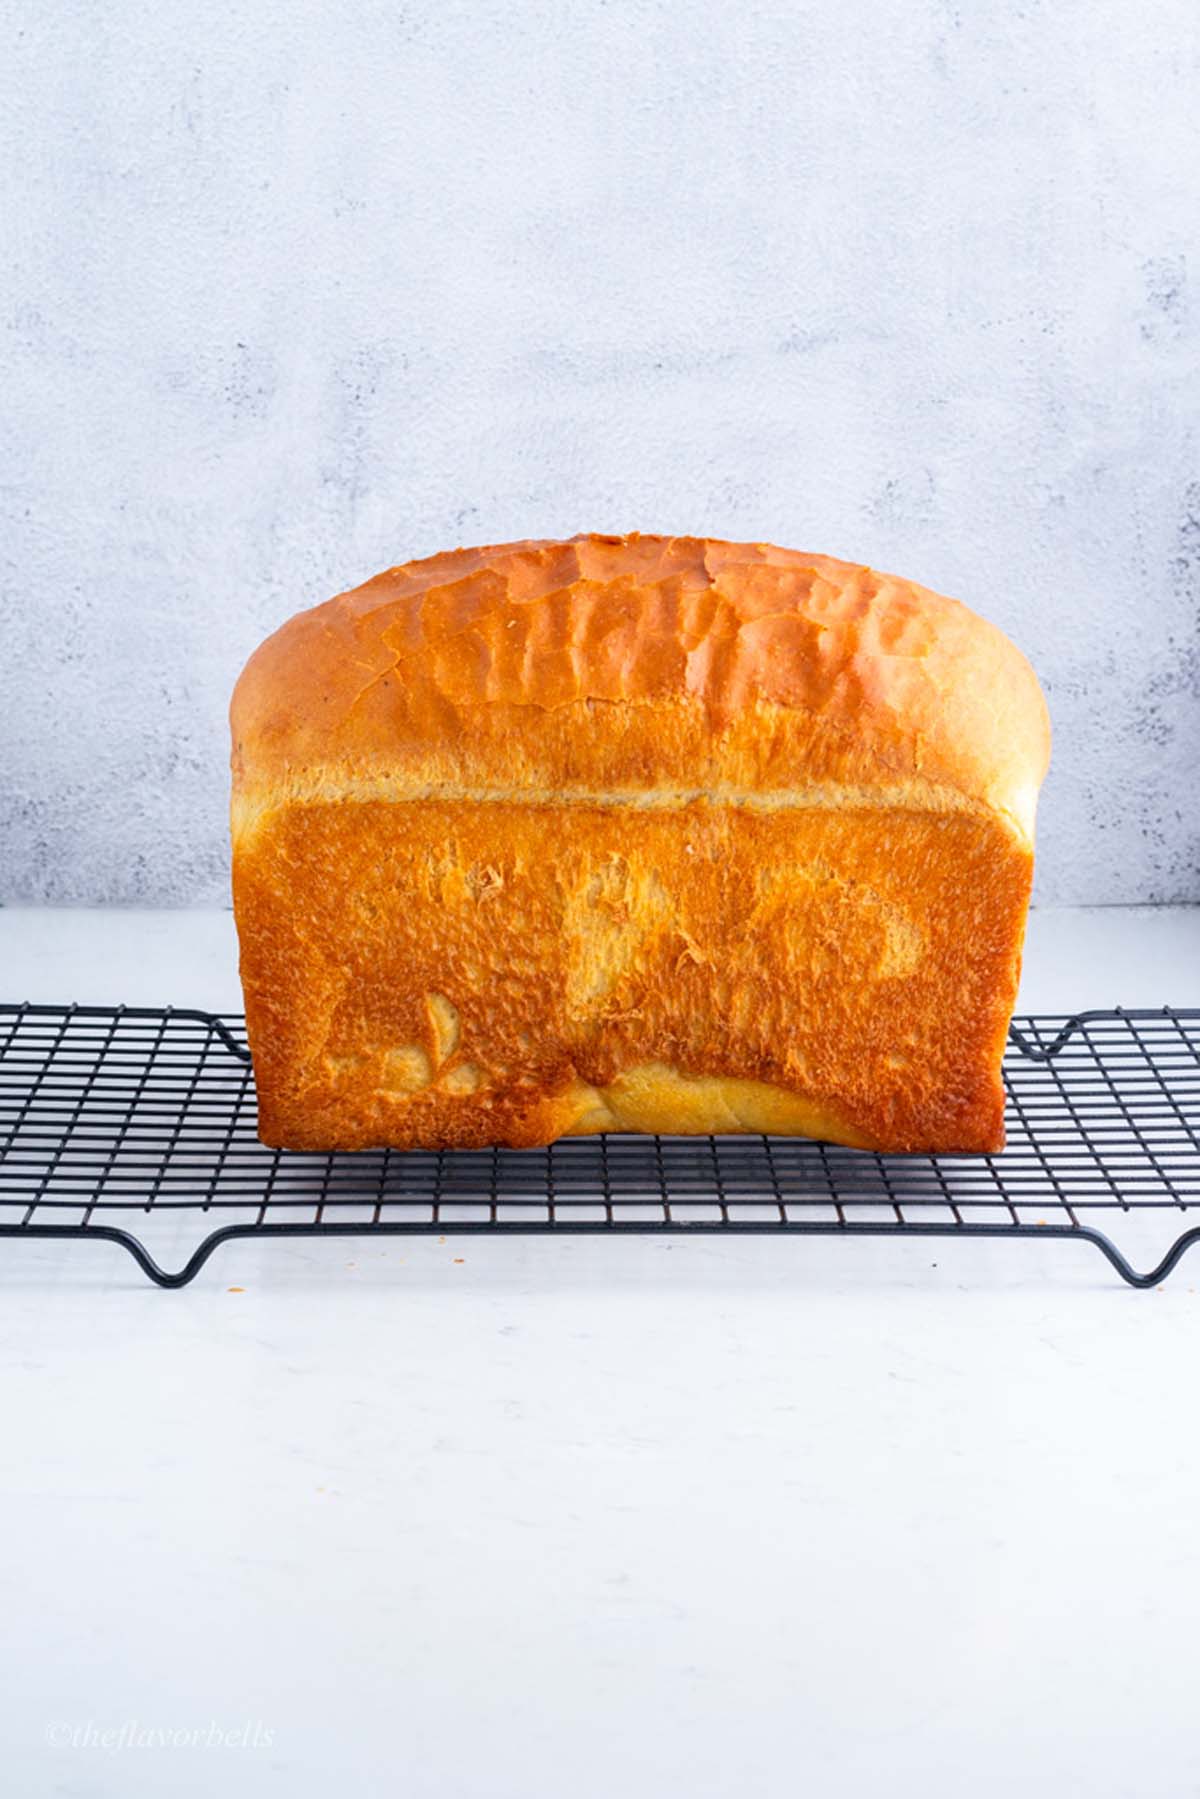
To bake the discard sourdough sandwich bread, preheat your oven to 380°F (193°C). Place a pan of hot water on the lower rack to create steam, which helps with the oven spring and a soft crust. Just before baking, spray the loaf with water to encourage even browning. Bake for 22–25 minutes, removing the pan of water after the first 10 minutes. The bread is done when it has a deep golden-brown crust and sounds hollow when tapped on the bottom. Let it cool completely on a wire rack before slicing—this helps set the crumb for the perfect sandwich bread texture!
💭 Pro Tips
Keep a few things in mind for making the perfect sandwich bread with sourdough discard.
- Bread not rising: Ensure your yeast is fresh and the proofing area is warm enough. If using sourdough discard, remember that it primarily adds flavor, so yeast is needed for the rise.
- Replace instant yeast with active dry yeast but remember to activate it in warm water before adding to the dough.
- Dense loaf: This is often due to under-proofing or insufficient gluten development. So, make sure the dough is kneaded well and has risen adequately.
- Monitor proofing times based on your kitchen temperature. Warmer kitchens accelerate proofing, while cooler ones slow it down. Aim for the dough to double in size but avoid letting it over-proof, which can weaken structure.
- Gummy Crumb: Allow the bread to cool completely before slicing to avoid a gummy texture.
- Sandwich loaf recipes work best with 62-66 percent hydration. This recipe uses 65 percent hydration. So, take care not to add only the measured quantity of water. This is where a scale comes in handy.
🫙🔥 Storage and Reheating Instructions
Congratulations on baking your discard sandwich bread! To enjoy your bread at its best, follow these friendly and foolproof tips for storing and reheating it.
Storing Your Bread
- Room Temperature: Once your bread has completely cooled, wrap it in a clean kitchen towel or place it in a bread box. This will help retain its freshness and keep the crust from getting soggy. It’s best enjoyed within 2–3 days when stored at room temperature. Avoid using plastic bags for room-temperature storage, as they trap moisture, which can affect the texture.
- Freezing for Later: If you’re not planning to finish the loaf within a couple of days, freezing is the best option. Slice the bread before freezing so you can thaw individual pieces as needed. Wrap each slice (or the whole loaf, if you prefer) in plastic wrap or aluminum foil, then place it in a resealable freezer bag. This double-layer protection prevents freezer burn and preserves the bread’s texture and flavor. Sourdough discard bread can be frozen for up to 2–3 months.
Reheating Your Bread
- For Slices: When you want to enjoy a quick slice, simply toast it straight from the freezer or at room temperature. This not only warms it up but also brings back the delightful crispiness to the crust while keeping the inside soft and tender.
- For Whole Loaves: If you’re reheating a whole frozen loaf, preheat your oven to 350°F (175°C). Remove the loaf from its wrapping and wrap it loosely in aluminum foil. Heat it in the oven for about 15–20 minutes until it’s warmed through. For a crispier crust, unwrap the foil for the last 5 minutes of reheating.
A Little Pro Tip: Adding a small pan of water to the oven while reheating can create steam, which helps revive the bread’s softness and keeps it from drying out.
❓Frequently Asked Questions
Sourdough discard is the portion of active sourdough starter that is removed during the feeding process to maintain its balance and health. It's often referred to as "discard" because it isn't active enough for leavening, but it still contains rich flavors and nutrients that enhance baked goods.
Using sourdough discard in sandwich bread gives the loaf a mild tangy flavor, a signature of sourdough, without long fermentation. It also reduces waste, allowing bakers to make the most of their starter. The discard brings natural acidity, which can tenderize the crumb and improve shelf life.
In terms of health benefits, the natural fermentation process in the starter helps break down phytic acid, making nutrients in the bread more bioavailable. While it doesn’t contribute much to rising, its enzymes and flavor compounds enrich the bread-making process.
This method is perfect for those who want to enjoy sourdough flavors with less time commitment. Plus, sandwich bread made with discard usually has a soft, sliceable texture, ideal for sandwiches and toast.
To achieve a soft and fluffy texture on sandwich bread with sourdough discard, focus on proper dough hydration, kneading, and proofing techniques. Here’s a breakdown:
1. Hydration: Sandwich bread generally, requires a softer dough, so aim for a hydration level of around 60–65%. This will make the dough pliable and easy to shape, resulting in a tender crumb.
2. Kneading: Kneading develops gluten, the protein network responsible for trapping air and creating structure. A well-kneaded dough should be smooth and elastic.
3. Proofing: Proper proofing is key. The Under-proofed dough won’t rise well, and the over-proofed dough can collapse. Look for dough that’s doubled in size during bulk fermentation and springs back slightly when pressed.
For extra softness, consider adding enrichments like butter, milk, or eggs, which tenderize the crumb. Also, using steam in the oven during the first few minutes of baking helps create a better oven spring, locking in moisture. This will yield the best discard sourdough sandwich bread.
🔗More sourdough bread Recipes
- Cheesy sourdough bread
- Sourdough bread bowl
- Chocolate chip sourdough bread
- Rye sourdough bread
- Sourdough challah
- Sourdough Croissants
- Sourdough bagels
- Pumpkin sourdough
Sourdough Discard Recipes
- Sourdough discard pretzels
- Sourdough discard naan
- Sourdough discard bread
- Sourdough discard Focaccia
- Sourdough discard pancakes
Making this easy sourdough discard sandwich bread is a delightful journey that combines practicality with the unique, tangy flavors of sourdough. Don't let your sourdough discard go to waste—transform it into something extraordinary with this simple yet rewarding bake, like this discard rolls.
Share your experience in the comments below and let us know how your bread turned out! If you loved this recipe, explore more sourdough ideas on the blog, and don’t forget to pin it to your baking board for future inspiration.
Happy baking! 🥖✨
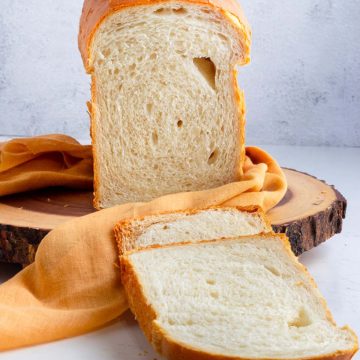
Sourdough Discard Sandwich Bread
Equipment
- Rolling Pin
- Loaf Pan 8x4x4 inches
- Weighing scale
Ingredients
- 350 g Bread flour 2 ¾ cups
- 150 g sourdough discard ½ cup + 2 tbsp
- 200 g whole milk ¾ cup + 1 tbsp
- 8 g sugar 2 tsp
- 8 g salt 1 ¼ tsp
- 2 teaspoon instant yeast
- 15 g oil 1 tbsp
Instructions
Step 1: Combining Ingredients
- Add dry ingredients; bread flour, instant yeast, salt, and sugar to the bowl of a stand mixer and whisk to combine.
- Add wet ingredients, sourdough discard, milk, and oil. Mix with a spoon until a shaggy dough forms.
Step 2: Kneading the Dough
- Stand Mixer Method: Use a dough hook on low speed ( speed 1 or stir on KitchenAid) to combine, then knead at medium speed (2-3 on KitchenAid) for 12-15 minutes.Finish kneading at high speed (speed 4 or 5 for KitchenAid) for 5-6 minutes or until the dough becomes smooth, supple and detaches itself from the sides and bottom of the stand mixer bowl.
- Hand Kneading Option: Turn the dough onto a lightly floured surface and use the stretch-and-fold technique to develop the gluten. Push the dough away with the heel of your hand, fold it over, and rotate. Repeat this motion for 15-20 minutes or until the dough becomes smooth and elastic. Test elasticity with the windowpane test.
Step 3: Bulk Fermentation
- Place dough in a greased bowl, cover, and let rise in a warm spot (75–80°F) for 60–90 minutes. It should double in size and spring back slowly when pressed.
Step 4: Shaping
- Deflate the dough, and flatten it into a rectangle of about 8 inches wide using a rolling pin. I used an 8x4x4 inch loaf pan for the recipe, anything around that will work just fine.
- Then tightly roll into a log. Pinch the seam to seal and place seam-side down in a greased loaf pan.
Step 5: Proofing
- Cover and let the dough proof for 45–60 minutes until it rises 1 inch above the rim. Check readiness by pressing lightly—it should leave a slight indentation.
Step 6: Baking
- Preheat oven to 380°F. Add an empty pan on the bottom rack of the oven.
- Spray loaf with water and transfer to oven for baking. Add a cup of water into the heated empty pan.
- Bake for 22–25 minutes, removing the water pan after 10 minutes. The crust should be golden and sound hollow when tapped.
- Brush with butter just as the sourdough discard sandwich bread comes out of the oven for a soft crust.
- Cool completely on a wire rack before slicing.
Notes
- Bread not rising: Ensure your yeast is fresh and the proofing area is warm enough. If using sourdough discard, remember that it primarily adds flavor, so yeast is needed for the rise.
- Replace instant yeast with active dry yeast but remember to activate it in warm water before adding to the dough.
- Dense loaf: This is often due to under-proofing or insufficient gluten development. So, make sure the dough is kneaded well and has risen adequately.
- Monitor proofing times based on your kitchen temperature. Warmer kitchens accelerate proofing, while cooler ones slow it down. Aim for the dough to double in size but avoid letting it over-proof, which can weaken structure.
- Gummy Crumb: Allow the bread to cool completely before slicing to avoid a gummy texture.
- Sandwich loaf recipes work best with 62-66 percent hydration. This recipe uses 65 percent hydration. So, take care not to add only the measured quantity of water. This is where a scale comes in handy.
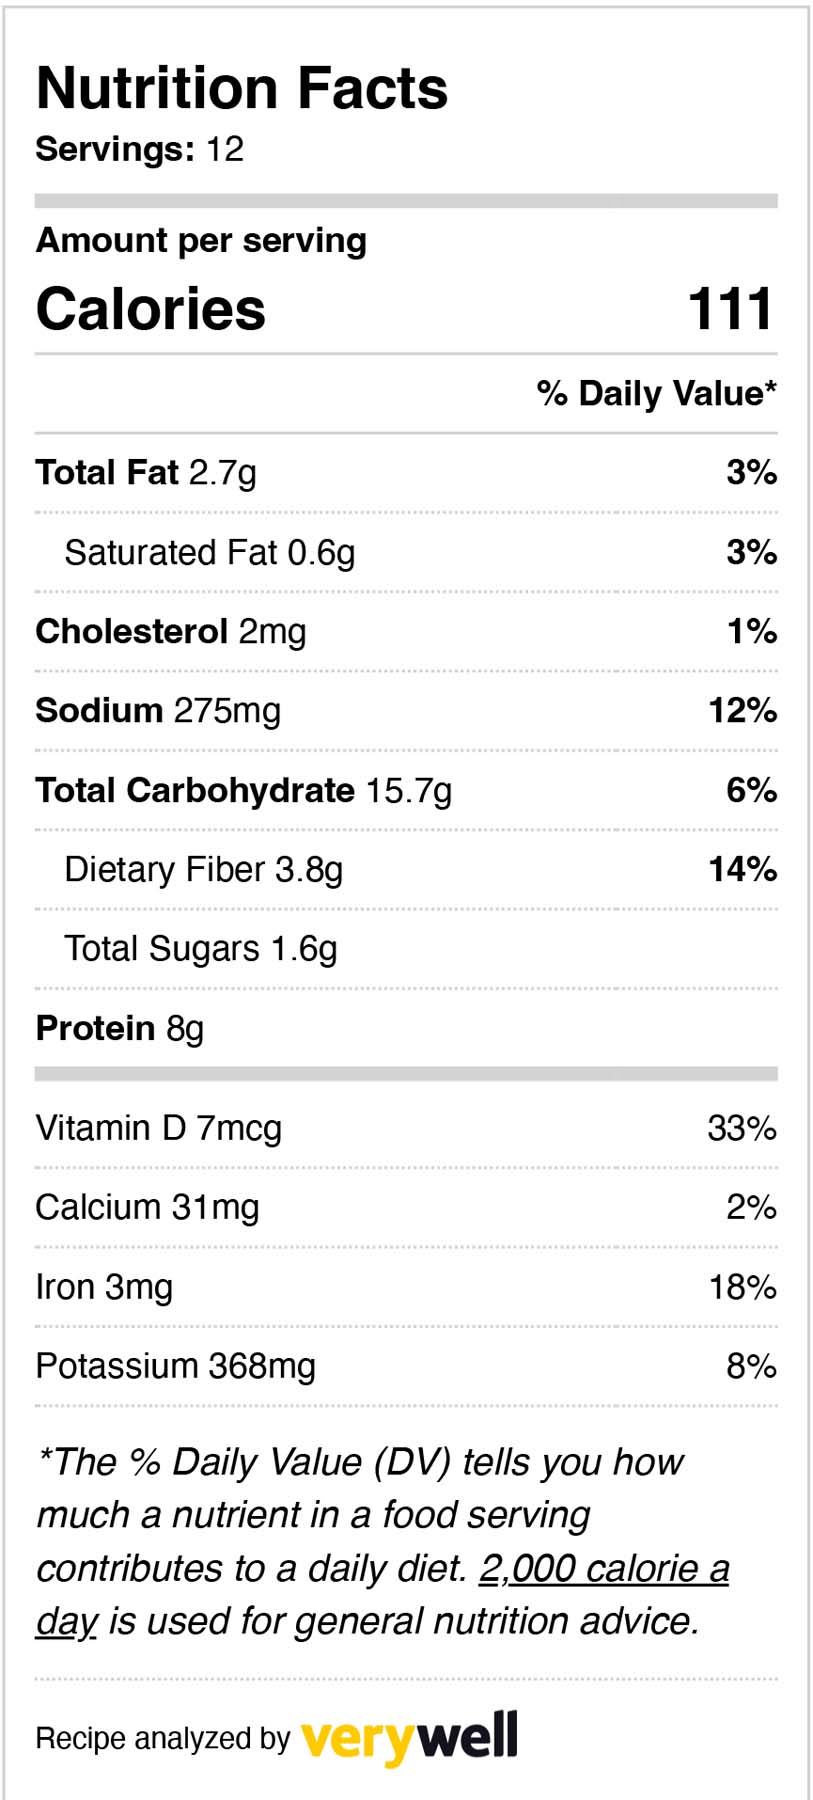
📋Nutrition Facts


Leave a Reply