If you’ve ever wondered what to do with your sourdough discard, this recipe is your answer! These super soft and quick sourdough discard rolls are the perfect way to reduce waste while creating something truly delicious—soft, fluffy, and packed with that signature tangy flavor. From family dinners to holiday feasts, these rolls are sure to impress.

There’s something incredibly satisfying about baking with sourdough discard. I still remember the early days of my sourdough journey—carefully feeding my sourdough starter and wondering what to do with all that extra discard. Throwing it away felt wasteful, so I started experimenting, and that’s when I discovered the magic of sourdough discard rolls.
These sourdough discard dinner rolls quickly became a family favorite. They are light, fluffy, and packed with the subtle tangy flavor that only sourdough can bring. Whether you’re making quick sourdough discard rolls with instant yeast on a busy weekday or indulging in overnight sourdough discard rolls for a weekend treat, this recipe is the perfect way to put your extra starter to good use.
Jump to:
- 👩🏽🍳Why You'll Love This Quick Sourdough Discard Rolls Recipe
- 🧂Ingredient Notes & Substitutions
- 🔪Step by step instructions
- 💭Expert Tips for Perfect Sourdough Discard Rolls
- 🫙Storage & Reheating Tips
- 🍽Serving Suggestions: How to Enjoy Your Sourdough Discard Rolls
- ❓Frequently Asked Questions (FAQ):
- 🔗 More Sourdough Discard Recipes
- Sourdough Discard Rolls
- 📝Nutrition Facts
👩🏽🍳Why You'll Love This Quick Sourdough Discard Rolls Recipe
If you’re looking for a foolproof way to use up your sourdough discard while making something absolutely delicious, these sourdough discard rolls are it! Here’s why you’ll love this recipe:
- Soft, Fluffy, and Flavorful – These sourdough discard dinner rolls have a beautifully light and airy texture with just the right amount of chewiness. The subtle tang from the discard adds depth to the flavor, making them more complex than regular yeast rolls.
- Quick and Easy to Make – Unlike traditional sourdough bread, these quick sourdough discard rolls don’t require an overnight rise. With just a few simple steps, you can have warm, homemade rolls on the table in no time!
- Versatile for Any Meal – Whether you use them as sourdough discard bread rolls for sliders, serve them as a side with soups and stews, or even turn them into easy sourdough discard rolls with herbs and cheese, they work for every occasion.
- Perfect for Any Occasion – These rolls are great for weeknight dinners, holiday gatherings, or even meal prepping for sandwiches. Make a batch for Thanksgiving, brunch, or simply to enjoy with some butter and jam.

🧂Ingredient Notes & Substitutions
When it comes to making these sourdough discard rolls, you can easily adjust ingredients based on what you have on hand. Here are some helpful tips on substitutions and sourcing:

Flour Choices
This recipe uses all-purpose flour for a soft texture, but you can swap up to 30% with whole wheat flour for a heartier bite. If using bread flour, expect a slightly chewier texture due to the higher protein content.
Milk Alternatives
Whole milk enhances the richness and tenderness of the rolls. If you prefer a dairy-free option, you can substitute it with oat milk, almond milk, or even water, though the rolls may be slightly less soft.
Sourdough Discard : How to use discard for best results?
Any type of sourdough discard works, whether it’s from a young starter or a mature one. If your discard is very sour, you may want to balance the flavor by increasing the sugar slightly. Ideally, the discard should be less than three days old and should be brought to room temperature. Don’t use until you observe some signs of vitality in the discard. It simply means that there should be some bubbling happening in the discard.
- For the best results, your sourdough discard should be fresh, ideally no more than three days old. Older discard tends to be more acidic, which can affect the flavor and texture of your rolls, making them denser or too tangy.
- Before using the discard, let it come to room temperature. Cold discard straight from the fridge can slow down fermentation and yeast activity, resulting in a longer proofing time.
- Most importantly, check for signs of vitality in your discard before using it. This means it should have at least some bubbling or slight activity, indicating that the natural wild yeast and bacteria are still alive.
- If your discard looks completely flat and lifeless, it may not contribute much rise to the dough, leading to heavier rolls.
- If necessary, let it sit at room temperature for a few hours to encourage some activity before adding it to your dough.
Yeast Options
Instant yeast is the fastest and easiest option. This is a quick discard bread rolls recipe so I have used instant yeast. But if you only have active dry yeast, you’ll need to dissolve it in warm milk before mixing. For a fully wild-fermented version, I mean, no-yeast sourdough discard rolls omit the yeast and extend the fermentation time significantly.
Sweetener Variations
Sugar helps with browning and balances the tanginess of the discard. You can replace it with honey or maple syrup for a natural alternative, though you may need to slightly reduce the liquid. Use vegan sugar options to make vegan discard rolls.
Salt Considerations
Fine sea salt or kosher salt is ideal. Avoid table salt, which can be too harsh or affect yeast activity if not properly mixed in.
Oil
Oil gives these rolls a rich, tender crumb. You can substitute with an equal amount of olive oil or a neutral oil like avocado oil for a dairy-free version. Coconut oil works too but may add a mild coconut flavor. You can also use melted butter in this recipe.
These simple swaps make it easy to customize the recipe based on dietary needs and pantry availability while still ensuring delicious results!
🔪Step by step instructions
Step 1: Mixing the Dough

Start by adding all the dry ingredients, including the instant yeast, flour, sugar, and salt, into the bowl of a stand mixer. Give them a quick mix to evenly distribute everything. Next, add in the sourdough discard, followed by the milk and oil.
Step 2: Kneading the Dough
Let the stand mixer do the work! Using the dough hook attachment, begin mixing on low speed (speed 1 or mix on KitchenAid) until the ingredients start coming together into a shaggy dough. At this point, increase the speed to 2-3 and continue mixing until all the flour is incorporated, and the dough starts forming a rough ball.

Knead the dough on medium speed for about 8–10 minutes, or until it becomes smooth, soft, and slightly tacky. You’ll notice the dough pulling away from the sides of the bowl but still sticking slightly to the bottom—that’s a good sign that it’s properly hydrated.
Now knead it at high speed for additional 4-5 minutes or until it leaves the sides and base of the bowl and becomes fully supple and smooth.
Kneading by Hand? No Problem!
If you’re kneading by hand, turn the dough onto a lightly floured surface and use the stretch-and-fold technique to develop the gluten. Push the dough away with the heel of your hand, fold it over, and rotate. Repeat this motion for 15-20 minutes or until the dough becomes smooth and elastic. It should pass the windowpane test, meaning you can stretch a small piece thin enough to let light pass through without tearing.
Step 3: Bulk Fermentation
Once kneaded, place the dough into a lightly greased bowl, cover it with a damp towel or plastic wrap, and let it rest in a warm, draft-free spot. This is where the magic happens—the dough will begin to rise as the yeast and sourdough discard do their work. Depending on the temperature of your kitchen, this bulk fermentation can take 1 to 1.5 hours, or until the dough has doubled in size. If your kitchen is on the cooler side, allow a little extra time for the rise.
If you are using dry active yeast it may take slightly longer to double than in the case of instant yeast. Please note that in no -yeast recipes it may take even longer than 8 hours to proof. It will simply depend on the vigor of the discard.
Step 4: Shaping the Dinner Rolls

Once the dough has risen beautifully, gently deflate it by pressing down with your hands. Transfer it to a lightly floured surface and divide it into equal-sized portions. My dough weighed about 810 grams. So I divided them into 9 portions of 90 grams each. For uniform rolls, use a kitchen scale to measure each piece.
To shape each roll, take a piece of dough and pull the edges toward the center. Now flip and place the roll, seam side down, and roll using a cupped hand motions creating a smooth, round ball.
Place them on a greased or parchment-lined baking tray, a baking pan, or cast iron skillet, while spacing them a little apart. This allows them to expand as they proof.
Step 5: Proofing the Rolls
Cover the shaped rolls with a light towel or plastic wrap and let them proof for another 45–60 minutes, or until they look puffy and nearly doubled in size. A good way to test readiness is with the poke test—gently press a finger into one roll. If the indentation slowly springs back but still leaves a slight impression, they’re ready to bake!
Step 6: Baking to Golden Perfection
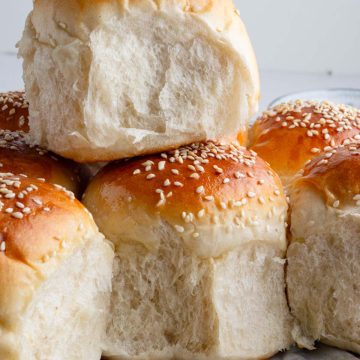
Before baking, give the rolls a milk wash ( or egg wash) by lightly brushing them with room-temperature milk. This step helps create a beautiful golden-brown crust. If you’d like, sprinkle sesame seeds on top for extra flavor and texture.
Preheat your oven and bake the rolls at 375°F (190°C) for 18-20 minutes, or until they turn a lovely golden brown. Once done, transfer them to a wire rack and let them cool slightly before serving.
Now, enjoy your freshly baked sourdough discard dinner rolls—perfectly soft, slightly tangy, and utterly delicious!

💭Expert Tips for Perfect Sourdough Discard Rolls
Baking with sourdough discard is simple, but a few expert tricks can make a big difference. Here’s how to ensure your sourdough discard bread rolls turn out perfectly every time!
Troubleshooting & Common Mistakes to Avoid
- Dough too sticky? If your dough feels overly wet and sticky, resist adding too much extra flour right away. Instead, knead it a little longer—gluten develops with time, making the dough smoother. A light dusting of flour on your hands can help with handling.
- Dough isn’t rising? This can happen if your yeast is expired or if your kitchen is too cold. Try placing the dough in a slightly warm oven (turned off) with the light on, or near a warm spot like the top of your fridge. If your sourdough discard is very old and inactive, it may not contribute much fermentation power, so fresh discard works best.
- Dense or tough rolls? Over-kneading or adding too much flour can make the rolls dense. The dough should be soft and slightly tacky, not dry. Also, make sure not to rush the proofing step—underproofed rolls won’t be as light and fluffy.
- Flat rolls after baking? This happens if the rolls overproof and collapse. Check them regularly during the final proofing stage and use the poke test—if the dough springs back too quickly, it needs more time, but if it deflates, it has gone too far.
🫙Storage & Reheating Tips
🍞 Storing: Keep your baked discard sourdough rolls in an airtight container at room temperature for up to 2 days. If you need longer storage, refrigerate them for up to a week, but they may lose some softness.
🔥 Reheating: To bring back that fresh-baked warmth, pop the rolls in a preheated 300°F (150°C) oven for 5–7 minutes or warm them in the microwave for 10–15 seconds with a damp paper towel to keep them soft.
❄️ Freezing: These rolls freeze beautifully! Once completely cooled, store them in a freezer-safe bag for up to 3 months. To enjoy, thaw at room temperature and reheat as needed.
Make-Ahead Tips
⏳ Prepare the Dough in Advance: If you want to prep ahead, you can refrigerate the dough after the first rise (bulk fermentation). Just cover it tightly and let it rest in the fridge overnight. When ready to bake, let it come to room temperature before shaping and proofing.
⏲️ Bake and Freeze: Another great option is baking the rolls ahead of time and freezing them. When needed, just reheat directly from frozen in the oven at 350°F (175°C) for 10–12 minutes.
With these expert tips, you’ll always have soft, flavorful, and perfectly golden sourdough discard dinner rolls—whether fresh out of the oven or made in advance!

🍽Serving Suggestions: How to Enjoy Your Sourdough Discard Rolls
These soft, fluffy, and slightly tangy sourdough discard rolls are incredibly versatile! Whether served warm with butter or used as a base for hearty sandwiches, they pair beautifully with a variety of dishes and occasions.
These rolls are a Perfect Pairings with Soups & Stews,🧀 As a Side for Dinner, 🥪 For Sandwiches & Sliders, 🍯 With Sweet or Savory Spreads, ☕ With a Warm Beverage, Holidays & Special Gatherings, Picnics & Potlucks, Brunch and Breakfast Buffets. No matter how you serve them, these sourdough discard rolls are guaranteed to be a crowd-pleaser at any meal!
❓Frequently Asked Questions (FAQ):
Absolutely! If you don't have sourdough discard on hand, you can certainly use active sourdough starter in its place. Active sourdough starter is more potent and will result in a slightly quicker rise time, giving your rolls a delightful texture and flavor. Additionally, if neither discard nor active starter is available, you can create a simple mixture of flour and water to maintain the dough’s consistency.
The flexibility in ingredient substitution means you can experiment with different options to suit your needs without compromising the quality of your sourdough discard rolls.
Several factors can affect the rise of your sourdough discard rolls:
* Temperature: Yeast and lactic acid bacteria thrive at 75°F to 85°F (24°C to 29°C). If too cold, fermentation slows; if too warm, dough might overproof.
* Yeast: Ensure your yeast is alive. A weak starter or dead yeast won't produce enough gas for a good rise.
* Flour Quality: Use bread flour for strong gluten development, which traps gas during fermentation.

🔗 More Sourdough Discard Recipes
- Sourdough discard Cinnamon rolls recipe
- Sourdough rolls
- Sourdough discard naan
- Sourdough Discard Bread
- Sourodugh Discard Focaccia
- Sourdough Rye bread
- Blueberry sourdough Bread
There you have it—a simple, zero-waste recipe to turn your sourdough discard into soft, flavorful rolls that are perfect for any occasion. Don’t let that discard go to waste—transform it into something truly special!
Give this recipe a try, and let us know how it turns out in the comments below. Share your creations on social media and tag us—we’d love to see your golden, pillowy sourdough discard rolls in action. Happy baking!
Sourdough Discard Rolls
Ingredients
- 400 g All Purpose flour (≈ 3 ¼ cups)
- 235 g whole milk (≈ 1 cup)
- 120 g Sourdough Discard (≈ ½ cup)
- 1 teaspoon Instant yeast
- 12 g Sugar (2 tsp)
- 8 g Salt (1 ½ tsp)
- 45 g oil or butter (3 tbsp)
Instructions
Step 1: Mixing the Dough Ingredients
- Combine all dry ingredients, including instant yeast, flour, sugar, and salt, in the bowl of a stand mixer. Mix briefly to ensure even distribution.
- Add the sourdough discard, followed by milk and oil, to the dry ingredients.
Step 2: Kneading the Dough
- Using the dough hook attachment, mix on low speed until the ingredients form a shaggy dough.
- Increase the speed to medium and continue kneading until the dough forms a rough ball and all flour is incorporated.
- Knead on medium speed for 8–10 minutes until the dough becomes smooth, soft, and slightly tacky. It should pull away from the sides of the bowl but stick slightly to the bottom.
- Switch to high speed and knead for an additional 4–5 minutes until the dough is fully supple, smooth, and pulls away from the sides and base of the bowl.
- Kneading by Hand: Transfer the dough to a lightly floured surface and use the stretch-and-fold technique. Push the dough away with the heel of your hand, fold it over, and rotate. Repeat for 15–20 minutes until the dough is smooth, elastic, and passes the windowpane test (stretches thin enough to let light through without tearing).
Step 3: Bulk Fermentation
- Place the kneaded dough in a lightly greased bowl, cover with a damp towel or plastic wrap, and let it rest in a warm, draft-free spot.
- Allow the dough to rise until it doubles in size, which typically takes 1 to 1.5 hours. Adjust time based on kitchen temperature—cooler environments may require longer.
- Note: If using active dry yeast, the rise may take slightly longer. For no-yeast recipes, proofing can take over 8 hours, depending on the vigor of the sourdough discard.
Step 4: Shaping the Dinner Rolls
- Gently deflate the risen dough and transfer it to a lightly floured surface.
- Divide the dough into equal-sized portions using a kitchen scale for uniformity.
- Shape each portion by pulling the edges toward the center, flipping it seam-side down, and rolling it into a smooth, round ball using cupped hand motions.
- Place the shaped rolls on a greased or parchment-lined baking tray, spacing them slightly apart to allow for expansion.
Step 5: Proofing the Rolls
- Cover the shaped rolls with a light towel or plastic wrap and let them proof for 45–60 minutes, or until puffy and nearly doubled in size.
- Test readiness with the poke test: gently press a finger into a roll. If the indentation slowly springs back but leaves a slight impression, they’re ready to bake.
Step 6: Baking to Golden Perfection
- Lightly brush the rolls with room-temperature milk for a golden-brown crust. Optionally, sprinkle sesame seeds on top for added flavor and texture.
- Preheat the oven and bake the rolls at 375°F (190°C) for 18–20 minutes, or until golden brown.
- Transfer the baked rolls to a wire rack and let them cool slightly before serving.
Notes
- Sourdough Discard Consistency: Ensure your discard isn’t too watery or stiff; adjust liquid in the recipe if needed.
- Yeast Activity: Activate active dry yeast in warm milk before using; instant yeast can be added directly.
- Over proofing: Avoid over proofing to prevent dense rolls; monitor dough during fermentation and proofing.
- Milk Substitute: Replace milk with water, plant-based milk, or buttermilk for variation.
- Oil Substitute: Use butter or olive oil instead of regular oil for a richer flavor.
- Sugar Substitute: Swap sugar with honey, maple syrup, or a sugar alternative if preferred.
- Flour Options: Experiment with bread flour for chewiness or whole wheat flour for a nuttier taste (adjust hydration as needed).
- Sticky Dough: Add flour (1 tablespoon at a time) if the dough is too sticky; avoid over-flouring.
- Dry Dough: Add milk or water (1 teaspoon at a time) if the dough feels dry and isn’t coming together.
- Rolls Not Rising: Check if your sourdough discard is active or if your yeast is fresh and not expired.
📝Nutrition Facts


Leave a Reply