Soft, tangy, and bursting with juicy blueberries, this Blueberry Sourdough Bread is the perfect blend of sweet and sour! With a crisp crust, airy crumb, and a hint of natural sweetness, it’s a must-try for breakfast or a snack. Bake this beauty and savor every bite!

Jump to:
🧂Ingredient Notes & Substitutions
- Flour – Bread flour is ideal for its higher protein content, which helps with gluten development and structure. However, you can substitute all-purpose flour if needed, though the dough may be slightly less chewy. Whole wheat flour can be used for added flavor and nutrition, but it should be mixed with white flour (e.g., 50/50) to maintain a good texture.
- Ripe Sourdough Starter – Ensure your starter is active and bubbly before using it. If you don’t have a sourdough starter, simply use a packet of commercial yeast (about 2 ¼ teaspoon or 7g) as a replacement. This will speed up fermentation but won’t provide the same depth of flavor that sourdough offers.
- Water – Filtered or spring water is best, as chlorine in tap water can hinder yeast activity. If using tap water, let it sit uncovered for a few hours to allow chlorine to dissipate.
- Salt – Fine sea salt or kosher salt works best. Avoid iodized table salt, as it can slightly impact fermentation and flavor.
- Blueberries – Fresh blueberries work best, as they hold their shape and don’t release excess moisture into the dough. Never opt for frozen blueberries as-is, as they will thaw in the dough, causing it to weep and break its structure. If you have no choice but to use frozen blueberries, thaw them to room temperature and roll them in flour before adding them to the dough to help absorb extra moisture.
- Sweetener (Optional) – Honey or maple syrup adds a subtle sweetness and enhances fermentation. You can skip it or replace it with agave syrup or a touch of brown sugar.

🔪Step by step instructions to make Sourdough Blueberry Bread
Step 1: Mixing the Dough
Start by combining your active sourdough starter, lukewarm water, and honey in a large mixing bowl. If you prefer a more savory loaf, you can skip the honey. Stir well to dissolve. In a separate bowl, whisk together the flour and salt, then gradually add this dry mixture to the wet ingredients. Stir until all the flour is hydrated, ensuring there are no dry patches. Wet your hands and mix the dough further to ensure even hydration. Cover the bowl and let it rest for 30 to 45 minutes—this autolyse phase allows the flour to absorb the water and helps gluten formation, making the dough easier to handle later.
Step 2: Bulk Fermentation (Stretch and Folds)
Over the next 3 to 4 hours, strengthen the dough with stretch-and-folds every 30 minutes. Grab a section of the dough, stretch it upward, and fold it over itself. Rotate the bowl and repeat on all four sides. This technique builds gluten structure without aggressive kneading. Let the dough rest at room temperature (70-75°F / 21-24°C) until it becomes puffy and airy, a sign that fermentation is progressing well.
Step 3: Adding Blueberries and Shaping the easy blueberry sourdough bread

Lightly flour your work surface and carefully transfer the dough onto it. Gently stretch the dough outward into a thin sheet, being careful not to tear it. In a small bowl, toss fresh or frozen blueberries with a little flour—this helps absorb excess moisture and prevents the berries from sinking. I have used fresh blueberries in this recipe. I have tried to make it with frozen blueberries a couple of times, but the results were never pleasant. Frozen blueberries just do not work for this recipe.
Evenly distribute the flour-coated blueberries over the dough. Now, fold the dough over itself to enclose the berries and shape it into a boule. Using a bench scraper or floured hands, pull the dough toward yourself in gentle motions to create surface tension, helping the loaf hold its shape. Transfer it into a well-floured banneton or a bowl lined with a floured kitchen towel.
Step 4: Cold Proof (Overnight Fermentation)
For the best flavor and texture, cover the dough and place it in the refrigerator for 8 to 12 hours. This slow, cold fermentation deepens the sourdough tang, enhances gluten development, and improves the final texture of the bread.
Step 5: Baking the Blueberry Sourdough Bread

Preheat your oven to 500°F (260°C) with a Dutch oven inside. Remove the cold dough from the refrigerator and carefully transfer it onto a piece of parchment paper. Using a sharp knife or bread lame, score the top at a 45-degree angle to help control the expansion of the loaf during baking. Place the dough into the preheated Dutch oven and add two ice cubes—this creates steam, leading to a crispier crust. Bake covered for 20 minutes, then remove the lid, lower the temperature to 450°F (232°C), and continue baking for another 20 to 22 minutes until the crust turns a deep golden brown. Once baked, let the bread cool completely on a wire rack before slicing. This step is crucial, as it allows the crumb to fully set, giving you a soft, airy texture inside with a beautifully crisp crust.
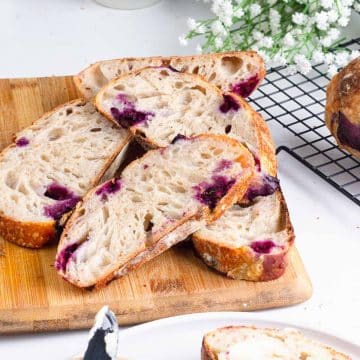
Enjoy your homemade blueberry sourdough bread toasted with butter, spread with cream cheese, or simply as is for a naturally sweet and tangy treat!
A Flavor Variation:
You can try a delightful variation by making Lemon Blueberry Sourdough Bread! Simply add 2 tablespoons of fresh lemon zest to the dough while incorporating the blueberries during shaping. The bright citrusy notes of lemon perfectly complement the tangy sourdough and sweet blueberries, enhancing the flavor with a refreshing twist. This blueberry lemon sourdough bread is perfect for a summery treat or an elegant brunch addition! 🍋💙

📔Baker’s Schedule
This schedule follows a 2-day cold fermentation process to enhance flavor and texture. Adjust the timeline based on your schedule and ambient temperature.
| Step | Time | Task |
| Day 1 | ||
| 1 | 8:00 AM | Feed Sourdough Starter |
| 2 | 12:00 PM | Mix Dough & Add Sourdough Starter and Salt |
| 3 | 1:15 PM | First Stretch & Fold |
| 4 | 1:45 PM | Second Stretch & Fold |
| 5 | 2:15 PM | Third Stretch & Fold |
| 6 | 2:45 PM | Fourth Stretch & Fold |
| 7 | 3:00 PM | Bulk Fermentation (4–6 hours) |
| 8 | 8:00 PM | Add Blueberries & Shape the Dough |
| 9 | 8:15 PM | Cold Proof Overnight |
| Day 2 | ||
| 10 | 8:00 AM | Preheat Oven & Score Loaf |
| 11 | 8:30 AM | Bake the Bread |
| 12 | 9:15 AM | Cool & Enjoy |

💭Pro Tips
Precautions to Keep in Mind
- Avoid Using Frozen Blueberries Without Thawing – Frozen blueberries will release excess moisture as they thaw, making the dough overly wet, weak, and difficult to shape. Always thaw, drain, and coat them in flour before incorporating them into the dough.
- Be Gentle When Folding Blueberries – Overmixing or aggressively folding the blueberries into the dough can cause them to burst, turning the dough an undesirable purple and making it too wet.
- Ensure Proper Dough Strength – Blueberries introduce additional hydration to the dough, which can make it softer. Be sure to perform adequate stretch and folds during bulk fermentation to strengthen the dough.
- Cold Proofing for Better Structure – Refrigerating the shaped dough overnight not only enhances flavor but also firms it up, making it easier to score before baking.
Troubleshooting Common Issues
- Dough Feels Too Wet and Sticky:This can happen due to excess blueberry moisture. Ensure the berries are well-drained and floured before adding them. Add a light dusting of flour if needed, but avoid adding too much as it can result in a dense loaf.
- Blueberries Sink to the Bottom: This usually happens when the dough is too slack or if the blueberries are too heavy with moisture. Strengthen the dough with stretch and folds and incorporate the berries during shaping rather than early mixing.

❓FAQs
Yes, you can use frozen blueberries, but it's essential to thaw and drain them before incorporating them into the dough. Using unthawed frozen blueberries is not ideal because they will gradually thaw during the proofing process, releasing excess moisture into the dough. This can weaken the gluten structure, making the dough too slack and prone to tearing.
Additionally, excess moisture can cause the berries to sink to the bottom of the loaf, leading to uneven distribution and a soggy texture in some areas.
To prevent these issues, follow these steps when using frozen blueberries:
1. Thaw the berries completely by leaving them at room temperature for about 30–60 minutes or using a gentle defrosting method in the refrigerator.
Drain any excess liquid that accumulates during thawing. You can place the berries in a fine mesh sieve or pat them dry with a paper towel to remove as much moisture as possible.
2. Toss the berries in a small amount of flour before adding them to the dough. This helps absorb any remaining moisture and prevents them from bleeding excessively into the dough.
3. Gently fold the blueberries into the dough during the shaping stage rather than the initial mixing phase. This ensures they remain intact and evenly distributed without affecting gluten development.
If possible, fresh blueberries are the best option because they hold their shape better and don’t introduce extra moisture. However, when handled properly, thawed frozen blueberries can still work well in sourdough bread and provide the same delicious flavor.
Yes, you can bake blueberry sourdough bread without a Dutch oven, though a Dutch oven is ideal because it traps steam and creates a crispy crust. If you don’t have one, here are a few alternative baking methods:
1. Using a baking stone or steel with steam: Preheat a baking stone or steel in your oven at the highest temperature (500°F / 260°C). Place the shaped dough on parchment paper and onto the hot surface. To create steam, place a metal tray or cast-iron skillet on the lower rack and pour in a cup of boiling water right after placing the dough inside. This steam helps the crust stay soft long enough to expand before hardening.
2. Using an inverted baking tray method: If you have a large heatproof mixing bowl, you can place the dough on a preheated baking sheet and cover it with the bowl for the first 20 minutes. This traps some steam, mimicking a Dutch oven. Remove the cover for the last part of baking to develop a crispy crust.
3. Adjusting oven moisture levels: If none of these options are available, you can lightly spray the dough with water before baking and place a small dish of water in the oven to add humidity. While this isn’t as effective as a Dutch oven, it can still help improve the crust texture.
🫙How do I store this Artisan blueberry filled bread to keep it fresh?
Since blueberry sourdough contains fresh fruit, it has a higher moisture content than regular sourdough bread. This means it needs proper storage to maintain freshness and prevent mold growth. Here’s how to store your loaf based on when you plan to eat it:
- For short-term storage (1-2 days): Keep the loaf at room temperature in a paper bag or wrapped in a clean kitchen towel. This allows some air circulation while preventing it from drying out. Avoid plastic wrap, as it traps moisture and can make the crust soggy.
- For medium-term storage (3-5 days): Store the loaf in a bread box or a sealed but breathable container. If the climate is very humid, consider storing the bread in a cool, dry place to prevent mold growth.
- For long-term storage (freezing): If you won’t finish the loaf within a few days, slice it and freeze individual pieces in an airtight freezer bag. You can also wrap the entire loaf in plastic wrap and then in foil to prevent freezer burn. When ready to eat, thaw at room temperature or toast slices directly from frozen.
- Avoid refrigerating sourdough bread: Refrigeration speeds up staling due to moisture loss. However, if you live in a very humid climate where mold growth is a concern, the fridge can be an option for short-term storage. In this case, lightly toast slices before eating to restore their texture.
By storing your blueberry sourdough properly, you can keep it fresh, flavorful, and enjoyably soft for as long as possible! Or use them to make sourdough French toast, they just taste wow!

🔗More Sourdough Bread Recipes
- Artisan Sourdough
- Sourdough Croissants
- Sourdough Breadsticks
- Rye sourdough Bread Recipe
- Sourdough Cinnamon Raisin Bread
- Sourdough Bagels Recipe
- Easy Sourdough Challah
If you tried this recipe, let me know in the comments how it turned out! Don’t forget to share your blueberry sourdough loaf on social media and tag me—I’d love to see your creations.
For more sourdough bread recipes and baking tips, be sure to subscribe to my blog and explore other delicious artisan sourdough variations.
Happy baking! 🍞
Blueberry Sourdough Bread
Ingredients
- 350 g 3 cups bread flour
- 70 g ½ cup active sourdough starter
- 240 g 1 cup water
- 7 g 1 ½ teaspoon salt
- 75 g ½ cup fresh blueberries
- 1 tablespoon honey or maple syrup (optional, for slight sweetness)
Instructions
Step 1: Mixing the Dough
- In a large mixing bowl, combine the sourdough starter, lukewarm water, and honey (optional for sweetness). Stir well until fully dissolved.
- In a separate bowl, mix the flour and salt.
- Gradually add the dry ingredients to the wet mixture, stirring until all the flour is fully incorporated.
- Wet your hands and mix the dough further to ensure even hydration.
- Cover the bowl and let the dough rest for about 30 to 45 minutes (autolyse) to allow gluten formation and better dough structure.
Step 2: Bulk Fermentation (Stretch and Folds)
- Over the next few hours, perform stretch and folds every 30 minutes to strengthen the dough.
- To stretch and fold, grab a section of the dough, gently stretch it upward, and fold it over itself. Rotate the bowl and repeat on all four sides.
- Let the dough rest at room temperature (70-75°F / 21-24°C) until it becomes puffy and airy, indicating proper fermentation.
Step 3: Adding Blueberries and Shaping the Loaf
- Lightly flour a work surface and transfer the dough onto it.
- Gently stretch the dough outward into a thin sheet, being careful not to tear it.
- Toss fresh or frozen blueberries with a little flour to prevent excess moisture, then evenly distribute them over the dough.
- Fold the dough over itself to enclose the blueberries and shape it into a round boule.
- Using a bench scraper or floured hands, pull the dough toward yourself to build surface tension.
- Transfer the shaped dough into a floured banneton or a bowl lined with a floured kitchen towel.
Step 4: Cold Proof (Overnight Fermentation)
- Cover the dough and place it in the refrigerator for 8 to 12 hours for a slow, flavorful fermentation.
- This process enhances the tangy sourdough flavor and improves the dough's texture.
Step 5: Baking the Blueberry Sourdough Bread
- Preheat the oven to 500°F (260°C) with a Dutch oven inside.
- Remove the cold dough from the refrigerator and place it onto parchment paper.
- Score the top of the dough at a 45-degree angle using a sharp knife or bread lame.
- Carefully transfer the dough into the hot Dutch oven and add two ice cubes to create steam for a crisp crust.
- Bake with the lid on for 20 minutes, then remove the lid, reduce the oven temperature to 450°F (232°C), and continue baking for another 20 to 22 minutes until the crust turns deep golden brown.
- Once baked, let the bread cool completely on a wire rack before slicing. This ensures the crumb is fully set, giving you a soft, airy texture inside with a crisp crust.
Notes
- Thaw Blueberries Before Using – Adding frozen blueberries directly to the dough will cause them to release excess moisture as they thaw, leading to a sticky, weak dough that's difficult to handle. To prevent this, always thaw, drain, and lightly coat the berries with flour before mixing them in.
- Handle Blueberries with Care – Mixing too vigorously or applying too much pressure when incorporating blueberries can cause them to burst, making the dough excessively wet and turning it an unappealing shade of purple. Gently fold them in to maintain their shape and prevent excess moisture.
- Maintain Dough Strength – Since blueberries add extra hydration, they can make the dough softer than usual. To keep the structure intact, ensure you perform enough stretch and folds throughout bulk fermentation to build gluten strength.
- Fixing Wet and Sticky Dough – Excess moisture from blueberries can make the dough too sticky and difficult to handle. To prevent this, always drain and flour the blueberries before adding them. If the dough still feels too wet, use a light dusting of flour while shaping—but avoid adding too much, as it can make the bread dense.
- Keeping Blueberries Evenly Distributed – If the blueberries sink to the bottom, the dough may be too weak or the berries too heavy with moisture. To fix this, strengthen the dough with stretch and folds during bulk fermentation and add the blueberries during shaping rather than early mixing to ensure even distribution.
Nutrition Facts


Leave a Reply