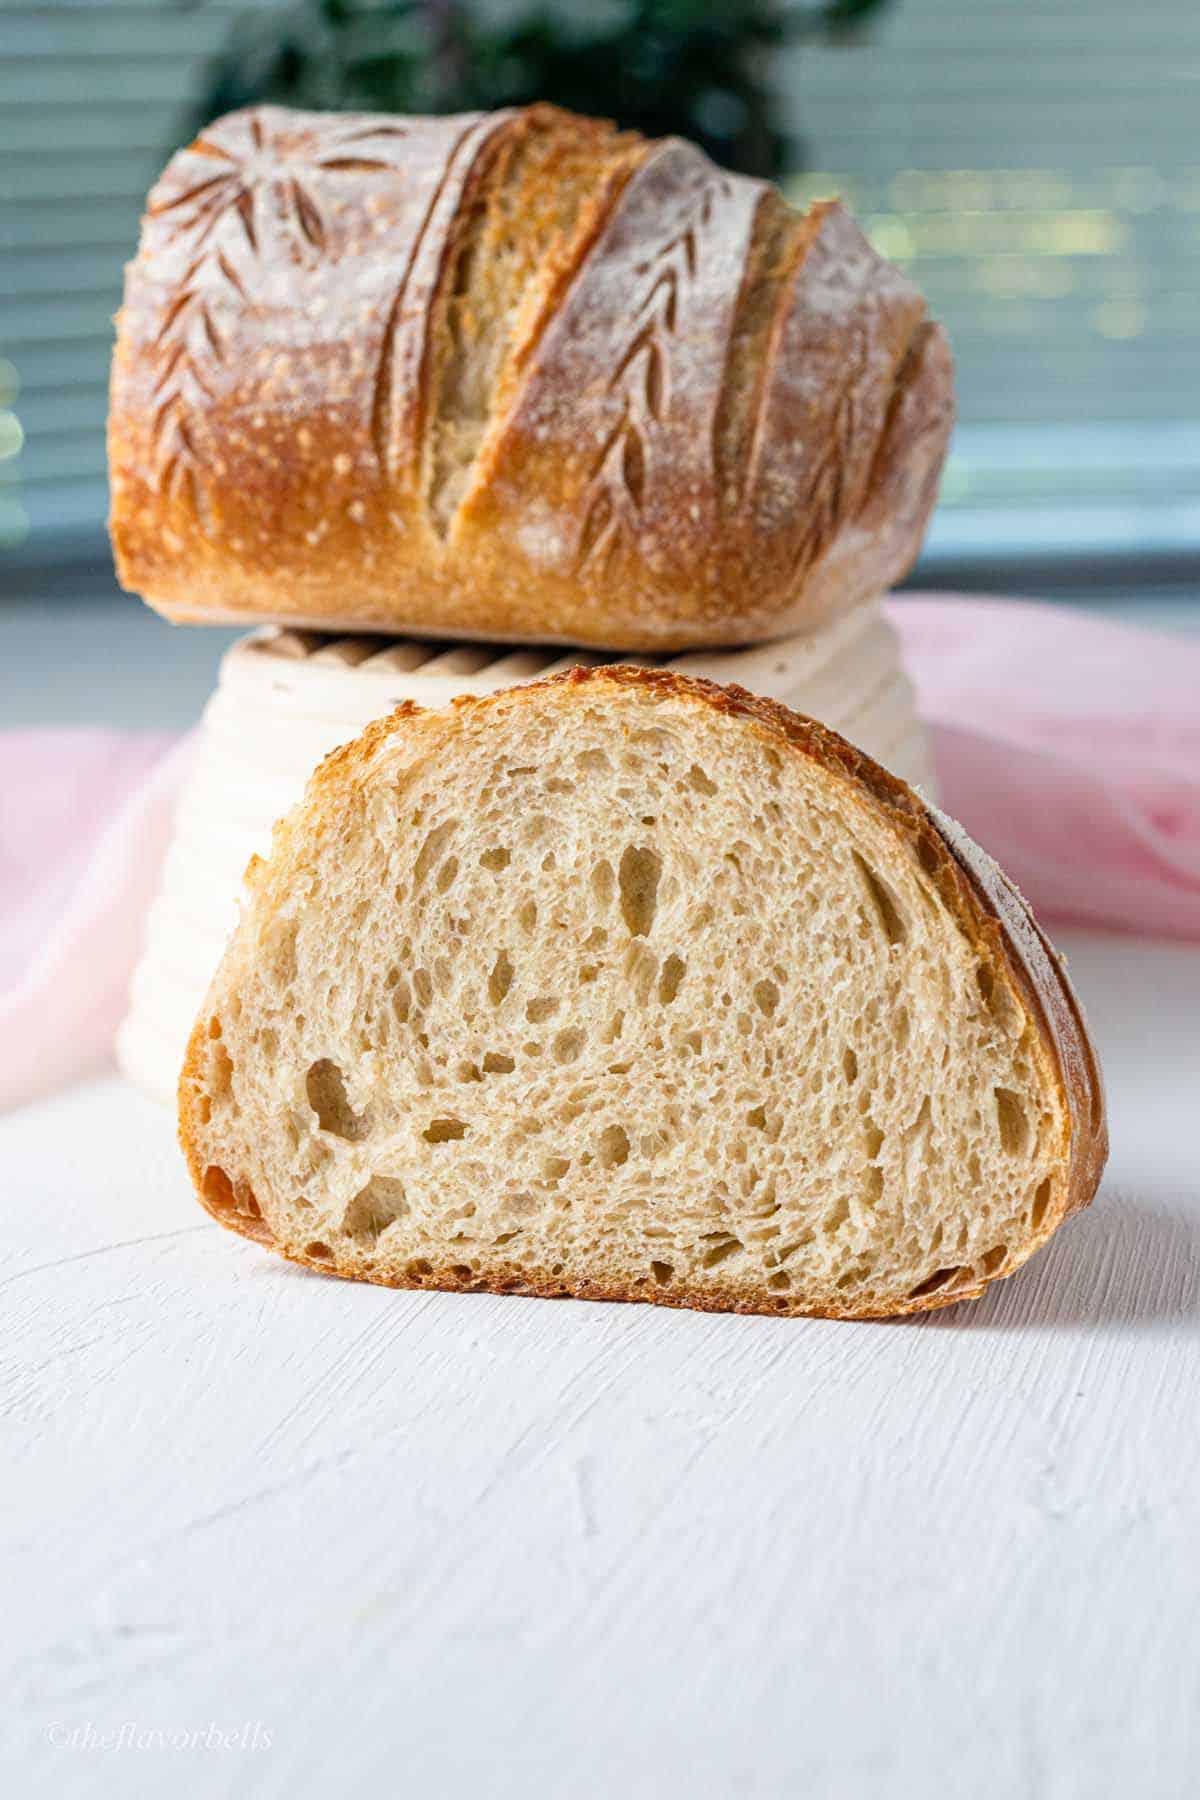
This same day sourdough bread is a simple, quick, yet delicious, and hearty bread for sandwiches, and toasts. Start the recipe in the morning, and you will have a crusty loaf for dinner to enjoy with stews and soups. This quick sourdough bread recipe is all that you need when you do not have time for slow-fermented sourdough.

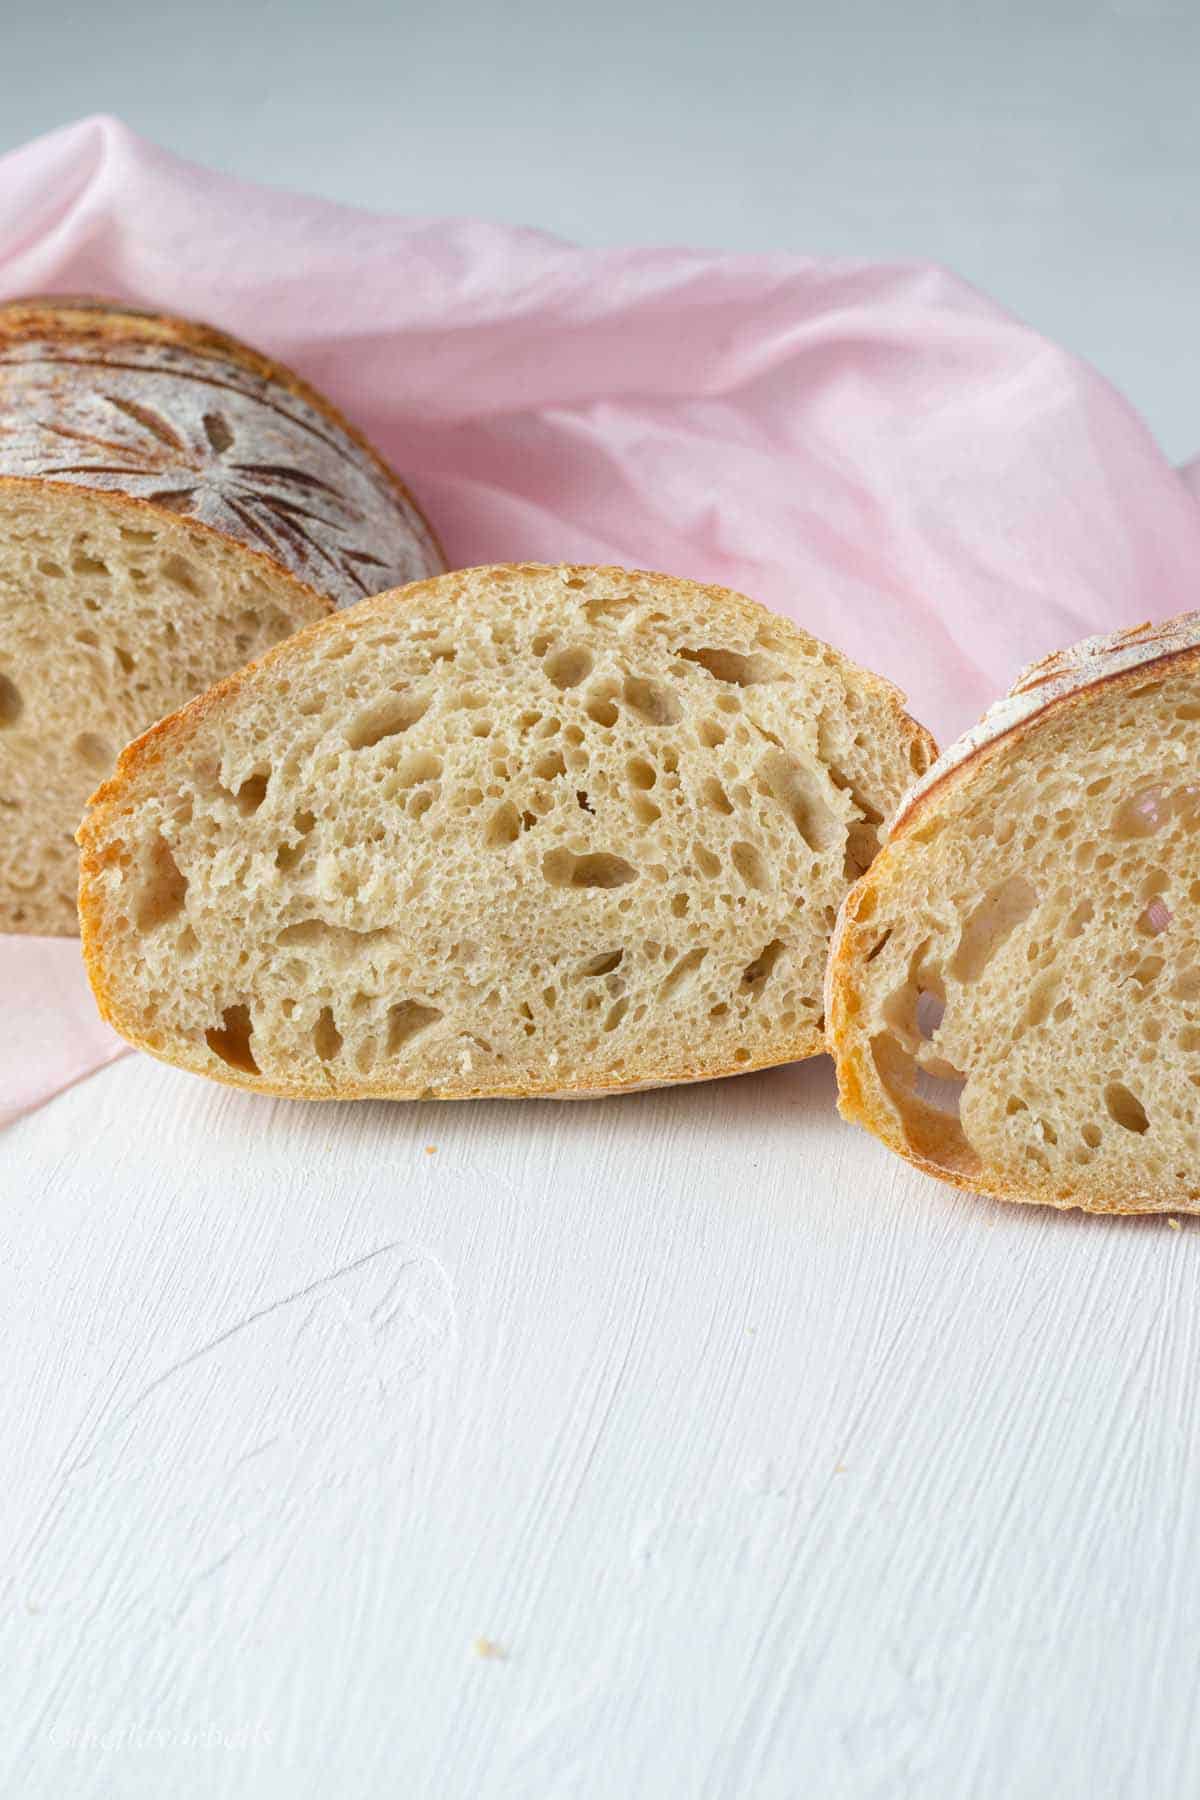
I worked on this easy recipe just as an experiment, and it was a satisfactory loaf of bread keeping in mind the time it takes. I have already made it 4 times so far. So, I thought why not share the recipe? Yes, it does not have the best open crumb and all, but trust me, you do not always need that. You need a loaf of bread with close crumbs to feed a crowd, not holes.
Jump to:
- Why will you love this same-day sourdough bread recipe?
- 🍶 Ingredients for making same day sourdough bread.
- 🍞 Instruction to make same day sourdough bread
- 📋 Baking Schedule
- 🫙Storage
- ❓Frequently Asked Questions
- 🍛 More sourdough recipes
- 📝 Recipe card for the Same day Sourdough bread
- Same Day Sourdough Bread Recipe
- 📋 Nutrition Facts
Why will you love this same-day sourdough bread recipe?
- Quick sourdough bread. Flour to baked bread in 11 hours!
- Easy homemade sourdough bread recipe that is simple yet delicious.
- The ingredients are simple, and you must already have them in your pantry.
- It is great for making sandwiches and toast.
- A great recipe to test your sourdough starter with.
- Customizable. You can add topping and additive flavors of your choice like garlic to make garlic sourdough bread, chocolate to make chocolate sourdough bread, cranberry, cheese, whole grains, etc.
🍶 Ingredients for making same day sourdough bread.

Sourdough starter
We need an active mature starter for making this same-day sourdough bread without having to use commercial yeast. An active sourdough starter is in its Growth or stable stage. In simple terms, the starter that is at its peak or about to reach its peak is considered an active starter.
A mature starter one that has been around for 4-5 months or more. The microbiota inside such a starter is much stable, predictable, and resistant to various foreign contamination and unfavorable conditions.
You want to feed the starter the night before so that it is ready for baking in the morning.
How do I feed my starter or make levain?
The night before baking prepare a levain using
- 5 g sourdough starter
- 45 g water
- 30 g bread flour
- 15 g whole wheat flour
It will double in 8-12 hours depending on the vigor of your starter. So, adjust for the time. As we start baking at 7 in the morning, and we need a starter by 8 a.m. So, I made my levain at 10 p.m. as I know for the feeding ratio of 1:9:9, my starter takes about 8-9 hours.
You do not necessarily have to follow my feeding ratio, just feed as you would to have a ripe starter by 8 a.m.
Flour
For keeping this sourdough bread recipe simple I have used 95 percent bread flour and 5 percent of whole wheat flour. I used king Arthur flours.
Also, if you will use regular all purpose flour for making this bread, the results might differ. Bread flour has higher protein content than all-purpose flour. Hence the bread made with bread flour will be lighter. If you are interested in knowing what else makes their bread dense, do read this post on what causes dense sourdough bread.
Water
Use filtered water to make the levain. You can use tap water if you are sure that it is chlorine and fluoride-free.
Salt
Salt is the only flavoring agent that is added to this sourdough bread. Though you can add whatever topping or filling you like to your sourdough. I am keeping it simple.
🍞 Instruction to make same day sourdough bread
Step 1 Preparing the dough and Autolyse
Image 1. Use a weighing scale to measure the ingredients precisely.
To follow a bread recipe to perfection, it is crucial to measure each ingredient in weight and not in volume.
In a large mixing bowl add the flour and then add the water. Retain about 8 g of water to add later with the salt.
Mix well to combine the flour and water properly so that no dry flour patches are left. You can use the back of a wooden ladle to do so. It is crucial to ensure that the dough is well hydrated throughout. If needed, go in with your hands.
Please note that from the surface you might feel that the dough is very dry and you might feel tempted to add more water. But as you will go in with your hands and start to combine the flour with water, you will observe that the dough will become fully hydrated without any need for further water.
I like to use the Pincer method, which means just going in with your hands grabbing the dough in your hand, and just squeezing it. Then, leave it and grab some more. Your hand will act as a pincer in this method. This way we keep on moving and work with our dough for a good 1-2 minutes, till everything is well combined.
Now clean the sides of the bowl and cover it with a cling wrap and let it autolyse for 1 hour.

Autolyse initiates the gluten formation in the dough. Glutenin and gliadin combine to form Gluten. The most important ingredient to achieve a light and open crumb sourdough bread.
It is important not to add salt or starter in this stage. Salt and yeast fermentation is known to stretch the gluten. The gluten formed at this stage is not strong enough. The sole purpose of autolyse stage is to obtain maximum gluten formation.
You can also use a stand mixer for mixing the dough
Step 2 Adding starter and salt in stages:
(Image 2 ) After the dough has got enough time to autolyze, we will add the levain or the sourdough starter. (Follow the baking schedule for more clarity.)
I like to spread the levain on the dough surface. Then, I go in with the tips of my fingers and poke the starter into the dough. I do it for good 30 seconds or so before I start to stretch and fold the dough, with the purpose to incorporate the sourdough starter.
Take as much as time you need, but you need to ensure that there is no unincorporated starter left in the dough. If required, flip the dough, and use the pincer method to combine.
Once you are satisfied, cover, and let it rest for 30 minutes.
After 30 minutes, add the salt. Sprinkle the salt on the dough surface. Now add the reserved water.
Adding water at the later stages of gluten development is called Bassinage.
To combine the water and salt into the dough I use the same technique that I used for combining the levain. First, I poke the starter into the dough and then do stretching and folding.
When, you feel that the salt and water are well combined, clean the edges of the bowl and cover it. Let it rest for 45 minutes before you start to stretch and fold it further.
Step 3 Bulk rise and stretching and folding
Image 3. The dough has already been in the bulk rise stage, for 45 minutes when we start our first stretch and fold.
Wet your hands slightly and grab the dough by putting your hands under and stretching it outwards. Stretch it to a point till you could easily stretch it without feeling any resistance from the dough. Now fold it under the opposite side of the dough. Rotate the bowl, at 45 degrees, and repeat.
In one session of Stretching and folding you should be doing 4-6 stretches and folds. Reduce their number toward the later stretching as the dough will become stronger.
For the first two rounds do 6 stretch and fold, and 4 in the last two rounds. Give a resting time of 45 minutes between each stretching and folding session.
One thing to note here is that your dough might not be ready after the fourth session of stretch and folds. In such cases, give the rest of 30 minutes and do another round.
You can always do a windowpane test to confirm that the dough is ready.
How to know that bulk fermentation is complete?
- The dough would have increased in volume. Not doubled up, but somewhere about 60-70 percent increase in volume.
- The dough would become smooth and elastic. Will not remain sticky.
- The dough would retain its dome structure from the last stretch and fold.
- There would be visible bubbles under the skin of the dough
- The feel of the dough will change. It will feel lighter and become jiggly due to the air pockets formed on fermentation.

Step 4 Pre-shaping and shaping the same day sourdough bread
We can shape it the way you want. You can shape it as a round boule or a bâtard (football-shaped). For this same day sourdough bread recipe, I am going to shape it as a batard.
For pre-shaping this same day sourdough batard, I invert the bowl on a lightly flour-dusted workstation and let the dough fall onto the surface. You can also shape it into a round boule.
Using the flour-dusted fingers stretch the right side and bring it to the center, and seal. Now, stretch the left side and seal it while bringing it to the center. Similarly, stretch the bottom side, and while sealing it roll the entire dough so that all the seams face down and the top of the batard will be facing you.
Allow the dough to relax for 5 minutes.
For final shaping: Once the dough has relaxed, flip the dough, such that the seam side is facing you.
Stretch the right side and bring it to the center and seal. Similarly, bring the left side to the center and seal. Rotate the dough 90 degrees, such that the central seam is parallel to you. Now place your hands under the dough and bring it forward and seal it with your palms.
Then, roll the dough between your cupped hands to build tension and give desired length and shape to the batard.
Then, transfer the shaped sourdough batard to a flour-dusted oval banneton.
Step 5 Proofing the shaped sourdough bread

Dust the baskets generously with rice flour if you have or just use the regular flour. Rice flour can help prevent the dough from sticking to the sides of the banneton.
If you do not have a proofing basket, just DIY a proofing basket. Use any bowl and line it with a naturally breathable cotton cloth. Dust the cloth generously with rice flour or regular flour.
Since this is a one day sourdough bread, 11 -12 hours to be precise. We do not have time for slow fermentation. We will let the dough ferment at room temperature for 4-5 hours.
I place my banneton in a plastic bag and fluff it up with air and seal it with a rubber band.
In cold weather, go for a proofing box or oven with the light turned on. You can also use your instant pot to proof the bread, if the ambient temperature of your kitchen is cold.
The most crucial factor in sourdough is to understand when the dough is ready to bake. I struggled with it for a long time. Later I realized that I have been baking over-proofed dough. Keeping track of the temperatures and fixing the time frames accordingly has helped me in getting consistent results over time.
I like to do this poke test to check if my dough is ready to bake.
Step 6 Scoring and baking the same day sourdough bread
It is very important to bake the bread at the right temperature for the best results.
How to make same day sourdough bread in a Dutch oven.?
Sourdough bread should be baked at 500 0F in a Dutch oven or something similar.
So, we all pre-heat the oven to 500 0F with a cast iron Dutch oven inside. The oven air might reach 500 0F in 30 minutes, but the Dutch oven will take much longer to heat up to that temperature. So, I always preheat the Dutch oven for at least an hour at 500 0F before putting the bread into it.
Also, you can place an ice cube under the parchment paper, before closing the lid of the Dutch oven. It buys more time for the bread to spring.
Now, once the temperature is reached, remove the bread on parchment paper or a bread sling. Make a simple straight score or some decorative scoring, using a sharp scoring blade. Carefully lift it and transfer it to a Dutch oven.
After baking at 500 0F for 20 minutes, reduce the temperature to 450 0F and remove the lid of the Dutch oven. Let the same day sourdough bread bake for 20 minutes more until it turns golden brown. Some people prefer their sourdough dark, and some like them lighter. Bake as you like.
Let it cool for 30-40 minutes before slicing. The bread is still baking from the inside and slicing the hot bread will cease the process. The bread might turn doughy as a result. So, show some patience. You have worked so hard to reach this stage. You deserve better.
Use a sharp knife ( bread knife) to slice the bread! Build your favorite sourdough sandwich or toast.
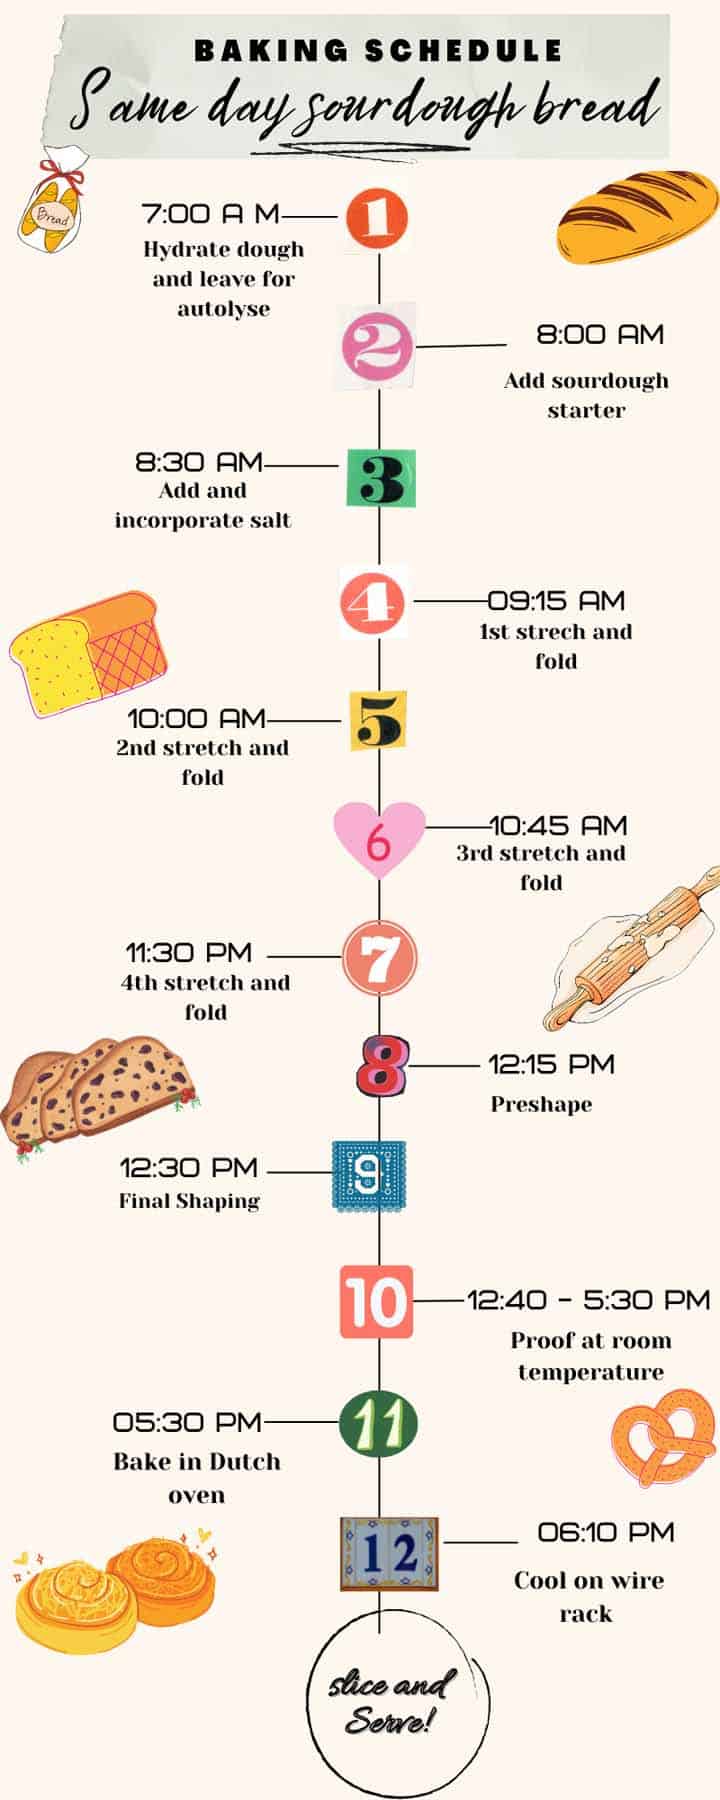
📋 Baking Schedule
Please flow the baking schedule in the illustrated image for more clarity on the timing to make same-day sourdough bread.
🫙Storage
The sourdough same day bread has a shorter shelf life than slow fermented bread. Freshly baked sourdough bread can last 3-4 days at room temperature if stored properly.
It is best stored by wrapping it in a cotton cloth or a cotton bread bag. Place it in a cool corner of your kitchen or a bread box.
It is not advisable to refrigerate the sourdough bread. Though you can freeze it if you baked in bulk and want to store the sourdough bread for longer. Place the entire loaf or slices in a freezer-safe bag, with air removed. Now warp it with a double layer of foil, mark the date and place it in the freezer.
❓Frequently Asked Questions
If you want to speed up the sourdough bread, there are a few things that you can do.
-Increase the starter percentage. Unless your sourdough starter is very sour, you can easily raise its percentage to 30 percent. Especially when you are looking for quick bread with quick fermentation.
-Use a proofing box to proof the sourdough bread fast if you live in colder regions.
-You can use a pinch of commercial yeast in the dough.
Well, that is not necessary. But in an ideal situation, we like our bread to have double fermentation. The first is the bulk fermentation and the second one is the proofing of the shaped bread dough. Bread recipes using instant yeast, do not require to rise twice. One rise is enough for them.
But sourdough bread is known for its flavor. And fermentation is the primary source of flavor in the bread.
Yes. You have to at least wait for 7 days to start baking with a new sourdough starter. Sourdough starters are active cultures of yeast. They take time to stabilize and become sturdy enough to survive unfavorable conditions. Under an ideal situation let your stater mature at room temperature for 2 weeks before starting to bake with it.
Yes, you can. If you feed your sourdough starter in a 1:1:1 or 1:2:2 ratio, it will reach its peak in 3-5 hours. In such a situation you can use it to bake sourdough bread on the same day.
🍛 More sourdough recipes
A few Bread recipes with sourdough starter and other ways to use sourdough starter are linked below:
- Rustic sourdough bread with a perfect crust and open crumb
- The best garlic sourdough bread recipe
- Jalapeño Cheddar sourdough: A spicy cheese sourdough bread!
- Sourdough Rolls | No-yeast quick dinner rolls using sourdough starter
- The best Sourdough doughnuts recipe with Cinnamon sugar
- Sourdough chocolate bread recipe: Easy and delicious !
- How to make sourdough hot dog buns from scratch?
- How to make the basic sourdough batard?
I hope you will love this same-day sourdough bread. Share your results and opinions in the comment section below. Also, subscribe to never miss a recipe.
Till then
Bake it Delicious!
📝 Recipe card for the Same day Sourdough bread

Same Day Sourdough Bread Recipe
Equipment
- Large mixing bowl
- Banneton Basket
- Bread lame
Ingredients
Ingredients for sourdough bread
- 380 g Bread flour 95%
- 20 g Whole wheat flour 5%
- 95 g Levain 24%
- 288 g Water (280+8 )g (70 %+ 2 %)
- 12 g Salt
Instructions
Step 1 Preparing the dough and Autolyse
- In a large bowl, add the flour and then add the water. (Retain about 8 g of water to add later with the salt.)
- Mix well to combine the flour and water properly so that no dry flour patches are left.
- Clean the edges of the bowl and cover it. Let the dough autolyse for 1 hour. (Refer to the Baking schedule illustration in the blog post.) (You can reduce the time to 45 minutes if you think that the starter is entering the decline stage.)
Step 2 Adding starter and salt in stages:
- Adding starter
- Spread the sourdough starter on the dough, and use your fingers to poke it into the dough. Now use stretching and folding to incorporate the starter or use the pincer method.
- Ensure that the starter is well combined into the dough. Now cover and let the dough rest for 30 minutes.
- Adding salt
- Now add salt and the retained water. Use the pincer method(see notes) and keep combining until salt and water are well incorporated into the dough. Let it rest for 45 more minutes.
Step 3 Bulk rise and stretching and folding
- Now do the first stretching and folding of the bulk rise phase (see notes).
- Cover and let the dough rest for 45 minutes, before doing the second round of coil folds.
- Repeat the process and do 3 more rounds of stretching and folding, spaced about 45 minutes apart.
Step 4 Pre-shaping and shaping the same day sourdough bread
- Pre-shaping
- 45 minutes after the final round of stretching and folding, remove the dough onto a lightly floured work surface for conducting a pre-shape. Stretch the right side and bring it to the center and seal. Now, stretch the left side and seal it while bringing it to the center. Similarly, stretch the bottom side, and while sealing it, roll the entire dough so that all the seams face down. Now dust the surface with some flour and cover the dough. Let it relax for 5 minutes on the counter.
- Final Shaping
- Gently flip it so that the seams are facing you. Stretch the right side and bring it to the center and seal. Similarly, bring the left side to the center and seal. Rotate the dough 90 degrees, such that the central seam is parallel to you. Now place your hands under the dough and bring it forward and seal it with your palms.
- Then, roll the dough between your cupped hands to build tension and give desired shape and tension to the batard.
Step 5 Proofing the shaped sourdough bread
- Gently lift the shaped sourdough batard and place it in the flour-dusted oval banneton with the seam facing upwards.
- Cover and let it rest and proof at room temperature for about 4-5 hours.
Step 6 Scoring and baking the same day sourdough bread
- When the dough is ready to bake, preheat the oven to 500oF with the Dutch oven and its lid inside.
- When the oven is ready, flip the dough over on parchment paper or a bread sling. Now, score the loaf as you like.
- Transfer it to the Dutch oven and cover. Bake at 500oF for 20 minutes and then, remove the lid. Let it brown for another 20 minutes at 450oF
- When it has browned to your liking, remove it from the oven and let it cool for about 30 minutes before slicing.
- Slice and enjoy!
Notes
- Water: Use filtered water to feed the starter and make the levain. You can use tap water if you are sure that it is chlorine and fluoride-free.
- Sourdough starter/ levain: We need a ripe starter to make levain on the night before.
Ingredients for Levain:
6 g starter,
42 g water,
30 g bread flour,
12 g whole wheat flour. - The levain should ferment all night and reach its peak in the morning when it is time to bake. So, I like to prepare my levain in a 1:9:9 ratio. You can always reduce the feeding ratio to suit the duration of fermentation you desire.
- To see if the levain is ready: It is a good idea to mark the level of the levain in the jar with a rubber band so that you would know when it has doubled and is near its peak. You can do a float test to see if the levain is ready.
- Preparing the dough: Please note that while combining flour and water, you might feel that the dough is very dry and you might feel tempted to add more water. But as you will go in with your hands and start to combine the flour with water, you will observe that the dough will become fully hydrated without any need for further water.
- The pincer method means just going in with your hands and grabbing the dough in your hand, and just squeezing it. Then, leave it and grab some more. Your hands will act as a pincer in this method. We keep on moving and work with our dough for a good 1-2 minutes, or till everything is well combined.
- The dough might not be ready after the final session of coil folds. In such a case, give the rest of 30 minutes and do another round. You can always do a windowpane test to confirm that the dough is ready for pre-shape.
- Bulk rise: If you want to increase the bulk rise period for 4.5-5 hours aim for the Final Dough Temp. (FDT) of 76 0 F and determine the temperature of the water using the formula: Water temp.= FDTx4 - ( kitchen temp+ flour temp.+ levain temp. +friction factor)
- Stretching and folding: Wet your hands slightly and grab the dough by putting your hands under and stretching it outwards. Stretch it to a point till you could easily stretch it without feeling any resistance from the dough. Now fold it under the opposite side of the dough. Rotate the bowl, at 45 degrees, and repeat. In one session of Stretching and folding you should be doing 4-6 stretching and folding. Reduce their number toward the later stretching as the dough will become stronger.
- Shaping. You can also shape this same-day bread into a round boule if you like.
- Scoring and baking. The score should be at least half an inch deep.
- You can brown your sourdough bread according to your liking, just increase or reduce the final bake time.
- Bake it right! Check the temperature of the baking stone or Dutch oven as well. The oven air reaches 500 degree F much earlier than the baking steel, or Dutch oven. It is a general suggestion to let the Dutch oven preheat for about an hour before putting the sourdough bread into it.
- If you bake on a baking stone or baking steel, do not forget to arrange the steam in the oven by placing a tray on the lower shelf with water just enough for the first half of the baking time.
- The Dutch oven does not need any extra arrangement for steam as the moisture from the bread gets trapped inside it and acts as steam. But I still recommend adding a cube of ice under the parchment paper.
📋 Nutrition Facts


Andrew Hopskinne
I want to make a larger loaf. Do I simply double the recipe or some other adjustments are required? By the way, gorgeous score and lovely texture on the bread.
Meenakshi
Yes, you can simply double the amount of flour and then work backward to find the hydration and starter weight keeping in mind the baking percentages. Hope it helps.