Have you ever tried to make yeast water? There are numerous ways to make yeast at home. One such way is to make it is by capturing wild yeast from our surroundings. Today we will be making raisin and fig yeast water. You can use this to make any kind of bread.
Estimated reading time: 19 minutes
Table of contents
I knew how to capture the wild yeast and create starters that will bake delicious bread every time. Be it the sourdough starter or yeast water starter. In today's post, I will try to unwrap various hows and whys around yeast water.
What is Fruit yeast water, and why do you need it?
Yeast occurs naturally in our environment. Be it on the surface of the leaves, fruits, and vegetables that we eat, on our skin, and on pretty much everything around us. This naturally occurring yeast is called wild yeast.
It is the same as the baker's yeast but just that it happens to occur naturally rather than being commercially made.
They are the same species Saccharomyces cerevisiae. Though, they may be different strains.
When we collect the wild yeast present in our environment in the form of yeast-enriched water, we call it Yeast Water. Yeast present on the surface of the fruits is collected by placing the fruits in a jar of water and letting the yeast grow and multiply in its natural habitat by giving it ideal conditions for that.
By ideal conditions, I mean giving it sugar or any sort of fruit juice to feed on, water( moisture), air, and ideal temperature(85-950 F). As the yeast will multiply in the water, water will get more and more concentrated with yeast. Such water is then called fruit yeast water.

Is it worth your time and effort?
Absolutely yes. It will barely take 10 minutes of your active time in 7 days, and you will have a yeast water starter for your lifetime. Just refrigerate it and use it to make a loaf of bread every week. You will never have to buy commercial yeast from the market.
It is not as sour as the sourdough. So, if you are somebody who does not relish the tanginess of the sourdough, this natural yeast starter is for you.
It is easy to maintain, and you can make all sorts of bread with it. It is a very organic way of baking with natural yeast.
How do you use Fruit yeast water?

This yeast water can work as commercial yeast (active dry yeast are instant dry yeast) for making any type of leavened bread. Irrespective of the origin, yeast tends to break sugars into alcohol and carbon dioxide. The carbon dioxide gives rise to the bread, and alcohol gets evaporated.
Be it the wild yeast or the store-bought yeast, it is fully capable of leavening any bread. The only difference is that the active dry yeast is more instant and more reliable when compared to the wild and naturally occurring yeast.
I have been using a yeast water starter to make bread for the past 2 years. I maintain 3 starters; one wild yeast water starter and two sourdough starters. Well, that's a long story, let's leave it for some other day.
But I wanted to tell you that you can almost bake anything using this starter. You might find this yeast water bread recipe useful. More on this later.

How to make yeast water?
As I briefly mentioned in the introductory paragraph, for making yeast water, we try to capture the maximum possible yeast from our natural environment. Yeast is present on almost all the surfaces around us. So how do we choose, where to extract it from? But also remember that we are trying to capture yeast not just from the fruits but from our kitchen environment also. By which I mean the air in your kitchen.
Before we move on to that let's try to explore our options in terms of the fruits. Fruits are most ideal to extract yeast. They have naturally occurring sugars( sucrose and fructose), so we don't need to feed much sugar in these cases. Also, fruit juices bring in a fruity and desirable flavor to the yeast water.
Which fruits can you use to make a fruit yeast starter?
Although yeast occurs on almost all fruit surfaces, the below-mentioned fruits have comparatively higher percentages.
- Raisins: all kinds of raisins
- Fig
- Dates
- Grapes
- Blueberries
- Apple
- Plum
- Prunes
Grapes, apples, and blueberries are great to start making homemade yeast. The powdery white substance on their skin known as bloom harbors a lot of naturally occurring yeast. So, if you want to use fresh fruits, choose any one of them.
The dried fruits like fig, dates, and raisin have a higher concentration of yeast and sugar. Not sure if they are somehow directly related, but there has to be some connection. I made my first natural yeast starter with dates and used the dates yeast water to make a starter. ( But after some time, it got contaminated.)
Over time I have experimented with different types of fruits. I have made it with apples, grapes, and fig.
Learnings from personal experience
I would like to share some of my learnings in this regard.
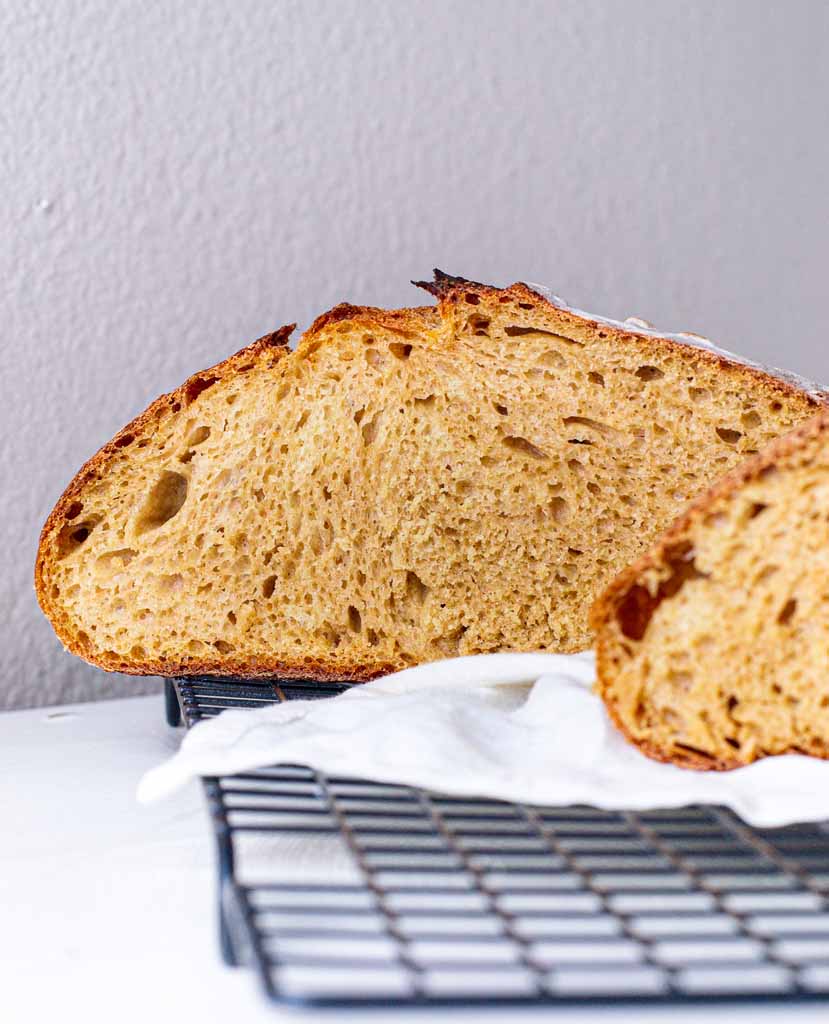
- I have observed is that the yeast water made with fig gets bubbly very soon. It is a direct indication that there is a good quantity of yeast in fig that is causing this fermentation. I usually use organic mission figs. They are dark, and the water made with them is that it's also dark. So when you bake with it, the color of the bread might be slightly darker in the first few bakes.
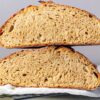
As you feed it with fresh flour, it will eventually become a neutral color. And, you can bake great bread with it. The bread made here is made with fig yeast water only. So, if that is a concern for you, use figs like Turkish fig, etc. - Raisins are my favorite. I always choose to use raisin over other fruits. Why? I just feel they are more reliable. That may be because I have experimented with them a lot, and I feel more confident about the results that I will get. The type of raisins doesn't matter. I have tested almost all varieties. There has never been any noticeable difference.
- Grapes have a very prominent Bloom on the surface. For a long time, winemakers believed that this white dust is nothing but the yeast. But it is fruit wax that grape produces to prevent its berries from moisture loss. And a lot of airborne yeast is trapped in it. You can use whatever type of organic grapes you have to make grape yeast water.
- Making apple yeast water is also very easy. The process is almost the same for all, depending on how to use it.
A few key things that we have to ensure before starting
- Wash the fruits before using them but, don't get very aggressive. You do not want to wash away all the yeast on the fruit skin or rind.
- Always use organic fruits. You do not want any kind of pesticides in your wild yeast culture.
- Use bottled water. If using tap water, make sure that it is filtered and is not Fluoridated or Chlorinated. Fluoride inhibits yeast growth, and chlorine is known to kill yeast.
- Choose a large glass jar or bottle with a lid. We want to leave enough space in the jar, as there will be constant carbon dioxide build-up.
Also, we want to see what's going on inside to know the process and understand the progress.
- Make sure that the bottle is clean and dry. Just ensure that it is sterile, and there are no soap residues or dirt on the rims, etc. If needed, sterilize the glass jar in the oven at 280 0 F for 15 minutes.
Two Methods of making yeast water
There are two methods to make yeast water using fruits.
1. Lazy method of making homemade yeast.
- We put measured quantities of fruits in a measured volume of filtered water. And after that, we do not give any active feeding. In this method, you don't have to do any maintenance of yeast water.
- All you gotta do is open it once a day and keep it open for 20 seconds before closing it. The Carbon dioxide that builds up during the yeast fermentation needs to be released, and the jar needs to be filled with fresh air. And yes, do give it a shake once a day. It helps to prevent mold growth on the surface.
- The fruit to water ratio for this method should be 1 to 4. It means, for 100 gm of fruits we will use 400 g of water. To demonstrate this method, I will be using raisins. We will make raisin yeast water with 2 tablespoon of sugar. If you do not want to add any external sugar to the yeast water, raise the Raisins to water ratio to 1:3.
But remember that you can choose any fruit for either of the methods.
Now, let's make yeast water. You can use any of the above-mentioned fruits, but I'm going to use raisins to demonstrate the Lazy process for making yeast water.
Ingredients and procedure:
Ingredients that we will be using for making raisin yeast water are as follows:
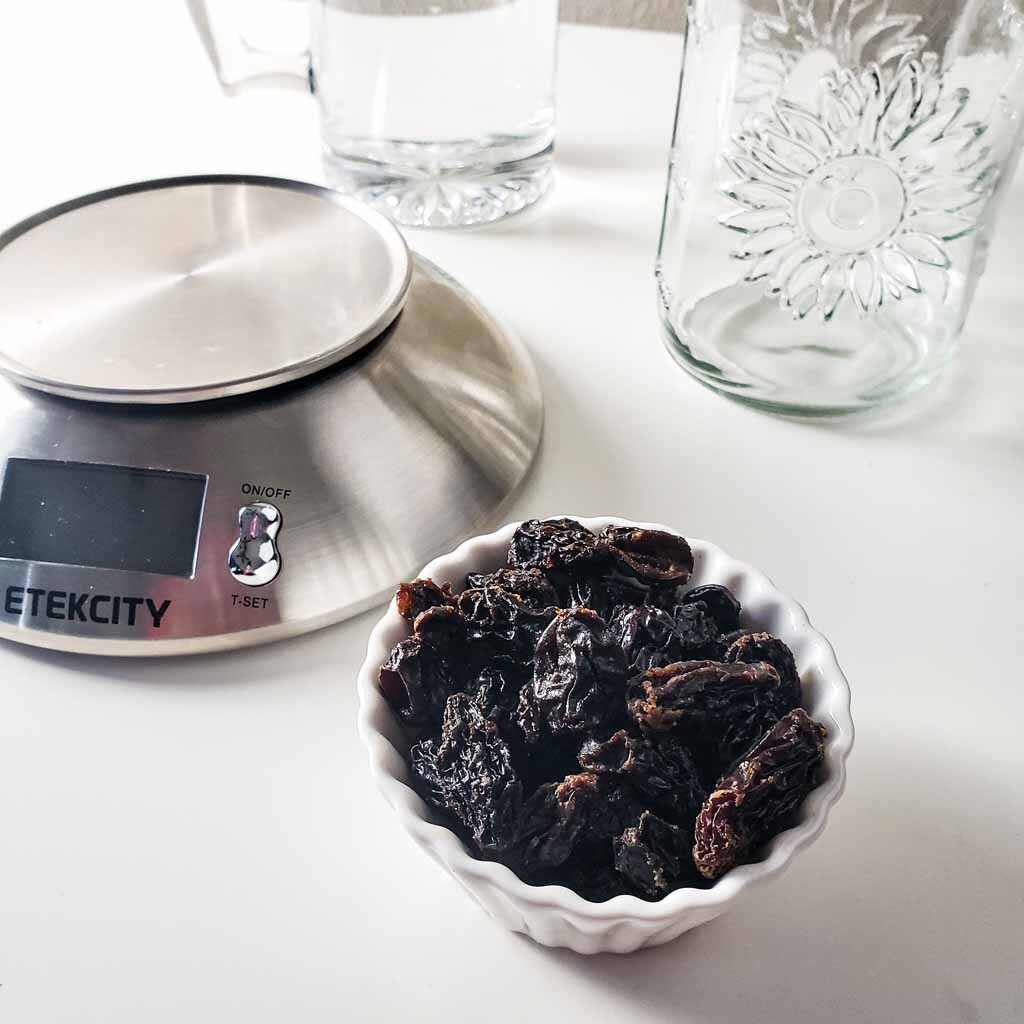
- 100 grams of organic raisins: I am using jumbo black raisins. They are sweeter than the usual black raisins. You can use red, golden green, sultans, monukka, or whatever you have. Just make sure to source organic ones.
- 400 grams of water: Use bottled or filtered water. The water should essentially be unchlorinated and unfluoridated.
- 2 tablespoon of sugar: Choose to use regular white sugar.
Process of capturing wild yeast with Lazy method
- First of all, make sure that the bottle is clean and dry. Then go ahead and measure the raisin and water.
- Into the clean glass bottle, add raisin and water, and close the lid loosely. I like to let it soak for 3-4 hours before I add the sugar. It is a personal choice. I feel that the raisins should undergo osmosis and swell before I add sugar. Not that 2 tablespoons of sugar will trigger reverse osmosis, but I just choose to do it this way. But you can go ahead and add everything altogether.
- Put the jar in a warm corner of your kitchen. We are looking for temperatures around 85 to 95 0F. If you have a window from where sunlight comes in, place it on the window pane.
- Now, fix a time in a day when you have a spare minute. Every day at the same time gives the jar a shake, open the lid for 20 seconds, and then put it back on. Do not close the lid very tightly, gas build-up can crack it ( it's rare though, but possible!)
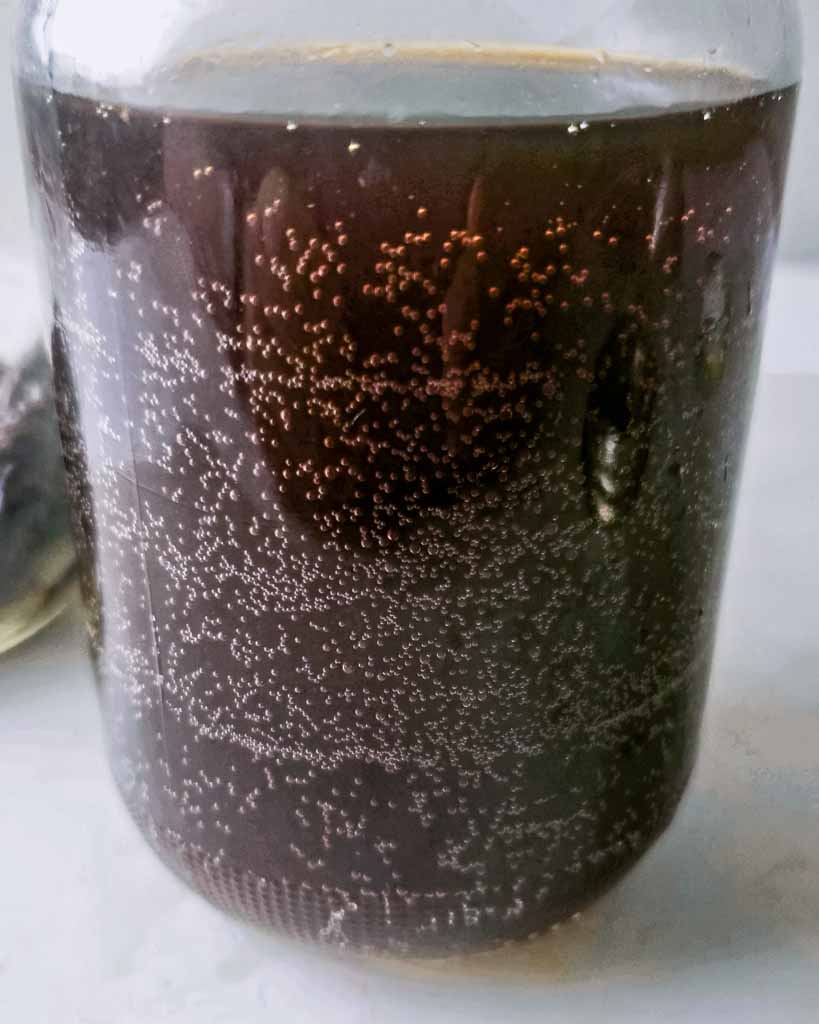
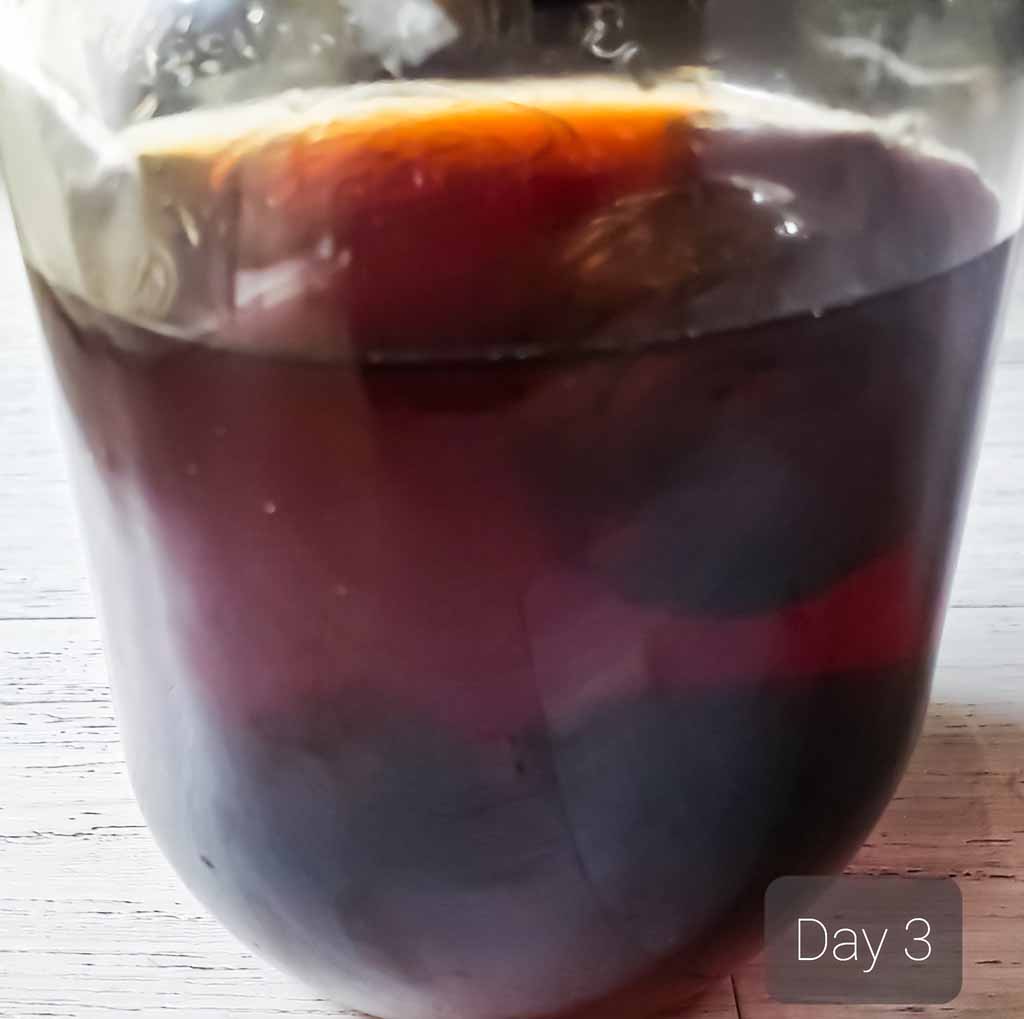
- Observe closely for the bubble build-up. Every day when you open the jar, observe the changes.
- The raisins will swell up, and slowly they will start to rise.
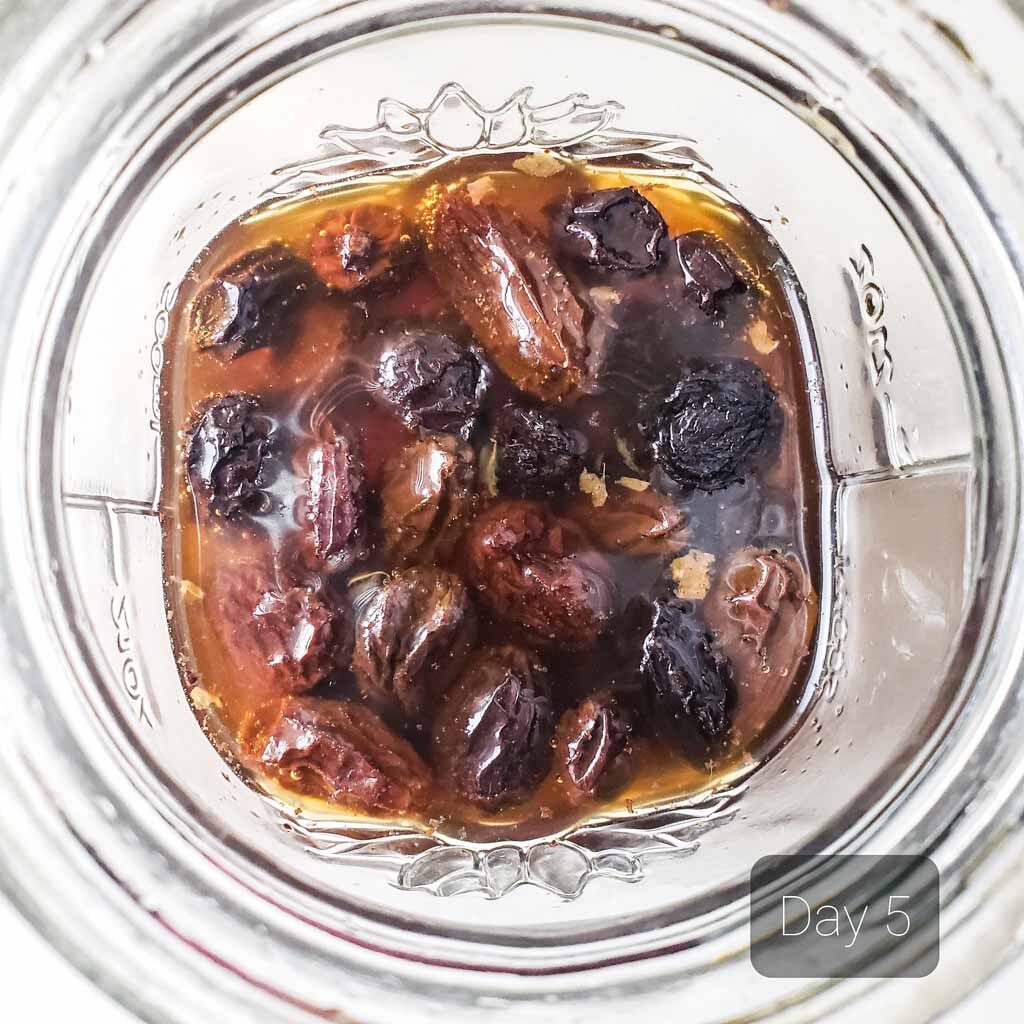
- Depending on the ambient temperature in your kitchen, by day six or seven, they should all float. When you open the jar, there will be a constant bubbling sound. It means that the yeast water is ready to make a yeast water starter and start making raisin yeast bread!
2. Active method of capturing wild yeast
In this method, we provide active feeding to our yeast water every day until it is ready. So, it means giving fresh fruit and sugar every day until it is ready to use. To demonstrate this method, I will be using figs. The final fruit to water ratio for this method should also be 1:4. For this method, we will be using organic dry Mission figs. On average, 1 fig weighed about 12 grams. And we will be adding one fig per day to the water. It means we will be adding 60g of fig to the water. So, we have to start with 240 g of water. You can be flexible with this. But that can alter how much time it will take to get ready. In my personal experience fig makes the fastest yeast water. It is ready to make wild yeast starter on the 5th day.
Ingredients and procedure:
For this method, I am using:
- 5 Organic dry mission figs
- 240 g/ml of filtered water
- 5 tablespoon of sugar
Procedure:
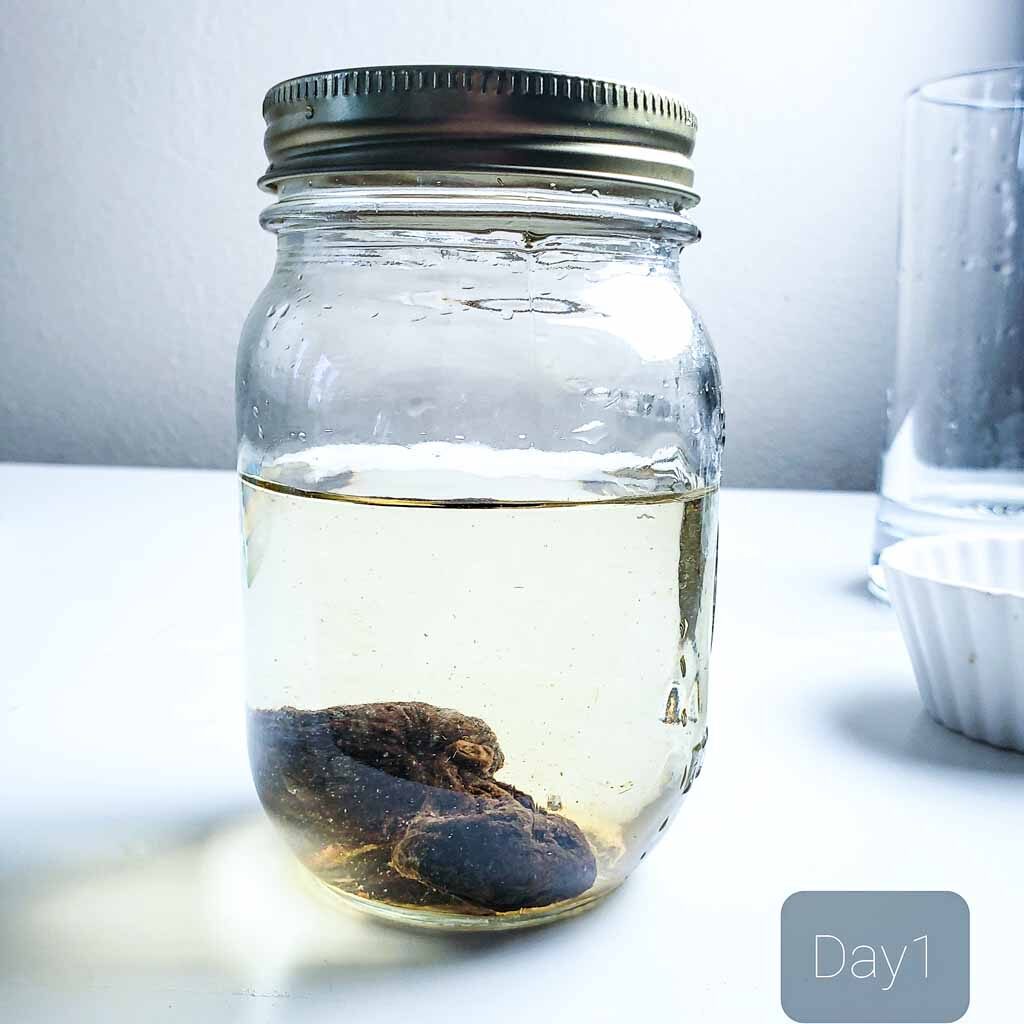
Combine all ingredients - Add 2 organic figs, water, and 2 tablespoons of sugar to a glass jar. Close the lid closely and give it a shake. Now loosen the lid, and let it rest in a warm place.
Maintain and feed - Now, fix a time and feed it with one fig and a tablespoon of sugar for three consecutive days.
- Do give them a shake every day. It helps to prevent mold growth on the surface.


How do you know that the fruit yeast water is ready?
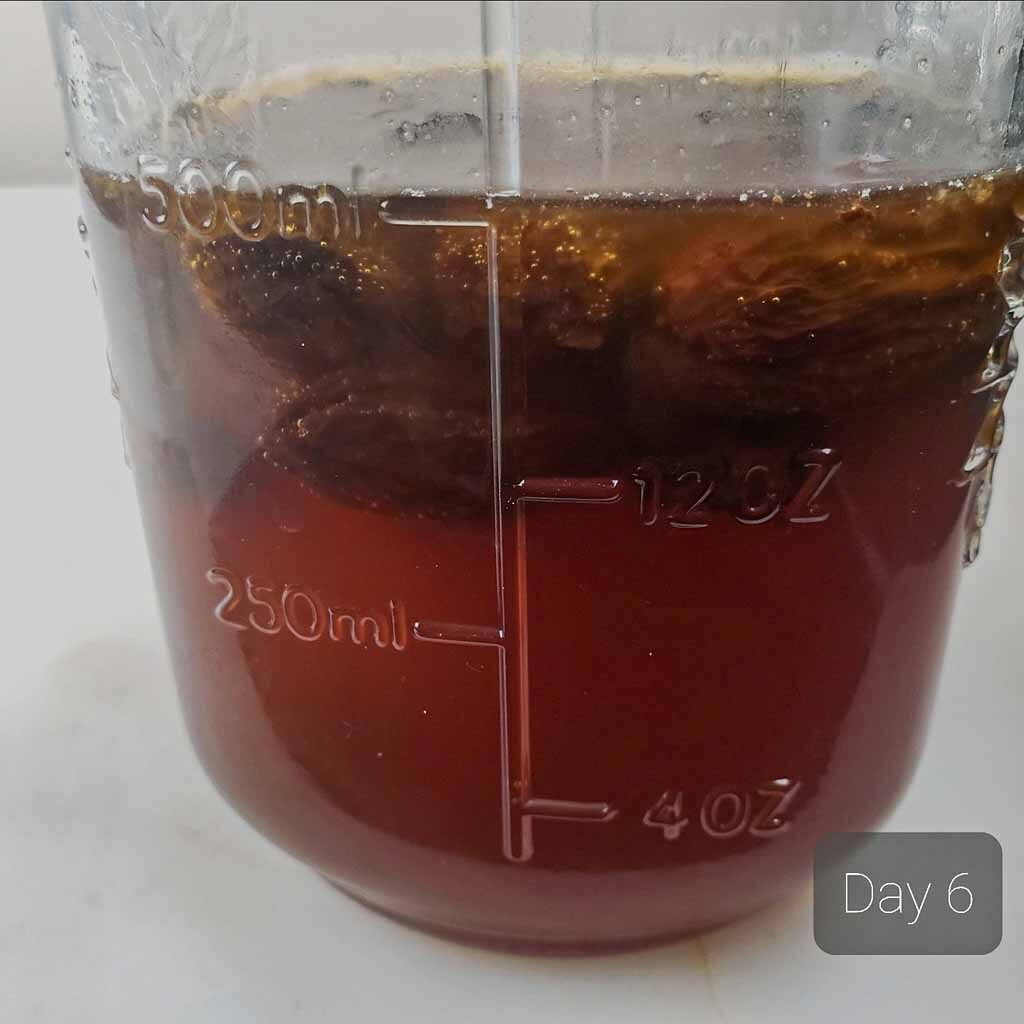
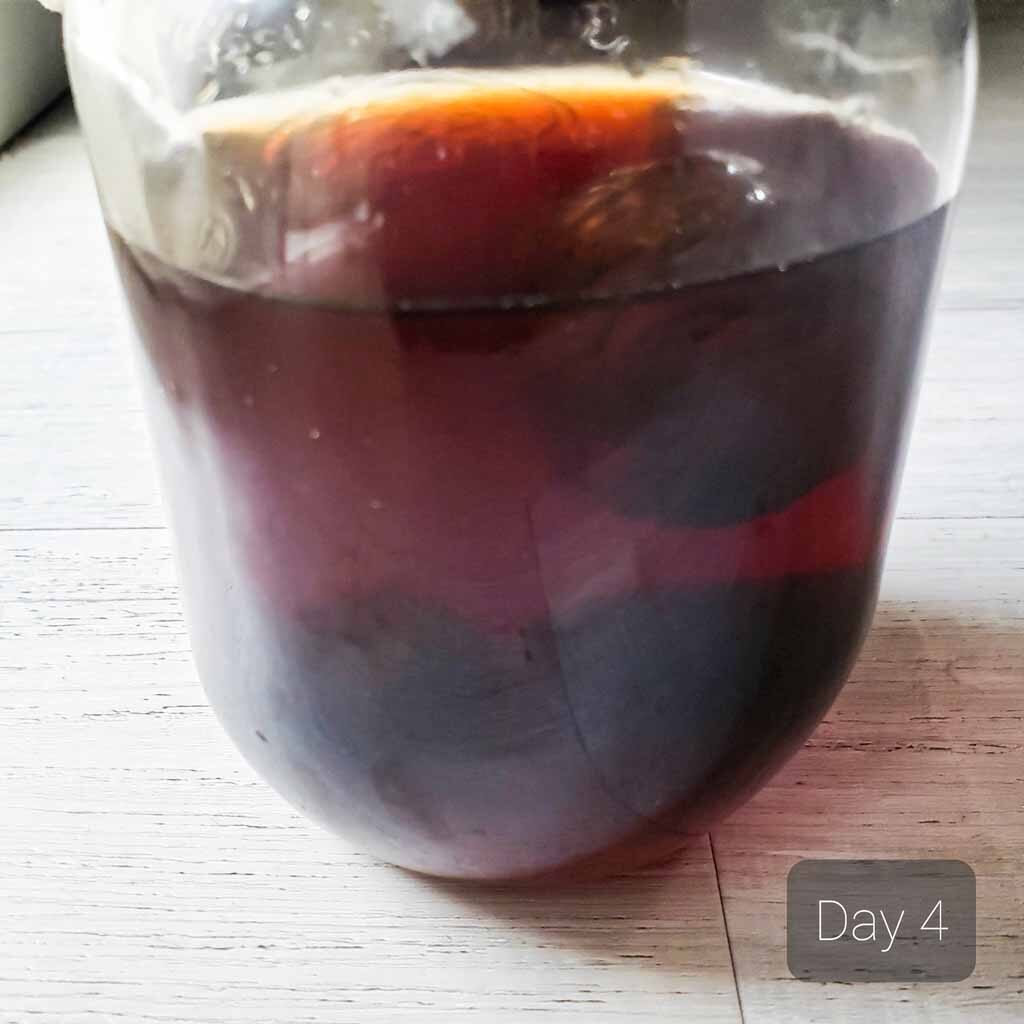
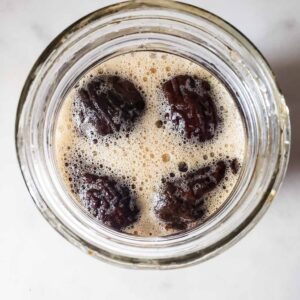
By the 5 th day, it will start to become foamy and bubbly. It is an indication that it is ready.
If you leave it for more days, it will get foamier and foamier. It would bubble up almost like a shaken bottle of soda.
In warmer temperatures, they can be ready on the fourth day or the day of the last feeding. It will vary on the type of fig and the ambient temperatures in your kitchen.
So it is advised to keep an eye and observe for bubble build-up. It is ready when you hear a consistent bubbling sound for a few seconds as you open the lid.
Difference between the two methods
- The key difference between the two methods is that; in the lazy method, you need to use a larger quantity of fruit, whereas in the active feeding method, you will be giving feeding in the form of sugar, so you will need fewer fruits. But just more active time. But I don't know like ...what time!! 30 seconds to drop a tablespoon of sugar and fig into the water.
- Also, in an active feeding method, we will be giving regular sugar from an external source. Whereas in the lazy method, mostly natural sugar fermentation takes place.
- Also, the active method may take a day or two less than the former.
So, choose the method that suits you. I will be discussing each in detail in this blog post.

Maintaining and storing yeast water for a long time?
Once the yeast water is ready, store it safely in the refrigerator for up to 60 days. When you keep it in the refrigerator, the yeast activity will reduce considerably. As it would in the case of a refrigerated sourdough starter. But as soon as you take it out of the refrigerator and let it come down to room temperature, the yeast activity will start to gain momentum.
To maintain, take a little bit of yeast water, dilute it with fresh water and add some fresh fruits. Feed it fresh fruits for 2 days. And your new yeast water will be ready.
Using a little bit of it to start new fermentation helps to speed up the process.
But in my opinion, there is no need to make it again, and again.
The best way is to create a fruit yeast water once and make a wild yeast starter from it. And then, maintain it just like a sourdough starter. Bake as much bread as you want!
How to make a fruit yeast starter out of it?
The fruit yeast water is used to make a starter that can bake any type of bread. Just like we create a sourdough starter, we can create its starter by mixing equal weight of flour and yeast water. Let it rise and double in volume, and use it just like a starter to bake a fruit yeast-water bread.
Some Frequently Asked Questions
The best way to store yeast water is to refrigerate it. It keeps well for up to 60 days. After that, the yeast population starts to deplete. It is a good practice to label it with a date so that you can keep track.
If the yeast water has been sitting in the fridge for a week or two more than 2 months, try to revive it. Bring it to room temperature and give it a feeding of sugar and fresh fruit. It will be much easier to revive it than creating fresh yeast water.
Yes, yeast water will work just like yeast to make bread. Unlike sourdough starter, yeast water starter is not sour and tangy. The bread made with yeast water tastes very much like commercial yeast-risen bread.
Well, I will not call it an easy way to make a sourdough starter but an alternate way to make it. As I mentioned in the previous question, the yeast water starter is not sour like a sourdough starter. So, it is not a straight alternative to the sourdough starter. But over time, if we keep feeding wheat flour to the yeast water starter, it does develop a flavor close to it.
I have a yeast water starter that is more than a couple of years old, and it smells and bakes just like a sourdough starter.
There are two ways that you can use to bake bread with the yeast water starter.
One way is to directly prepare a levain and further use that levain to make the bread.
Another way is to create the yeast water starter and use the starter for making bread.
I have made the bread shown in this post from the fresh yeast water levain.
If you are interested in learning, how to bake bread with a yeast water starter? Let me know in the comments. I will be more than happy to share the fruit yeast water bread recipe.
If you are interested in more naturally leavened breads, check out few of our recipes:
If you found this recipe useful, do not forget to share it with your friends. We would highly appreciate a comment and a rating! It helps me create more resources like this.
Happy wild yeast capturing!
Procedure to make yeast water using fruits with two methods
Equipment
- weighing machine
- A large jar
Ingredients
Ingredients for making yeast water with the Lazy method
- 100 g raisins (I used jumbo black raisins)
- 400 g water
- 2 tablespoon sugar
Ingredients for making yeast water with Active feeding method method
- 5 Organic dry figs (i used mission figs)
- 240 g Filtered water
- 5 tablespoon sugar
Instructions
Procedure for making raisin yeast water using the lazy method.
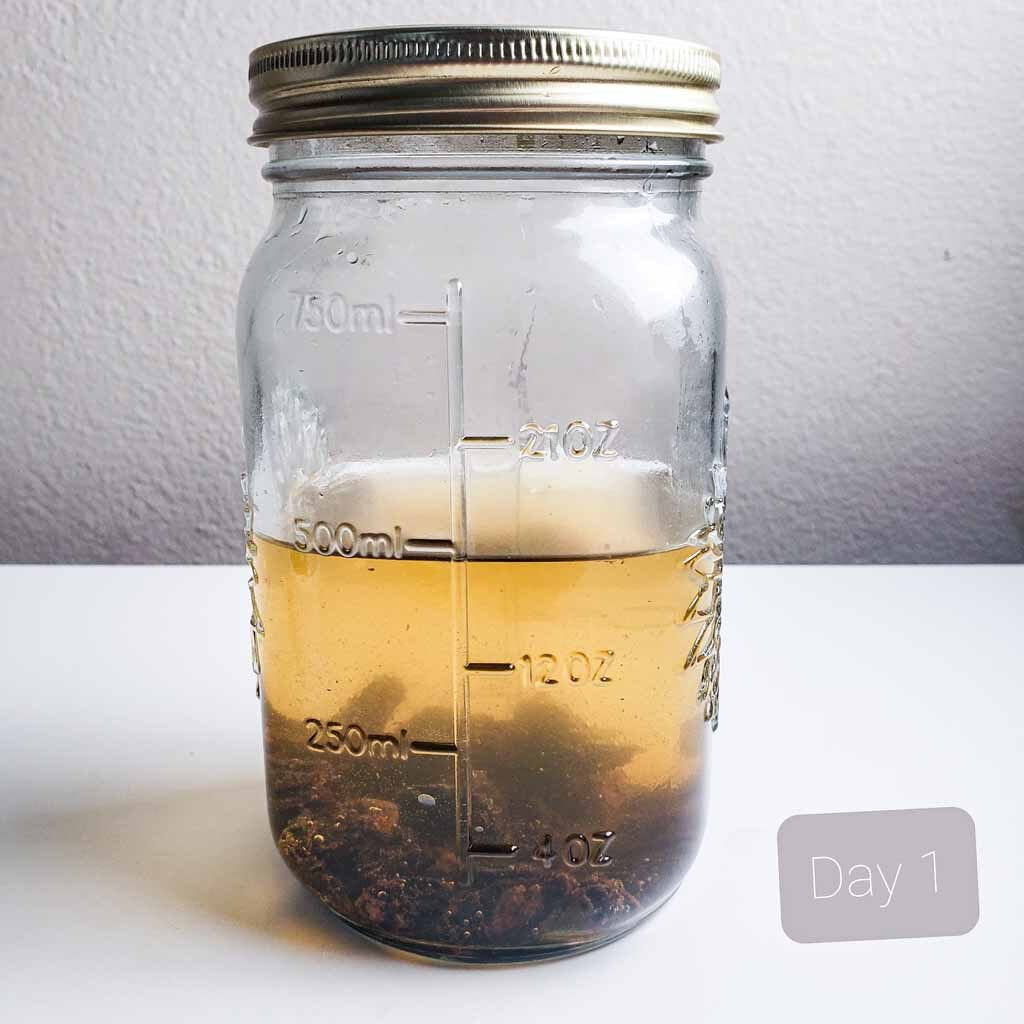
- Day 1: In a clean and dry jar add raisins, water, and sugar altogether. Close the lid tightly and give it a generous shake to dissolve the sugar completely.Now loosen the lid of the jar and place it in a warm part of your kitchen. The ideal temperature is somewhat around 85 to 95 0F. If you have a window from where sunlight comes in, place it on the window pane. Or if you live in a cold place, put it in the oven with lights turned on.
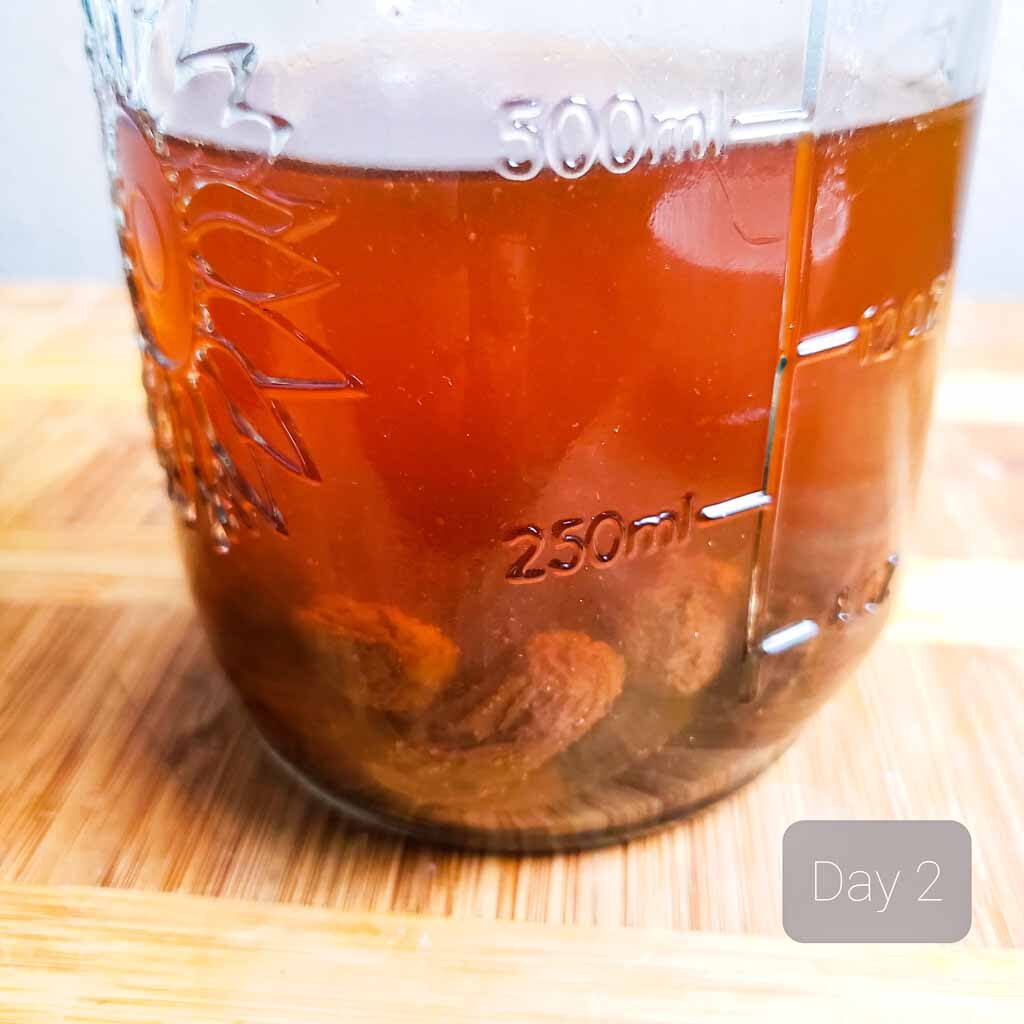
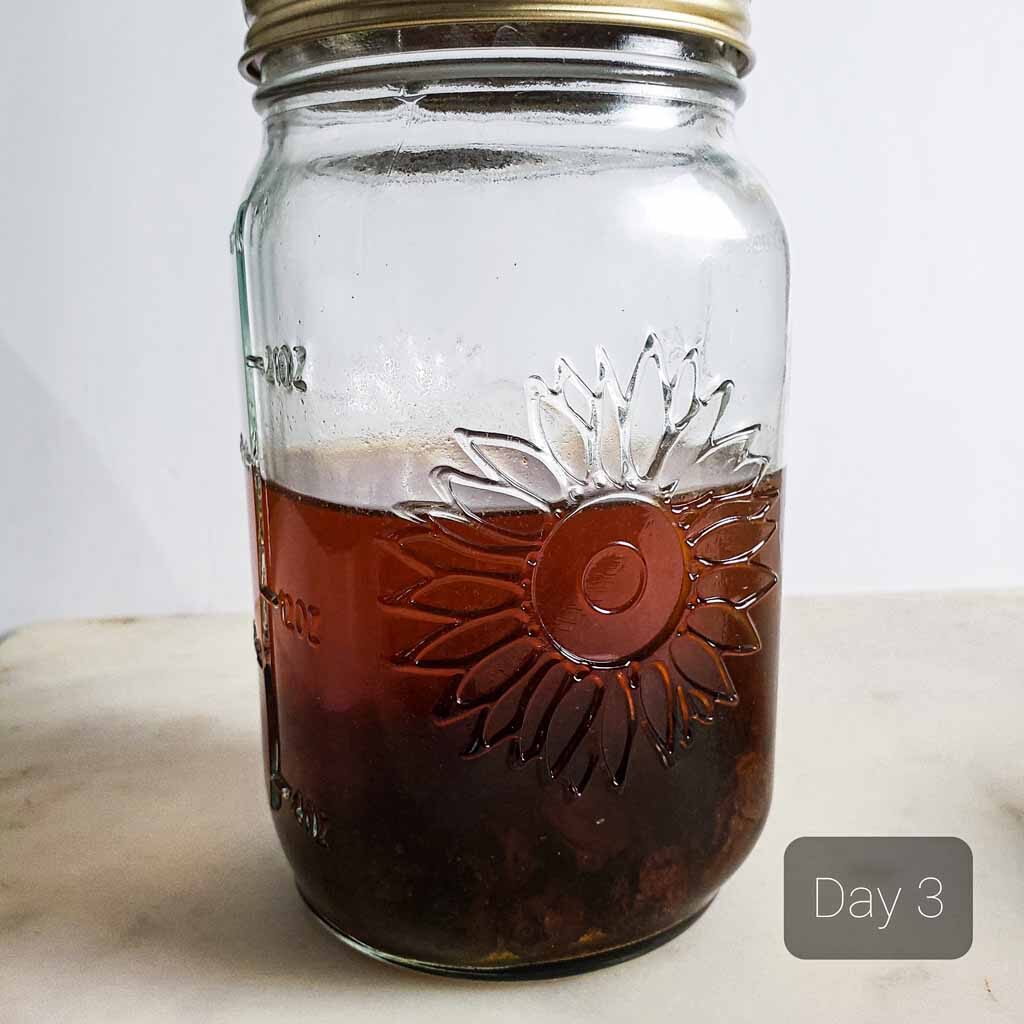
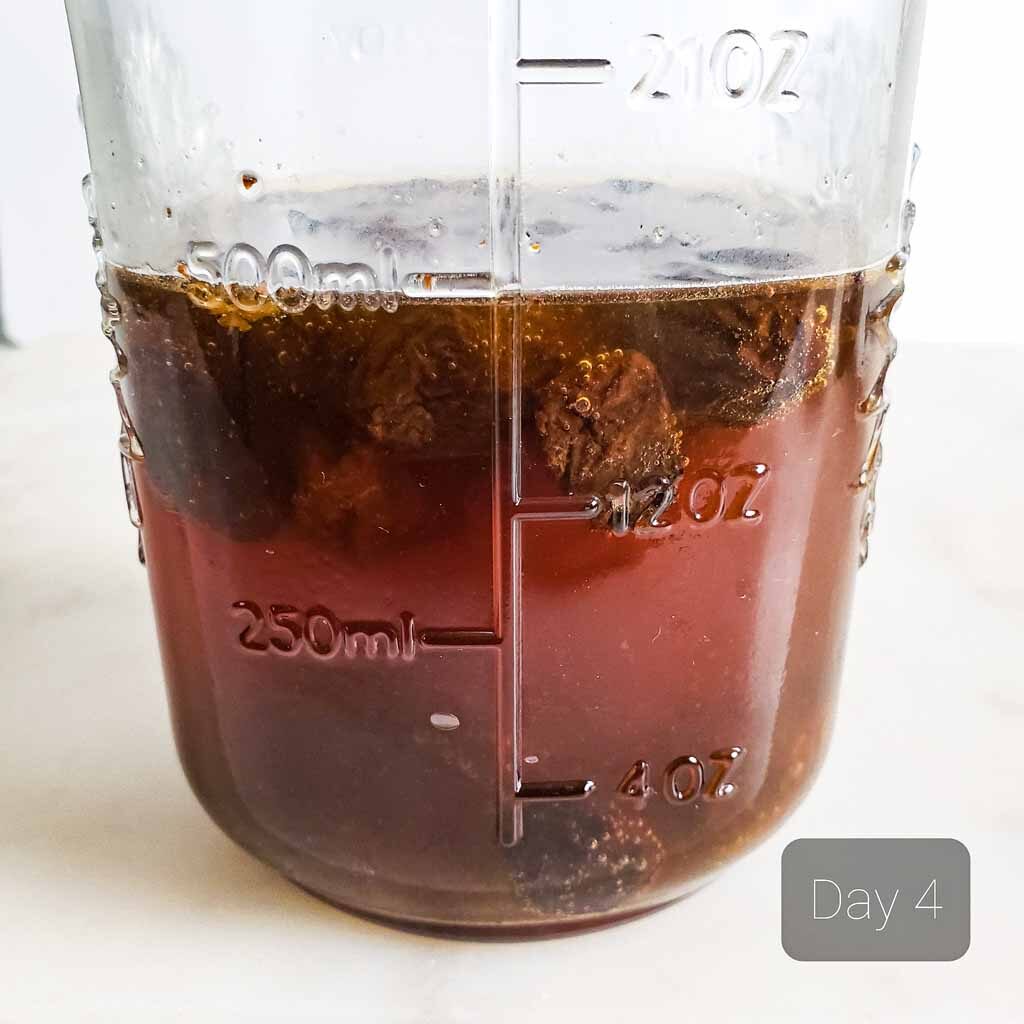
- Day 2- day 6: Give it a shake and open the lid once every day. It lets all the build-in carbon dioxide escape and replaces it with fresh air. Loosen the jar lid and let it ferment. Observe the yeast activity building up inside the jar.
- On the seventh day, when you open the jar, you should hear a constant bubbling sound. All the raisins should be up and floating on the surface. These are the clear signs that the raisin yeast water is ready.
- Sieve and refrigerate if you are not willing to use it immediately. You can even skip the sieving part and use the raisins to make raisin water yeast bread directly.
Procedure for making Fig yeast water using an active feeding method
- Day 1: Add 2 organic figs, water, and 2 tablespoons of sugar to a glass jar. Close the lid closely and give it a shake. Now loosen the lid, and let it rest in a warm place.
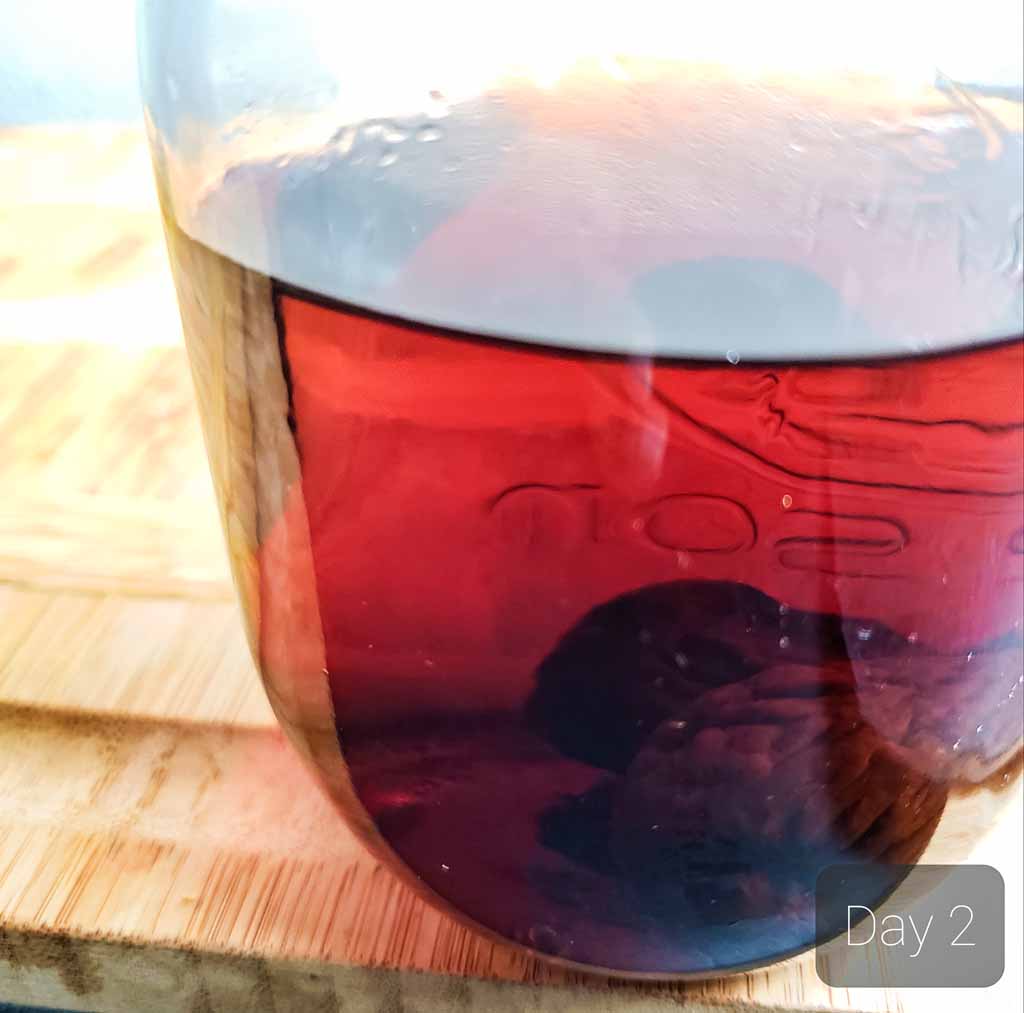
- Day 2-day 4: Feed the yeast water with one fig and a tablespoon of sugar for three consecutive days. Make sure to shake or stir the water every day. Let the water rest and ferment. Try to keep it at a temperature between 85-950F for quick results.
- Day 5: The yeast water will become foamy and bubbly. All the figs should be floating on the surface. These are the signs that the yeast water is ready. If that is not the case, give it another day, and it will be there.
- Now you strain and use this water to make a yeast water starter or yeast water levain and bake your favorite bread.
Notes
- In addition to raisins and fig, you can make yeast water with other fruits, including dates, grapes, blueberries, apples, prunes, etc.
- The exact time taken will vary on the type of fruit and the ambient temperatures in your kitchen.
- Always use organic fruits and give them a gentle wash. There is no need to rub and wash the fruits.
- Use bottled or filtered water. The water should essentially be unchlorinated and unfluoridated. Chlorine and fluoride are known to inhibit yeast activity.
- So it is advised to keep an eye and observe for bubble build-up. When you open the lid, and you hear a consistent bubbling sound for 5-10 seconds, it is safe to assume that the yeast water is ready.
- The best way to store yeast water is to refrigerate it. It stores well for up to 60 days, after that the yeast population starts to deplete. It is a good practice to label it with a date so that you can keep track.
Please note that the nutrition facts are the average of both recipes. And since we have strained all the fruits, it is the average sugar and fruit juice calories left in the fruit yeast water. ( most of which is actually metabolized)

Nutrition
Pin it for later!


Marycatherine
Pls ma, can we use warm water to prepare the yeast water or just normal water and for the yeast water sourdough starter , are we met to make the yeast water warm before preparing the sourdough starter
Meenakshi
Please use normal room temperature water.No need to warm the water. Hope it helps.
Annette
Hi
Is there a reason why I cannot use frozen fruit to make a natural yeast? I wondered if the freezing may kill the necessary component, though I think not?
Meenakshi
Well, the freezing does not kill the necessary ingredients for culturing the yeast; but it does kill the natural yeast present on the fruit surface. What we are trying to do here is to capture the wild yeast present on the surface of the fruits and provide them with the most suitable conditions to grow and flourish ( a sort of microbe culture creation). So, it is in our best interest to use fresh whole, organic fruits for creating a wild yeast culture.
Hope this helps.
Happy Baking!
Jennifer
I haven't been able to find answers to my questions so I hope it's ok to ask here. A few years back I was making yeast water after covid some things seem to have changed. Most website info says add salt. I see you don't and I have not before I didn't think it was necessary in fermentation.. no one seems to anser that.. also I never kept mine in the fridge. Is it necessary? I usually have used it with in a week or two.. I would be so greatful for some info
Meenakshi
Hi Jennifer,
You are absolutely right that there is no need for salt in fermentation. You need natural or added sugar to initiate and enhance any kind of fermentation. Salt on the contrary controls( limits) the yeast activity. So, if there is any recipe that uses salt, that might be to keep the fermentation in control( could be the case for someone in tropical regions, where the temperature and humidity are too ideal). But in a standard situation, there is no need for salt.
To answer your second question: If you intend to use up the yeast water in 15 days and start over a new culture again in the future, then you do not need to refrigerate it. But ideally, we create the culture once, let it mature at room temperature for some days, bake bread with it, and store the remaining in the fridge. Then in 3-4 weeks or whenever we want to make more bread with it, just bring it to room temperature, do a round of feeding and it is ready to make more bread for you. This way you could keep a never-ending supply of yeast water with you. But it should not stay longer than 60-65 days in the fridge. Over time, the yeast activity weakens and slows in the fridge, and eventually, it starts dying due to the depletion of nutrients in the yeast culture. So, do feed it with more food, and bake regularly with it.
I hope it helps.
Happy baking!
Craig Whitley
As we do not like a sour taste in our bread, the WYW has been a fantastic alternative. While we never had an issue obtaining commercial yeast, the sourdough/wild yeast water process does add significant flavor over commercial yeast, albeit it takes way more time. Fortunately we are sleeping while the WYW is adding flavor to our dough.
Very nice website and a wealth of information. Thanks!!
Vidya
Hi Meenakshi, it’s a very interesting concept this yeast water. I am definitely going to try it. Here’s a question: how will I know how much yeast water to use for baking a bread with it? I mean the quantity of yeast water. If you could please clarify.
Meenakshi
Hey Vidya, glad to know that you are interested in trying it. You can make bread with it in two ways. 1 by making a sourdough starter like think with it and using it to make bread on regular basis... or just use it prep a levain and bake 2-3 bread with it. The amount of yeast water required will depend on the recipe you are using. I have shared the recipe that I use on my blog. It's called yeast water bread. https://theflavorbells.com/wild-yeast-bread-or-yeast-water-bread-recipe/.
In fact, it is good that you pointed it out... I am going to put the recipe link in the blog post as well.
Hope it helps..have a good one.