If you are a bread fanatic like me, you must be an admirer of this classic French bread. The super crusty exterior with a soft and chewy interior. French Baguette is simply one of the best gifts of French cuisine to the world.
This is a simple 4 ingredient lean bread but not that easy to master. It does take some practice, but once you get it right, you will feel proud of your feat.

This recipe is no-knead Baguette. Yes, no kneading at all. We let the gluten develop on its own by resting the dough overnight. Appropriate hydration of the flour is the key here.
Firstly, let me talk briefly about my experience with baguette making and how I felt that it was nearly impossible to achieve anything close to the bakery baguette. Ashok has lived in France for three years and is a big-time Baguette fan. Every time I made a baguette, I looked for his validation. And trust me it took me quite a long time to get his validation. My baguette failures range from dense not well risen to well risen but hard-crusted loaves. Sometimes sheer transferring the baguettes to the oven was the reason for failure.
For making these homemade French Baguette we will needs some specific equipment like
- flour impregnated cotton towel called Couche,
- baguette pan,
- bread lame,
- flipping board, and
- an oven baking stone.
All of them play a vital role in baguette making but that doesn’t mean that you can’t make a good baguette without them.

Though, having a baguette pan does make your life easy. Just shape the baguettes, and place them in the well of baguette pan for rising. It helps the baguettes to rise in a circular shape as they should. Also, it saves you the hassle of the transferring. Which I find specifically challenging.
Baguette dough is already very tacky and after having risen, it becomes super delicate. There are good chances that while transferring you might end up deflating some of the air that has been incorporated into the dough by the yeast fermentation. Which is very disheartening. So, in case you are not using a baguette pan, use a professional Couche (e.g. linen canvas) or a flour-dusted cotton pillow as I use sometimes, to create wells for the shaped baguette to rest and rise.
Once the shaped baguettes have risen, use a flipping board or any flat board to flip and transfer the baguettes on to a baking pan. Do take care to dust the board with flour to prevent the dough from sticking to it.
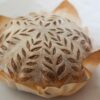
If you don’t have a bread lame, just use a sharp knife or a razor-like me to slash the dough to create weak spots for the dough to rise while baking.
One more thing that I specifically find helpful in baking bread at home is to spray the dough with warm water before putting them into the oven. It makes up for the steam that is necessary for even baking, soft interiors and prevents the over crusting of the bread surfaces.
As an additional measure, I also place a pan with warm water at the bottom of the oven.

Let us start with ingredients first. In this recipe, we will be using all-purpose flour. I know many people use bread flour instead. But that’s just not necessary for making baguette. Measure your flour properly using well leveled measuring cups or weighing scale. And the same goes for water. Using these two elements in the right proportion is the key to a perfect baguette. Which ensures that you achieve the appropriate hydration.
Another important ingredient is yeast. Our only leavening agent here. Since yeast is not bloomed separately before adding to the flour, it is crucial to ensure that your yeast is alive, not dead.

Salt is added to impart some flavoring here. Like most of the bread, the homemade French baguette is more about texture than flavor. The bread has its characteristic crispy crust and chewy interior. I am a bigger fan of the chewy interior than a crispy exterior. What do you like more? Reply in the comment section.
More bread Recipes:


Homemade French Baguette
Ingredients
- 750 g All-purpose flour
- 2 teaspoon Active dry yeast
- 2 teaspoon Salt
- 545 ml water
Instructions
- In a large mixing bowl, add flour. To which add yeast and salt. Mix well using a whisk.
- Add water and mix using the backside of a wooden spatula or steel spatula or something similar in strength. Make sure to hydrate the flour completely and there should be no dry flour patches in the dough.
- Cover the dough with a cling wrap and place it in a warm and humid place for 30 minutes.
- Then, uncover the dough and slightly wet your hands. Now, stretch the dough from a side and fold under the other side. Go around the bowl doing at least 6 stretching and folding.
- Now, let it rise for 45 minutes in a warm place.
- After the first rise, place the dough in an airtight container, much larger than the volume of dough.
- Let it slow rise in the refrigerator for at least 8 hours or overnight. This helps in gluten development and also in the flavor development in the dough.
- The next day when ready to bake the baguette, take it out of the refrigerator on to a well-dusted work surface. Use some flour and dough scraper to work the dough for 1-2 minutes to form it into a round. Then, divide the dough into 3 equal portions.
- Shape them into oval-shaped pieces. Use some dry flour if needed. Cover with a kitchen towel and let them come to room temperature. Almost half an hour.
- Fold the dough in half lengthwise, and seal the edges by applying pressure with the tip of your fingers brought together. Then again fold the rest of the half and seal again.
- Now, roll and bring the seam side down. Cup your fingers to roll the of dough into a log shape.
- Place the shaped baguette with its seam side down on a flour-dusted Couche or a baguette pan.
- Cover and let them rise unless they become more than double in size.
- Towards the end of the rising time preheat the oven to 440 0F.
- Place a pan with water at the bottom of the oven.
- If not using a baguette pan, transfer them to a baking sheet before slashing them.
- Using a sharp knife or a lame slash the baguette 3 times diagonally or make just one single vertical slash.
- Spray the baguettes with warm water before placing them into the oven.
- Bake till golden brown color.
- Let cool before slicing and enjoy fresh.
Notes


Leave a Reply