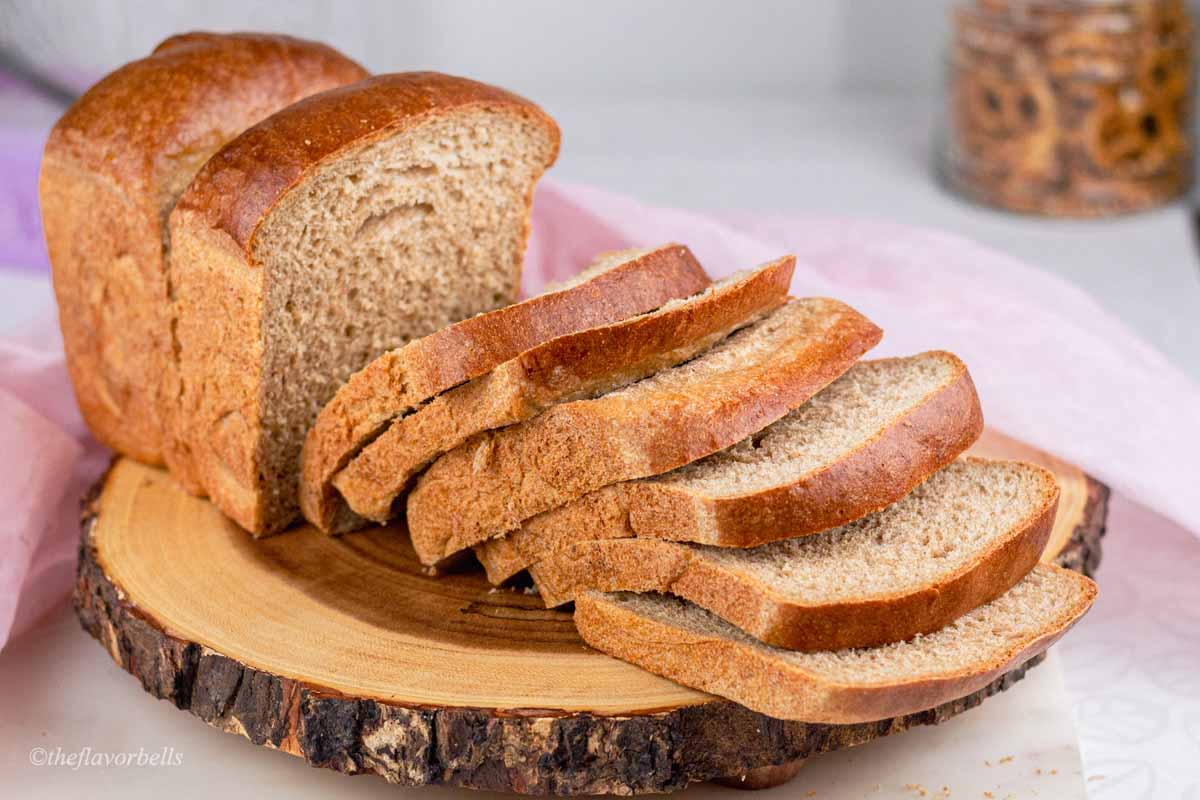
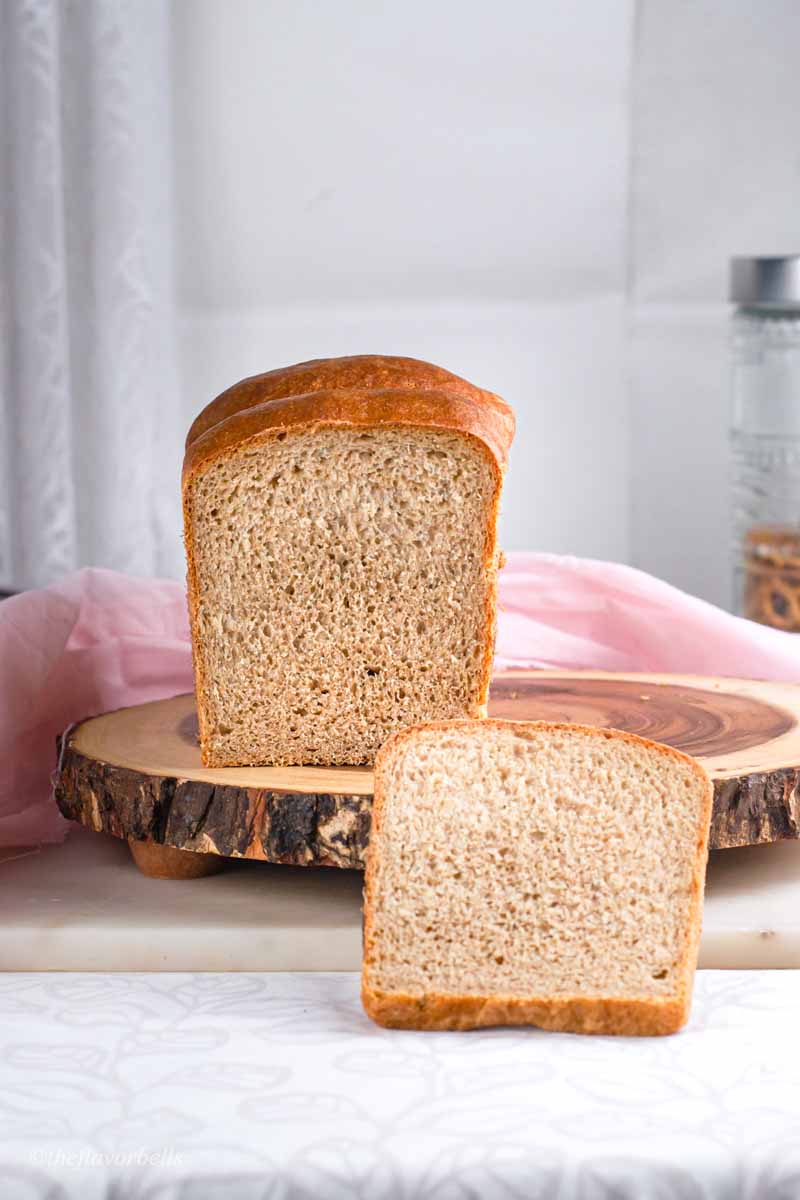
This dairy free bread is super soft, tender, and pillowy. It is made with whole wheat flour and without any animal-based ingredients. Those who are or have someone in their family struggling with lactose intolerance, are going to love this bread. And all my vegan readers are also gonna be wowed by how easy and delicious this bread turns out to be.
This bread has all the goodness and flavor of whole wheat with a light and fluffy texture without any animal-based ingredient!
You must try this bread recipe if the answer to any of the below questions is a yes.
- Is your child has a milk allergy or lactose intolerance?
- Have you been struggling to find dairy free bread to make at home?
- Are you or someone in the family allergic to eggs?
- There are not enough options of dairy free bread in your grocery store?
- Are you looking for a delicious vegan whole wheat bread recipe?
This is a perfectly soft and flavorful homemade bread recipe that is dairy free and egg-free. Yes, it’s just another way to say that this is a vegan milk bread recipe.
What is dairy free bread?
A bread that is free from any kind of milk products is called a dairy free bread. It could have other animal products, but specifically, it is dairy free. Recent studies show that about 30 million adults Americans develop some degree of lactose intolerance by the age of 20. But a few show very serious and life-threatening symptoms. This recipe is for such people. This bread recipe does not use any kind of dairy product. Be it milk, butter, ghee, or dry milk powder.
What is vegan bread? And how does it differ from dairy free bread?
A vegan bread is not just dairy free, it is free from all sorts of animal protein. No egg, animal fat, animal protein can be used in vegan bread.
On the contrary, a dairy free bread could have lard, eggs, or any other form of animal fat. It is very specific to people with milk allergy (lactose intolerance), who need to avoid dairy products in their diet.
So, let us see what we are going to need to make our dairy free bread recipe.
What do you need to make whole wheat vegan milk bread?
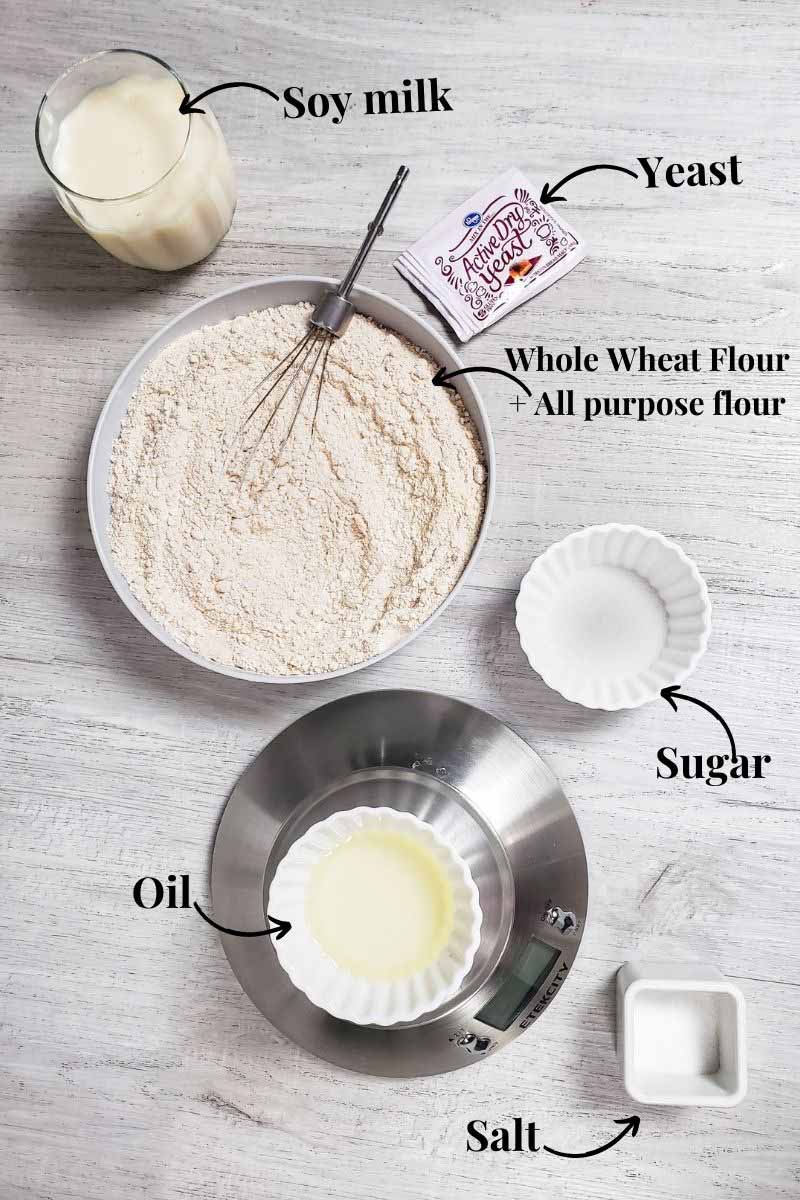
Flour
I have used a combination of organic whole wheat flour and all purpose flour for making this bread perfectly healthy and delicious. This is not at all dense like whole wheat flour. But has all the goodness of fiber and whole wheat grain with a light and fluffy texture.
I like to use organic and unbleached flours in my bread making, but you can use whatever you have without worrying about the result. Just measure the ingredients accurately to get consistent results.
Vital wheat gluten
As I said, this super fluffy vegan milk bread is made with whole wheat flour. The secret ingredient that makes this vegan bread fluffy and light is the vital wheat gluten. Gluten is the natural protein that is found in wheat flour. The high-protein bread flours have this protein in higher proportion. Hence, they make lighter and fluffier bread. But the high fiber content in the whole wheat flours prevents the whole wheat bread from being fluffy.
Gluten is the component that makes the dough elastic and captures more air as the bread bakes. So, by adding the vital wheat gluten to the whole wheat flour, we can make our loaves of bread lighter, fluffy with being healthy and delicious.
Non-dairy milk
We need to choose the non-dairy milk that has high-fat content, almost similar to that of whole milk. Coconut milk is plant-based milk that is closest to whole milk in terms of its components. But it also has a characteristic sweet flavor. It is good on some occasions but if you are looking for a flavor neutral wholesome bread recipe, it might not be the best choice. But is certainly worth trying at least once.
Second, in line is soy milk. It has much lesser fat content but has a very neutral flavor. Almond milk is the third alternative that you can use without affecting the results.
Active dry yeast
I have used active dry yeast in this delicious dairy-free recipe. I like to use active dry yeast as it needs to be bloomed first. Hence it is a way to confirm that the yeast is active and still potent to leaven the bread.
There is no sure-shot way of confirming that with the instant yeast. You only get to know that once the dough has been kneaded and if the dough is taking super long to proof. Such incidents are not common. but it happens. And trust me it's very heartbreaking. The fault is in the yeast, and we blame the recipe.
Oil:
You can use vegan butter, margarine, or coconut oil. But I like to use a neutral-flavored oil like grapeseed oil, or avocado oil. You can also use olive oil if you like.
Instructions: How to make dairy free bread?
Step 1: Activate the yeast: blooming the yeast
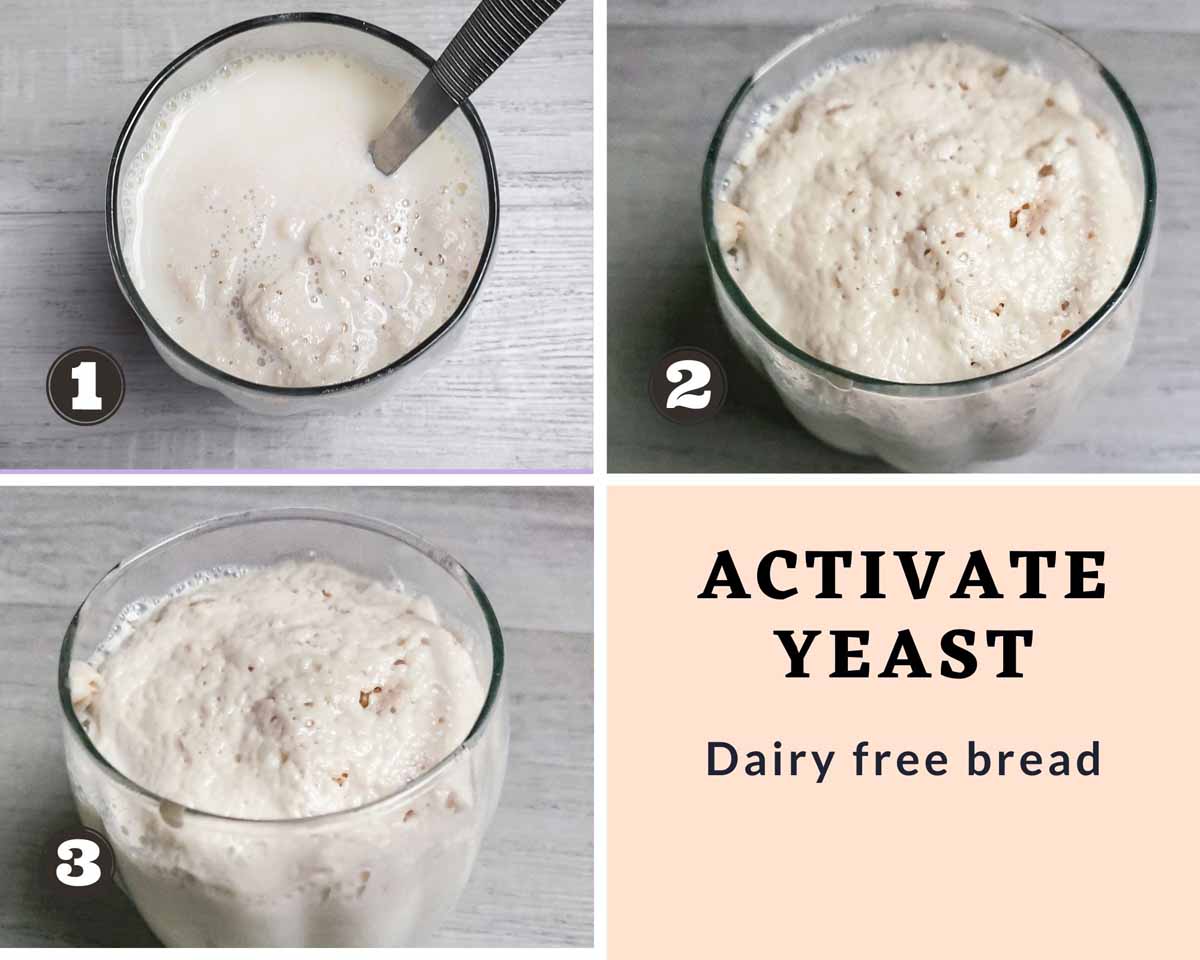
To activate the yeast, warm soy milk until it reaches the temperature of 110 0F. ( something around 100 0F should also work for activating the yeast.) First, we mix the sugar in the milk and then empty the contents of the packet of the active dry yeast. Further, give a gentle stir and cover it.
Now, put the yeast mixture in a warm corner of your kitchen for blooming. If the weather is cold, keep it for blooming in the oven with the oven lights turned on.
If you use the instant yeast, mix it with the flour while mixing the other dry ingredients. And for fresh yeast, the process is very similar to the activation of dry yeast.
Step 2: Kneading the dough
This is a very easy recipe. Just combine everything in the bowl of the stand mixer and start kneading. Let me tell you how I like to do it.
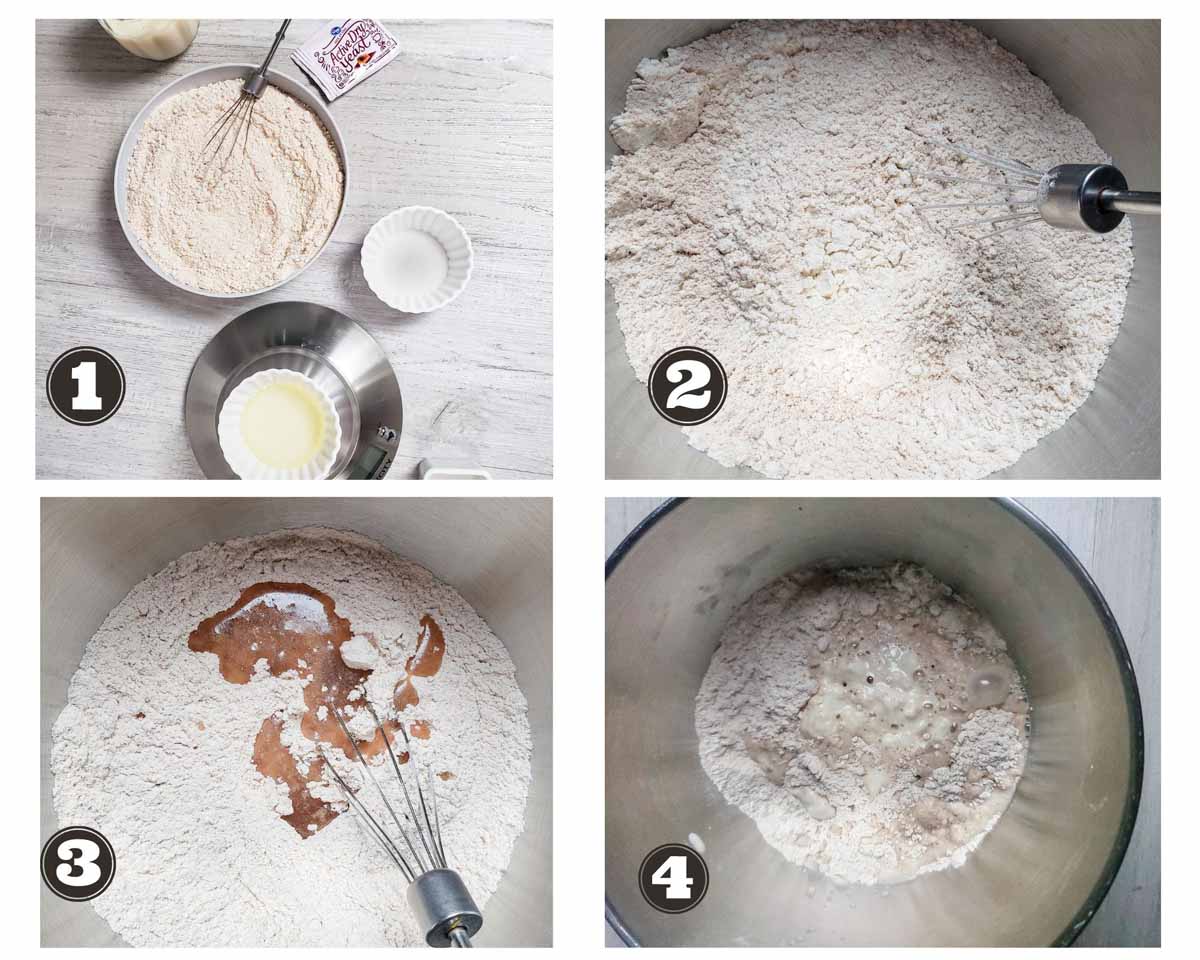
Firstly, I mix salt and vital wheat gluten in the flour and then add the oil. I give a quick whisk to the flour as I add the oil. The oil forms even lumps of the flour throughout. If you want, you can go in with your hands and rub the oil into the flour.
By this time, the yeast must have become bubbly and foamy. Now pour the yeast mixture into the bowl and place it on the stand mixer with the dough hook attachment.
Knead for 12-15 minutes at low speed or until the dough becomes smooth and supple.

Kneading with hands
If you are going to knead with your hands, start by combining dry and wet ingredients. Using the back of a spoon or ladle, combine everything to form a dough mass that has no dry flour patches. Make sure to hydrate every bit of flour. Cover the bowl with a kitchen towel or cling wrap and let it rest on the kitchen counter for 5 minutes.
Now dust the work surface with flour and transfer the dough mass onto it. Start working with the dough. Using the heels of your hand, stretch the dough away from you. And then, fold it over itself. Now rotate it and stretch again. Keep doing this until it comes together becomes manageable and stops sticking. Stop when the dough has become smooth.
You can also make this recipe using a bread machine.
Bulk rise/ First rise
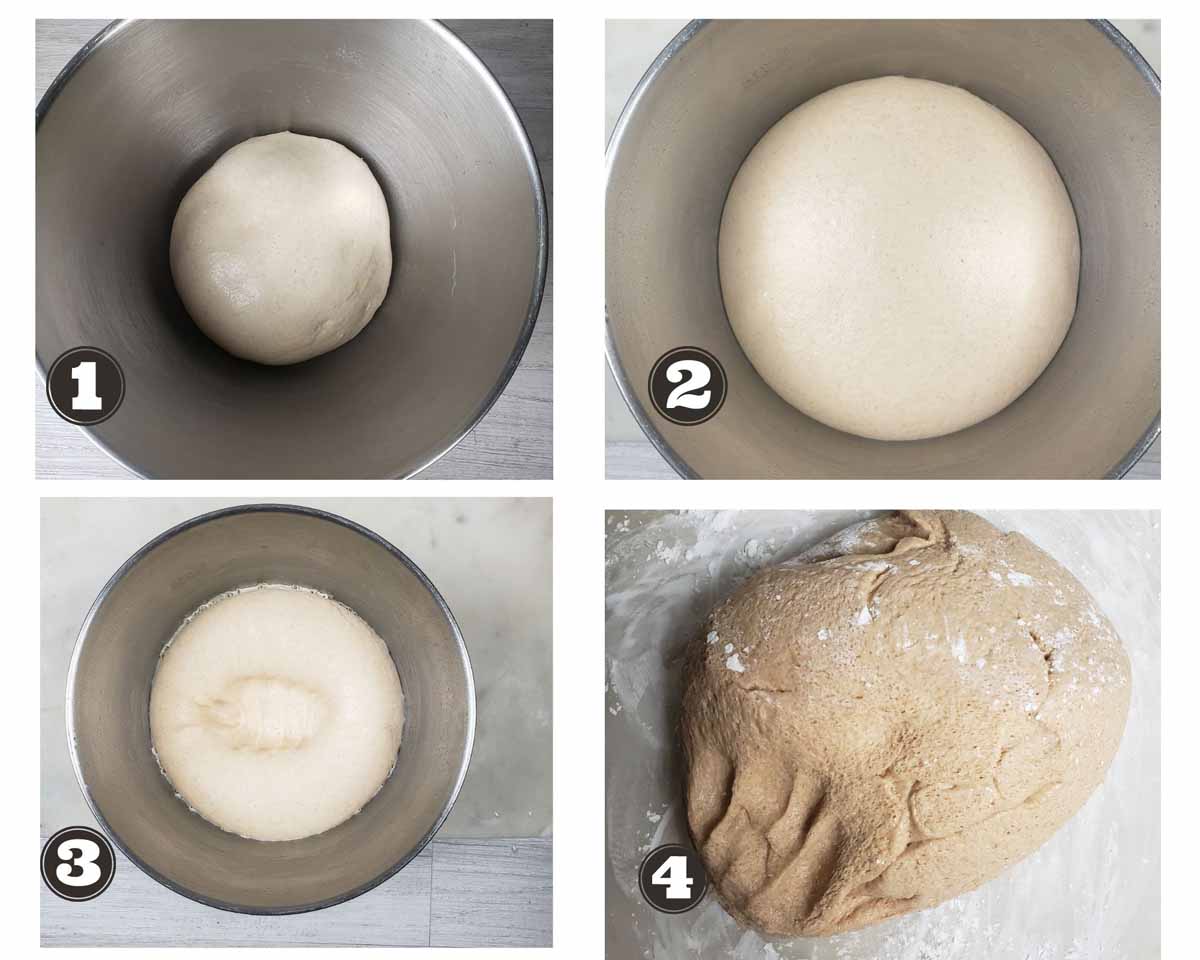
Now transfer the dough to a greased bowl and cover with a kitchen towel or a cling wrap. This is the stage at which yeast fermentation will start in the dough. I place the bowl for the bulk rise in a warm corner of the kitchen. A temperature between 75-85 0F is best for optimum yeast fermentation
By the end of the bulk fermentation, the dough would appear doubled up in volume. This process may take 2-3 hours, depending on your ambient kitchen temperature.
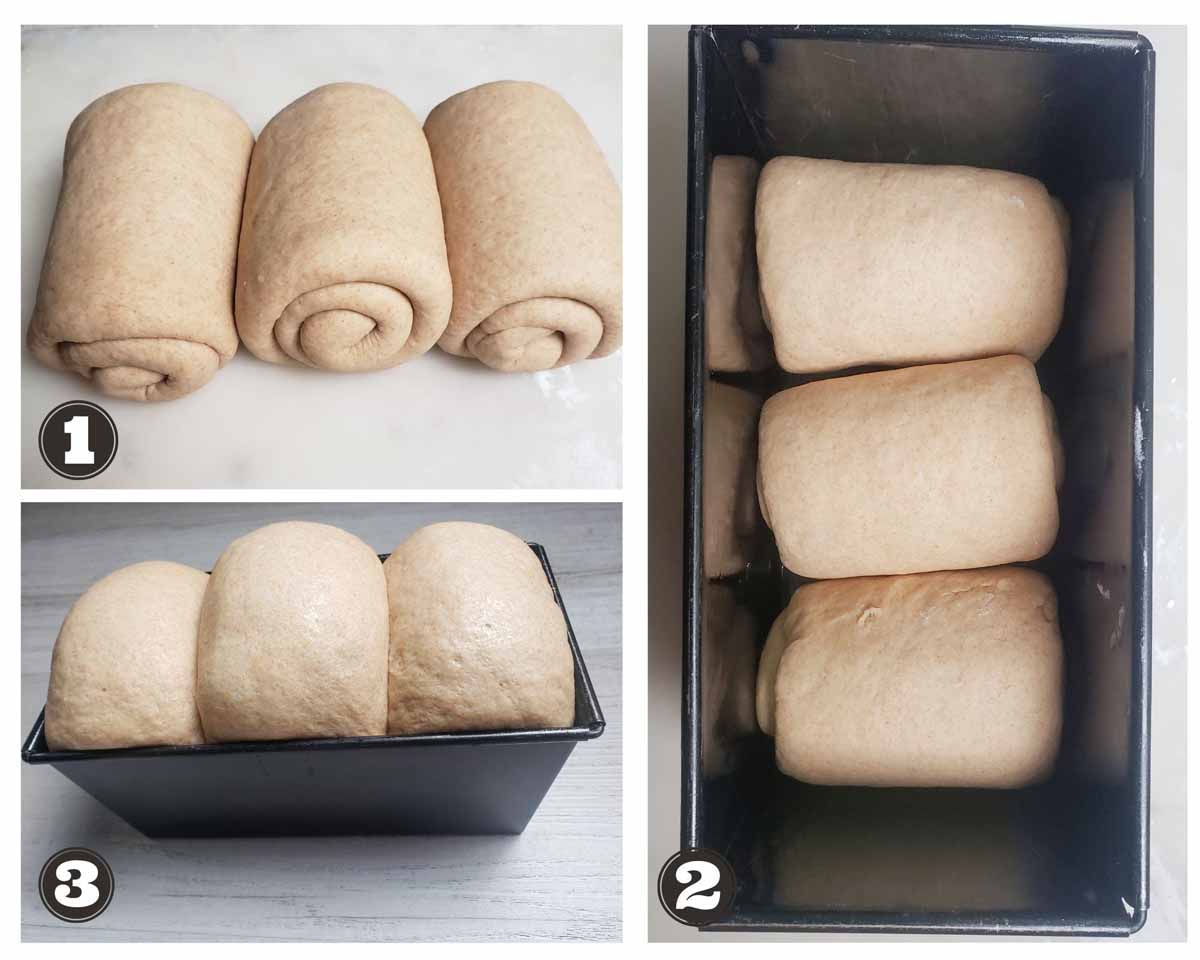
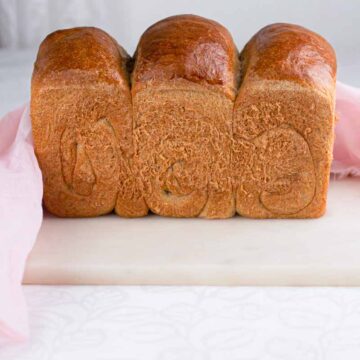
Shaping the dairy free bread
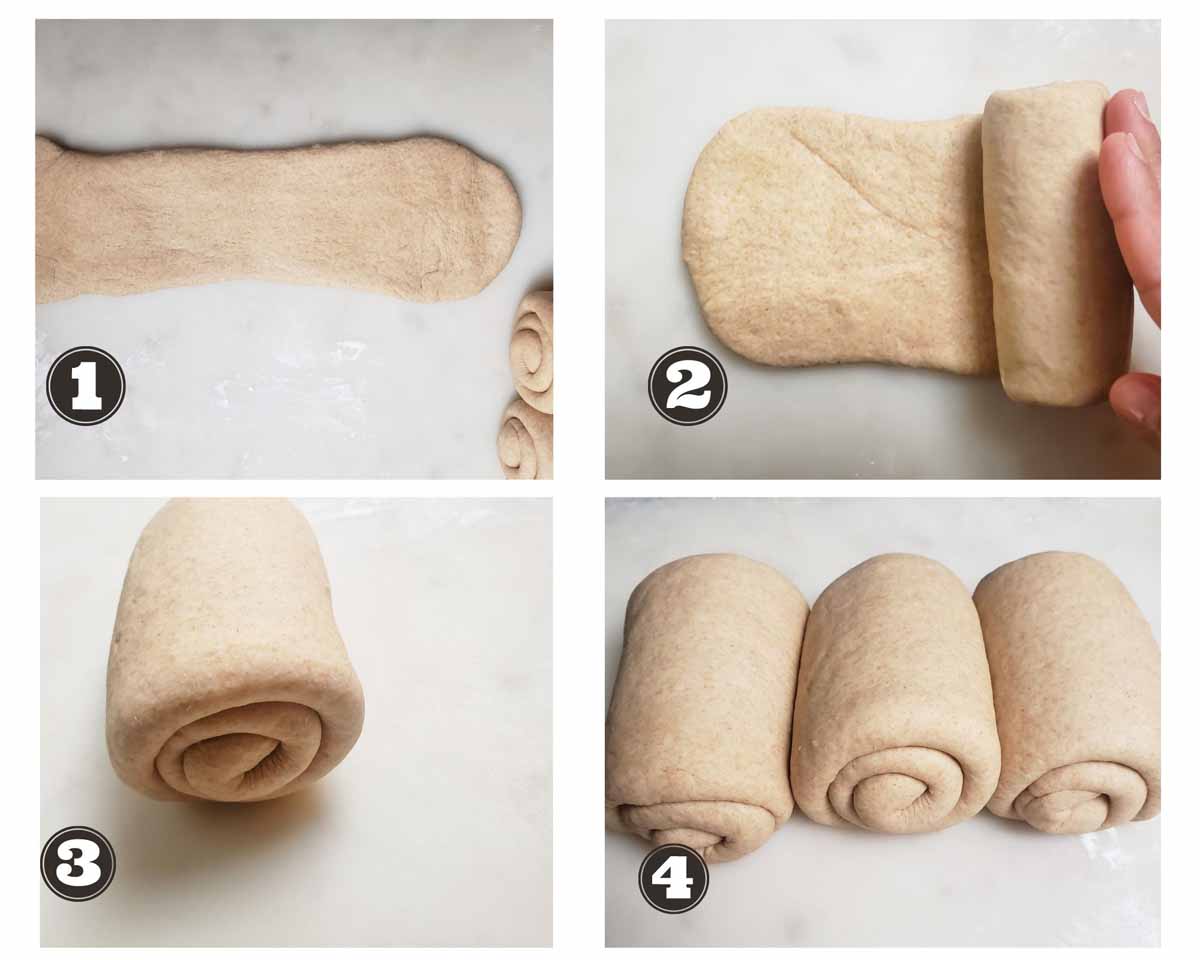
I am shaping this dairy free bread as a split sandwich loaf. Firstly, I divide the dough into three equal parts, using a weighing scale. Then I take one portion and roll it into a thin rectangular sheet, about 4 inches wide. I further rolled it into a log with the seal facing down.
Similarly, I shape the other two dough portions into logs. Then I grease a Pullman loaf pan and place the three logs in the loaf pan.
Alternately, you can shape the loaf into a single big loaf. I suggest you use any 9x4 inch non-stick loaf pan. If you use a bigger pan, the bread will still be good, but do not expect a tall loaf.
Second rise
Now, it's time to let the shaped dough rise again. I cover the pan with a greased cling wrap and let it proof in a warm corner of my kitchen. It can take 45 minutes to 80 minutes depending upon how warm and humid your kitchen is.
We want the dough to double up in volume and rise much above the rim. 1 inch above the rim at the center of the loaf, is what we should aim for.
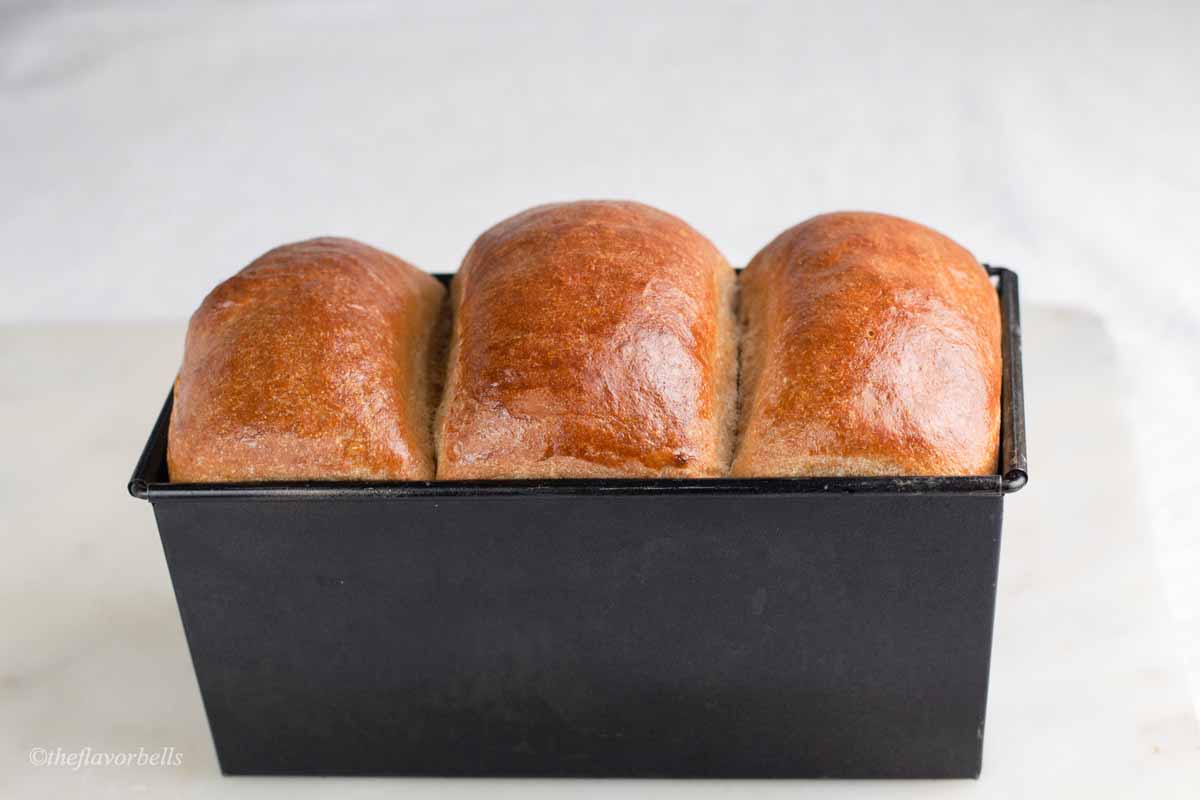
Baking
Towards the end of the proofing, I preheat the oven to 375 0F. I bake my dairy free bread for 32 minutes.
I also keep a pan with 1 cup of water on the lower shelf of the oven to induce steam into the oven. We just need enough water for the initial 15 minutes of baking. So, do not put too much water into the pan.
Alternately, you can put the pan for preheating and drop 4-5 cubes of ice after placing the loaf pan.
Somewhere in between the baking time, I quickly take out the loaf to brush the loaf with soy milk. It gives a good sheen and a deep golden-brown color to the crust of the bread. It is a good idea to rotate the loaf pan while putting it back. This ensures uniform baking and coloration of the crust.
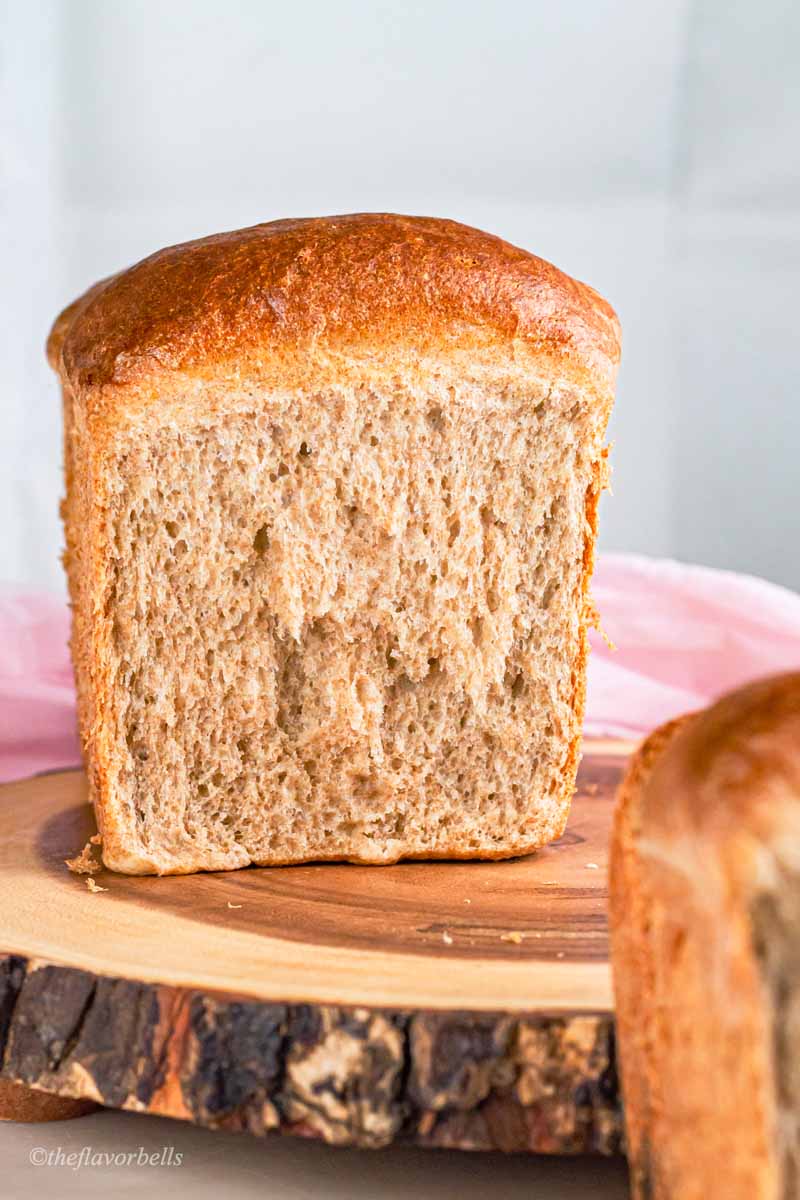
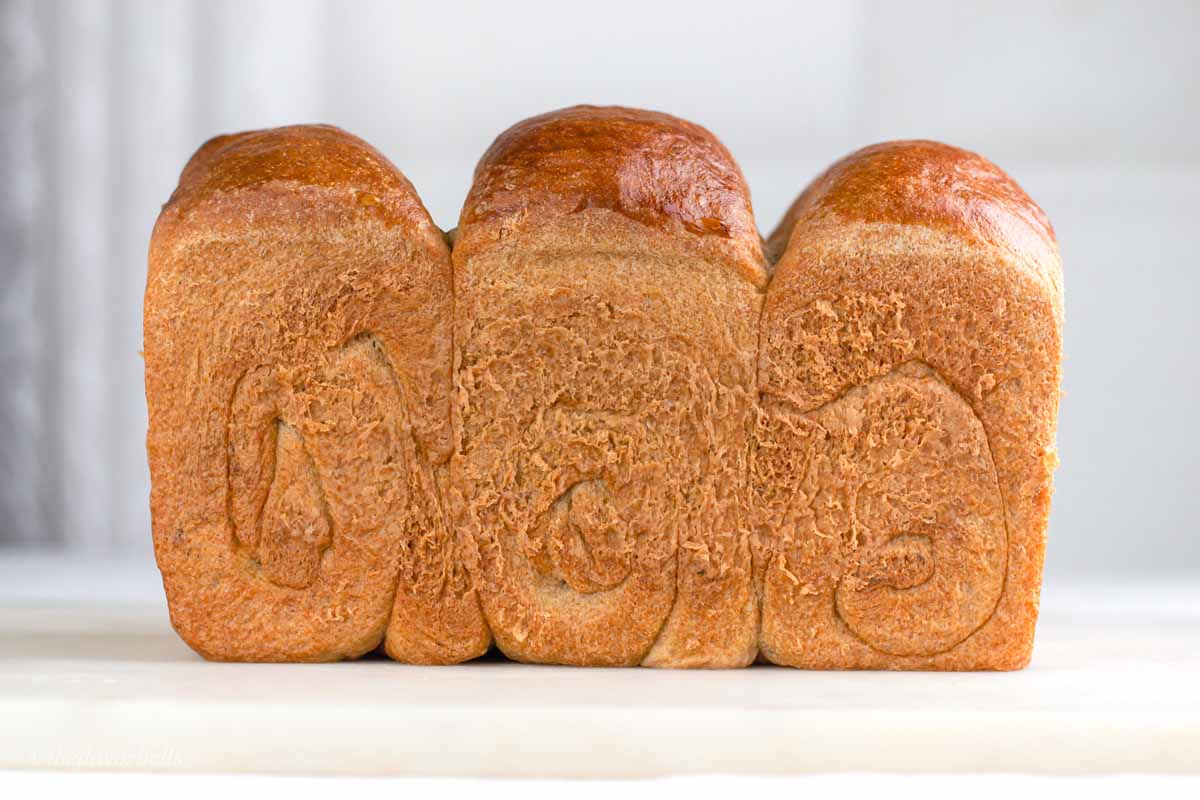
Let the bread cool in the pan for 10 minutes and then remove the bread from the loaf pan. Transfer it to a cooling rack and let the dairy free bread cool completely before serving or storing.
And there you have, a loaf of delicious, nutty, and fluffy bread for people with milk allergies.
How to serve dairy free bread?
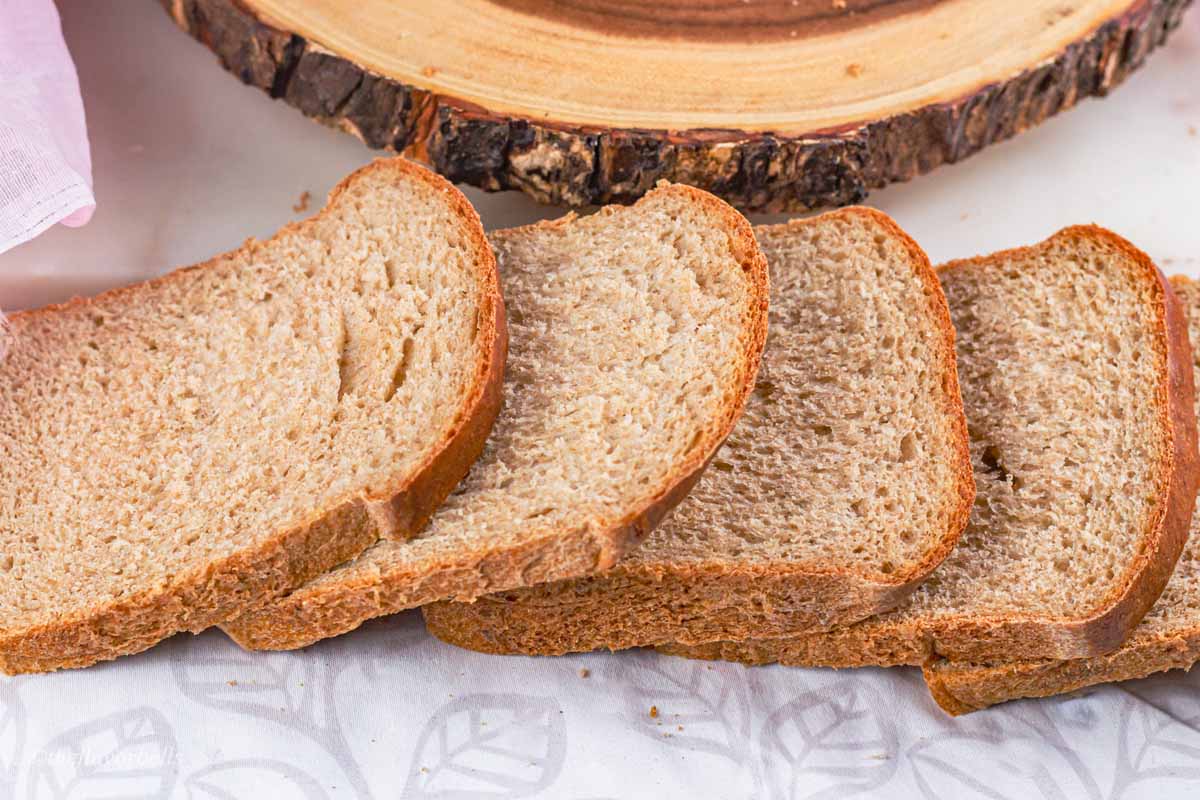
Enjoy this whole wheat dairy free bread as regular sandwich bread. You can serve it as your heart desires. Make it into an avocado toast or build the sandwich of your dreams.
Use it to make diary free bread pudding, or a humble jam and jelly sandwich. It's all in your hands now. Let me know what is your favorite way to enjoy it?
How to store dairy free bread?
As far as storing the vegan whole wheat bread is concerned, it is just the same as for any other bead. It will last 2-3 days at room temperature. Keep it covered tightly in a cloth bag.
If you are going to bake multiple loaves at a time, it is best to freeze them for prolonged storage. Place them in freezer-safe ziplock bags and cover with foil. Date and freeze for months.
Pro-tips to make this recipe perfectly
- Always bloom the yeast separately to be a hundred percent sure that yeast is alive and active.
- Heat the soy milk to 110 0F for blooming the yeast.
- Use an instant-read thermometer to know the exact temperature of the milk so that optimum yeast activity can be obtained in the dough.
- Do not follow the timeline given in the recipe blindly. The temperature and RH in your home can vary hugely from mine. Bulk rises until the dough has doubled in volume.
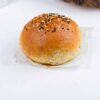
- Shape the bread according to your liking or how you plan to consume it. You can even use this recipe to make dairy free rolls or burger buns.
- Use an appropriately sized loaf pan for baking the bread. Using a smaller or bigger loaf pan makes an unappealing loaf.
- While baking, keep a pan filled with water on the lower shelf of the oven to induce steam into the oven.
- Using a pastry brush, to brush the whole wheat dairy free bread with soy milk.
Frequently Asked Questions
No, not all bread are dairy free. But, a lot of bread that we get in our supermarket are dairy free. Others may have some kind of dairy product in them. Butter and dry milk solids are the most commonly used dairy ingredients. It is always a good idea to check the ingredients before buying one.
Most of the lean bread are hundred percent dairy free like baguettes, focaccia, classic sourdough bread, pita bread, etc. Also, a whole lot of enriched bread sold in the supermarkets are dairy free. They use cheap dairy free alternatives. But the enriched bread can still contain dairy.
Homemade enriched bread always uses one or the other kind of animal ingredient. That is where a recipe like this comes into the scene. You can use this recipe to make a wholesome dairy free bread at home.
Like I said in the previous section, all the lean bread are just made up of flour, water, salt, and a leavening agent like yeast or sourdough. A few of these bread are:
Pita bread
Sourdough bread
Baguette
Focaccia
Ciabatta
Lavash bread
Roti ( Indian flatbread)
In addition to these, many of the supermarket bread are dairy-free. But it is always a good idea to check the list of ingredients at the back of the pack.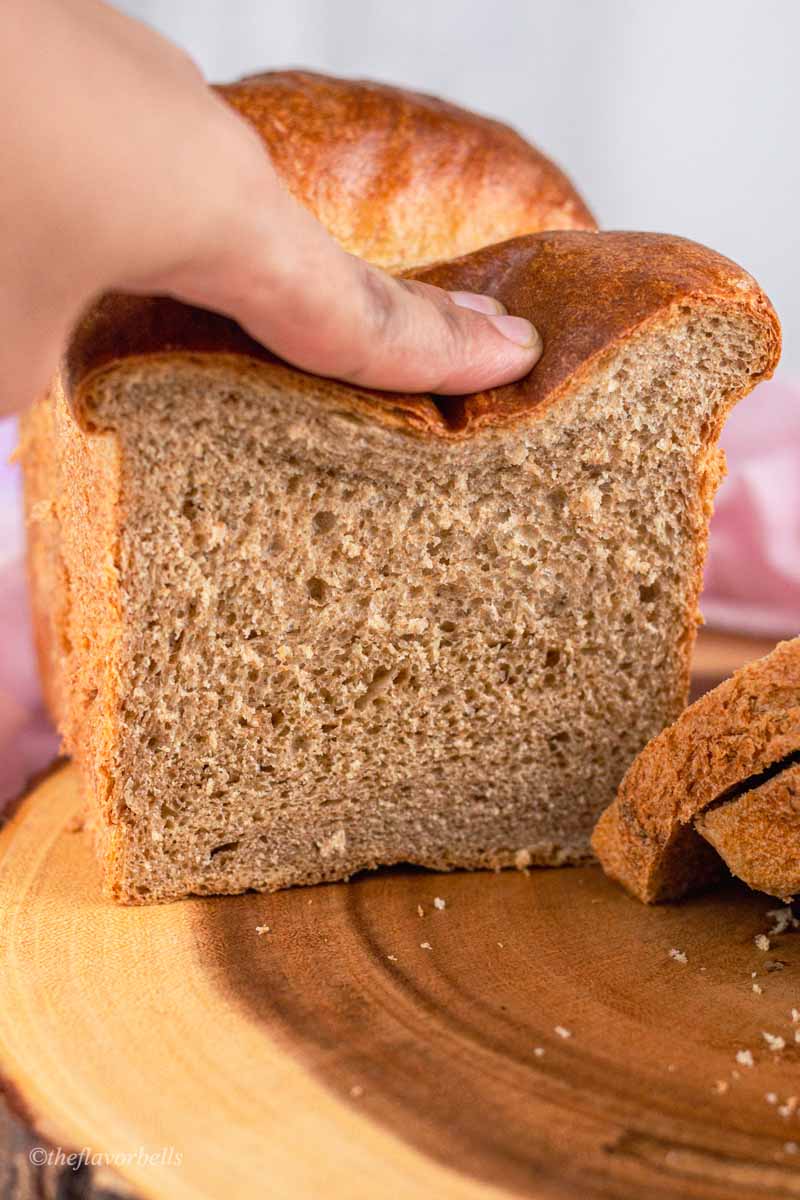
Yes, bagels are originally dairy free. But there is no way to surely tell if someone decides to add some form of dairy product to it. To make bagels, all you need is flour, salt, water, and yeast. But there is no hard and fast rule that dairy cannot be added to the bagel. I know a friend who adds butter to her bagel dough and her bagels are very famous. It is always a good idea to ask the baker or if buying at the supermarket, read the ingredients.
No sourdough is a lean bread, and it does not have dairy. It is just made up of flour, water, salt, and sourdough starter. It does not contain any type of animal product as such. Sourdough is a vegan-friendly bread. A few popular sourdough bread recipes on the website are; rustic sourdough bread and garlic sourdough bread.
Yes, pita bread is also dairy free bread. People with lactose intolerance can safely consume pita bread. Pita bread is a very versatile bread. It can be used to made from chips to a loaded sandwich. You can make pita bread with yeast or a sourdough starter. Check out this whole wheat pita bread made with sourdough discard.
No, a loaf of gluten-free bread may or may not be dairy free. Gluten free bread is made of flour that is not wheat-based and has no gluten. Some people are allergic to gluten. Gluten free bread is especially for them. Also, gluten-free bread is easy to digest and anybody can relish them.
All the bread recipes on this blog are egg-free recipes. But I often use dairy in my bread recipes. But there are a handful of dairy free recipes on the blog that have amazing bread reviews.
Suggested readings:
- A complete guide for wheat pita bread: sourdough/ Yeast
- Vegan hamburger buns: The quickest vegan bun recipe
- No-knead wild yeast bread: It’s a Yeast water bread recipe
- Homemade French Baguette
- The best garlic sourdough bread recipe
- Rustic sourdough bread with a perfect crust and open crumb
- How to make all-purpose Flour Sourdough bread
- Quick and Fluffy Sourdough vegan pancakes using the discard
If you found this recipe for dairy free bread useful, do not forget to share it with your friends. I would highly appreciate a comment and a rating! It helps me create more resources like this.
Happy baking!
Dairy free bread recipe card
Dairy free bread
Ingredients
- 275 g whole wheat flour (2 cups)
- 125 g all-purpose flour (1 cup)
- 16 g vital wheat gluten (2 tbsp)
- 290 g soy milk (1 cup+ less than ¼ cup)
- 2 ¼ teaspoon active dry yeast (1 pk)
- 27 g vegetable oil (2 tbsp)
- 14 g sugar (1 tbsp)
- 8 g salt (1 tsp)
Instructions
Step 1: Activate the yeast: blooming the yeast
- To activate the yeast, mix sugar in the warm soy milk. Then add the active dry yeast. Give a gentle stir and cover. The yeast should look bubbly and foamy after 5-7 minutes.
Step 2: Kneading the dough
- Mix salt and vital wheat gluten in the flour. Give a quick whisk to the flour as you add the oil. The oil will form even lumps of the flour throughout.
- By this time, the yeast must have become bubbly and foamy. Now pour the yeast mixture into the bowl and place it on the stand mixer with the dough hook attachment.
- Knead for 12-15 minutes at low speed until the dough becomes smooth and supple.
Bulk fermentation/ First rise
- Now transfer the dough to a greased bowl and cover with a kitchen towel or a cling wrap. Let the dough bulk rise in a warm and damp place for 2-3 hours or until the dough doubles up in volume.
Shaping the dairy-free bread
- First, divide the dough into three equal parts, using a weighing scale. Then take one portion and roll it into a thin rectangular sheet, about 4 inches wide. Further, roll it into a log with the seam facing down. Cover, while you work with the rest of the two dough portions.
- Similarly, shape the other two dough portions into the logs.
- Carefully lift them one by one and place them in a 9X4 inch greased loaf pan.
Second rise
- Now, cover the pan with a greased cling wrap and let it proof in a warm corner of the kitchen. It should take 45 minutes to 80 minutes depending upon how warm and humid your kitchen is.
- The dough should double up in volume and rise 1 inch above the rim at the center of the loaf.
Baking
- Towards the end of the proofing, preheat the oven to 375 0F.
- Keep a pan filled with a cup of water on the lower shelf of the oven to induce steam into the oven.
- Let the dairy-free bread bake for 30-32 minutes. Somewhere in between the baking time, quickly take out the loaf to brush it with soy milk.
- Let the bread cool in the pan for 10 minutes and then remove the bread from the loaf pan and transfer to a cooling rack. Let the bread cool completely before serving or storing.
Notes
- Always bloom the yeast separately to be a hundred percent sure that yeast is alive and active. Heat the soy milk to 110 0F for blooming the yeast. Use an instant-read thermometer to know the exact temperature of the milk so that optimum yeast activity can be obtained in the dough.
- If the weather gets cold, keep it from blooming in the oven with the oven lights turned on.
- If you use the instant yeast, mix it with the flour while mixing the other dry ingredients. And for fresh yeast, the process is very similar to the activation of dry yeast.
- Kneading with hands If you are going to knead with your hands, start by combining dry and wet ingredients. Using the back of a spoon or ladle, combine everything to form a dough mass that has no dry flour patches. Make sure to hydrate every bit of flour. Cover the bowl with a kitchen towel or cling wrap and let it rest on the kitchen counter for 5 minutes. Now dust the work surface with flour and transfer the dough mass onto it. Start working with the dough. Using the heels of your hand, stretch the dough away from you. And then, fold it over itself. Now rotate it and stretch again. Keep doing this until it comes together becomes manageable and stops sticking. Stop when the dough has become smooth and supple.
- You can also make this recipe using a bread machine.
- Do not follow the timeline given in the recipe blindly. The temperature and RH in your home can vary hugely from mine. Try to understand the messages of the dough. Bulk rises until the dough has doubled in volume.
- Shape the bread according to your liking or how you plan to consume it. You can even use this recipe to make dairy free rolls or burger buns.
- Use an appropriately sized loaf pan for baking the bread. Using a smaller or bigger loaf pan makes an unappealing loaf.
- While baking, keep a pan filled with about a cup of water on the lower shelf of the oven to induce steam into the oven.
- Using a pastry brush, brush the whole wheat dairy free bread with soy milk.
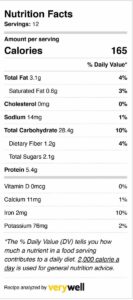
Nutrition facts


Sou Young
Best bread I ever made. Loved the texture on it. Finally, I am able to get over my bakery bread. Thanks a lot.