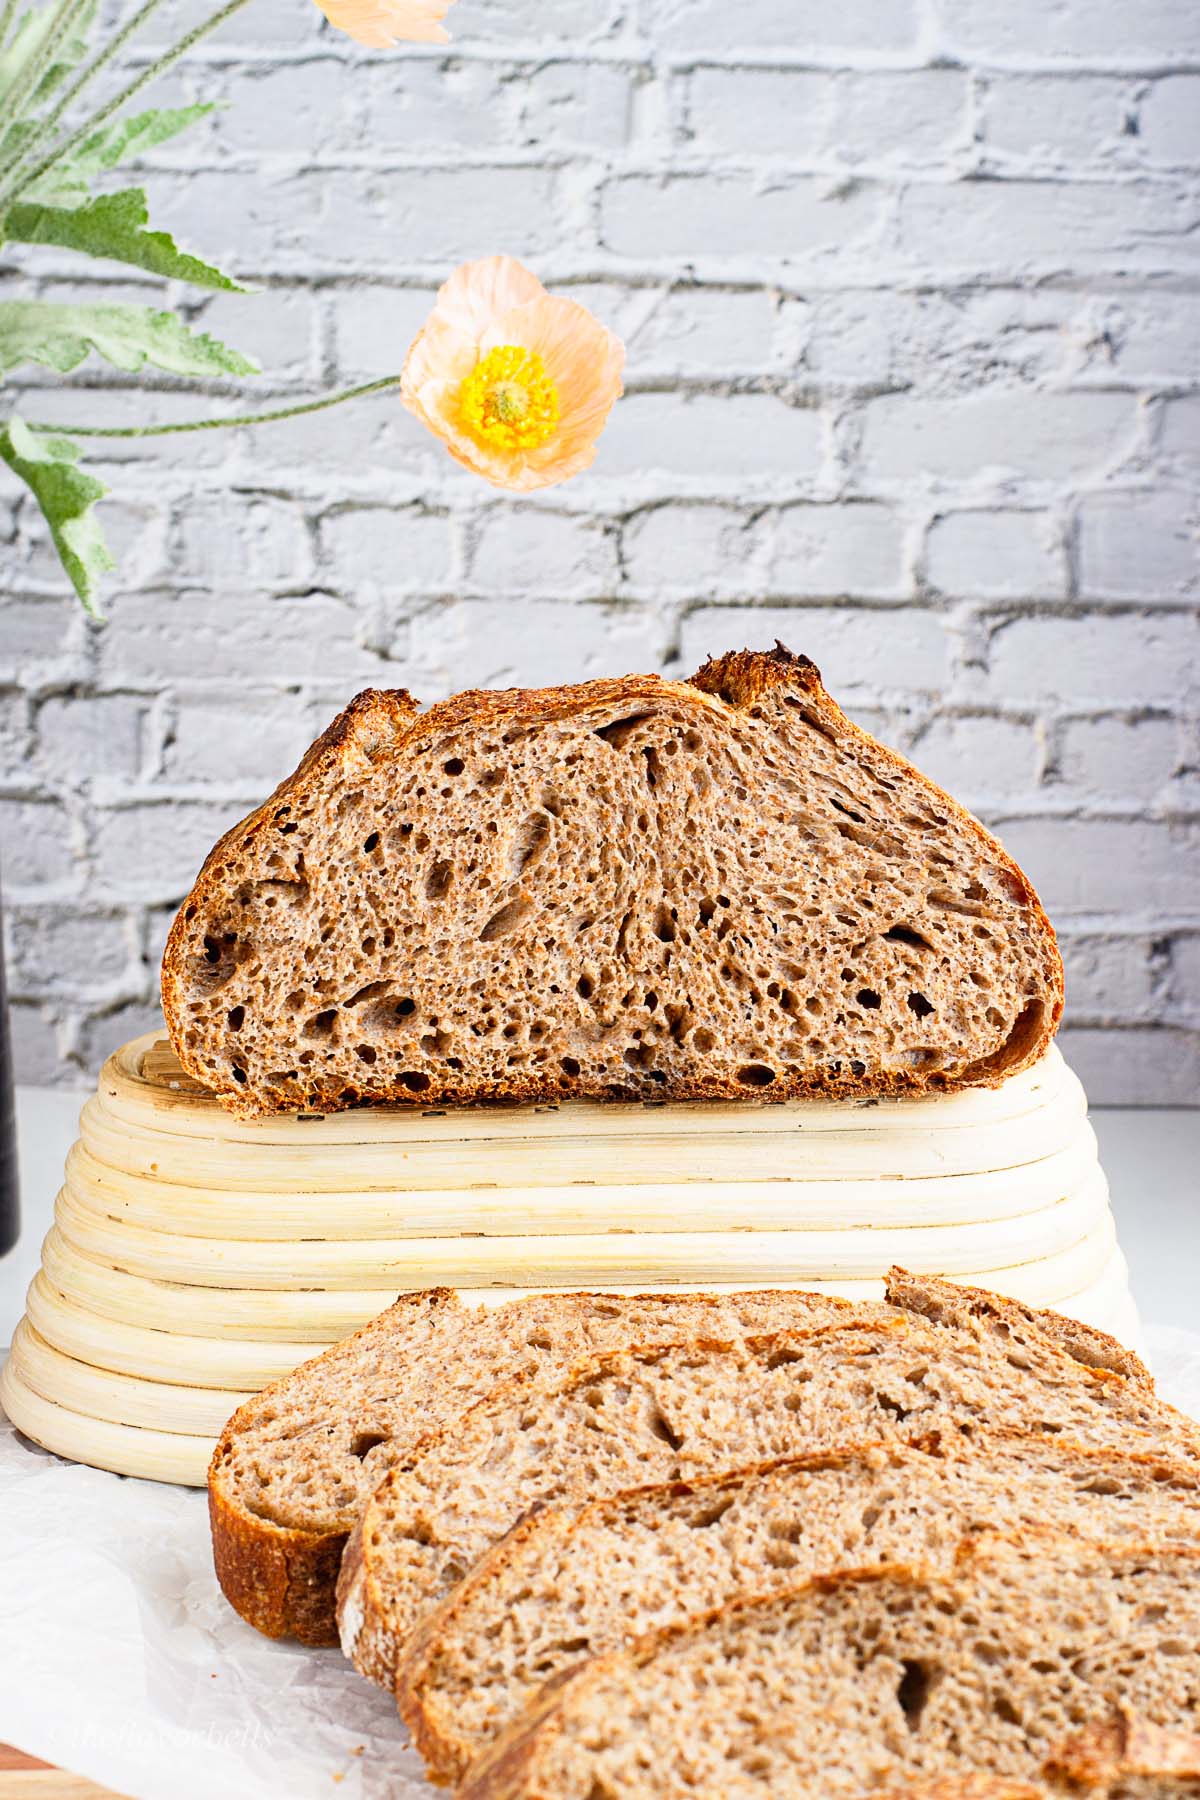
Baking your own 100 percent whole wheat sourdough bread is one of the most rewarding things you can do in the kitchen. With just a few simple ingredients like whole wheat flour, water, salt, and a strong sourdough starter, you can create a deeply flavorful loaf that’s hearty, nourishing, and full of character. This recipe is perfect for anyone who loves healthy sourdough bread with a rustic homemade touch.
Jump to:
- 👩🏽🍳 Why You’ll Love This Whole Wheat Sourdough Bread Recipe
- 🧂Ingredients Notes
- 🔪 Step By Step Instructions
- ⏰Baking Schedule: Sourdough Whole Wheat Bread Recipe
- 📝 Recipe Notes, Tips & Troubleshooting
- 🔗 More sourdough Bread Recipes
- Whole Wheat Sourdough Bread
- 🫙Storage and Reheating Instructions
- ❓Frequently Asked Questions
👩🏽🍳 Why You’ll Love This Whole Wheat Sourdough Bread Recipe
Here’s why this recipe is worth bookmarking and baking again and again:
- 100% Whole Wheat – No refined flour, just the goodness of whole grains in every slice.
- Nutritious and Delicious – A healthy, whole wheat sourdough bread that’s gut-friendly and naturally fermented.
- Perfect for Sandwiches or Toast – Makes a sturdy yet soft whole wheat sourdough sandwich bread.
- Naturally Leavened – No commercial yeast; we use an active sourdough starter for that deep, tangy flavor.
- Adaptable – Works with store-bought flour or freshly milled flour if you love baking with whole grains.
🧂Ingredients Notes
Let’s talk about the ingredients you’ll need for this rustic whole wheat sourdough bread recipe, and how you can adapt them:

- Whole Wheat Bread Flour
This recipe uses 100% whole wheat flour. You can use either store-bought or fresh milled flour from wheat berries. If using freshly milled whole wheat, the flavor is richer and the nutrition higher, but store-bought flour works well too. You can add ½ cup of bread flour or all purpose flour without modifying the bread the texture. - Sourdough Starter
Use a well-fed, active sourdough starter made with whole wheat flour if possible. A whole wheat sourdough starter gives a stronger rise and deeper flavor, but a white flour starter works too. - Water
Use filtered or non-chlorinated room temperature water. Avoid very cold water as it slows down fermentation. If you're unsure, let tap water sit out overnight. - Salt
Fine sea salt or fine Himalayan pink salt is preferred. Avoid iodized salt as it can slow down fermentation. Salt strengthens the dough and enhances flavor.
🔪 Step By Step Instructions
Here’s how to make your own sourdough whole wheat bread at home, step by step:
1. Combining the Dough
In a large mixing bowl, add your whole wheat flour and room temperature water. Mix using a dough whisk or your hands until there are no dry bits. The dough will be shaggy and sticky. This stage ensures the flour is fully hydrated—critical when using whole grain flours.
2. Autolyse
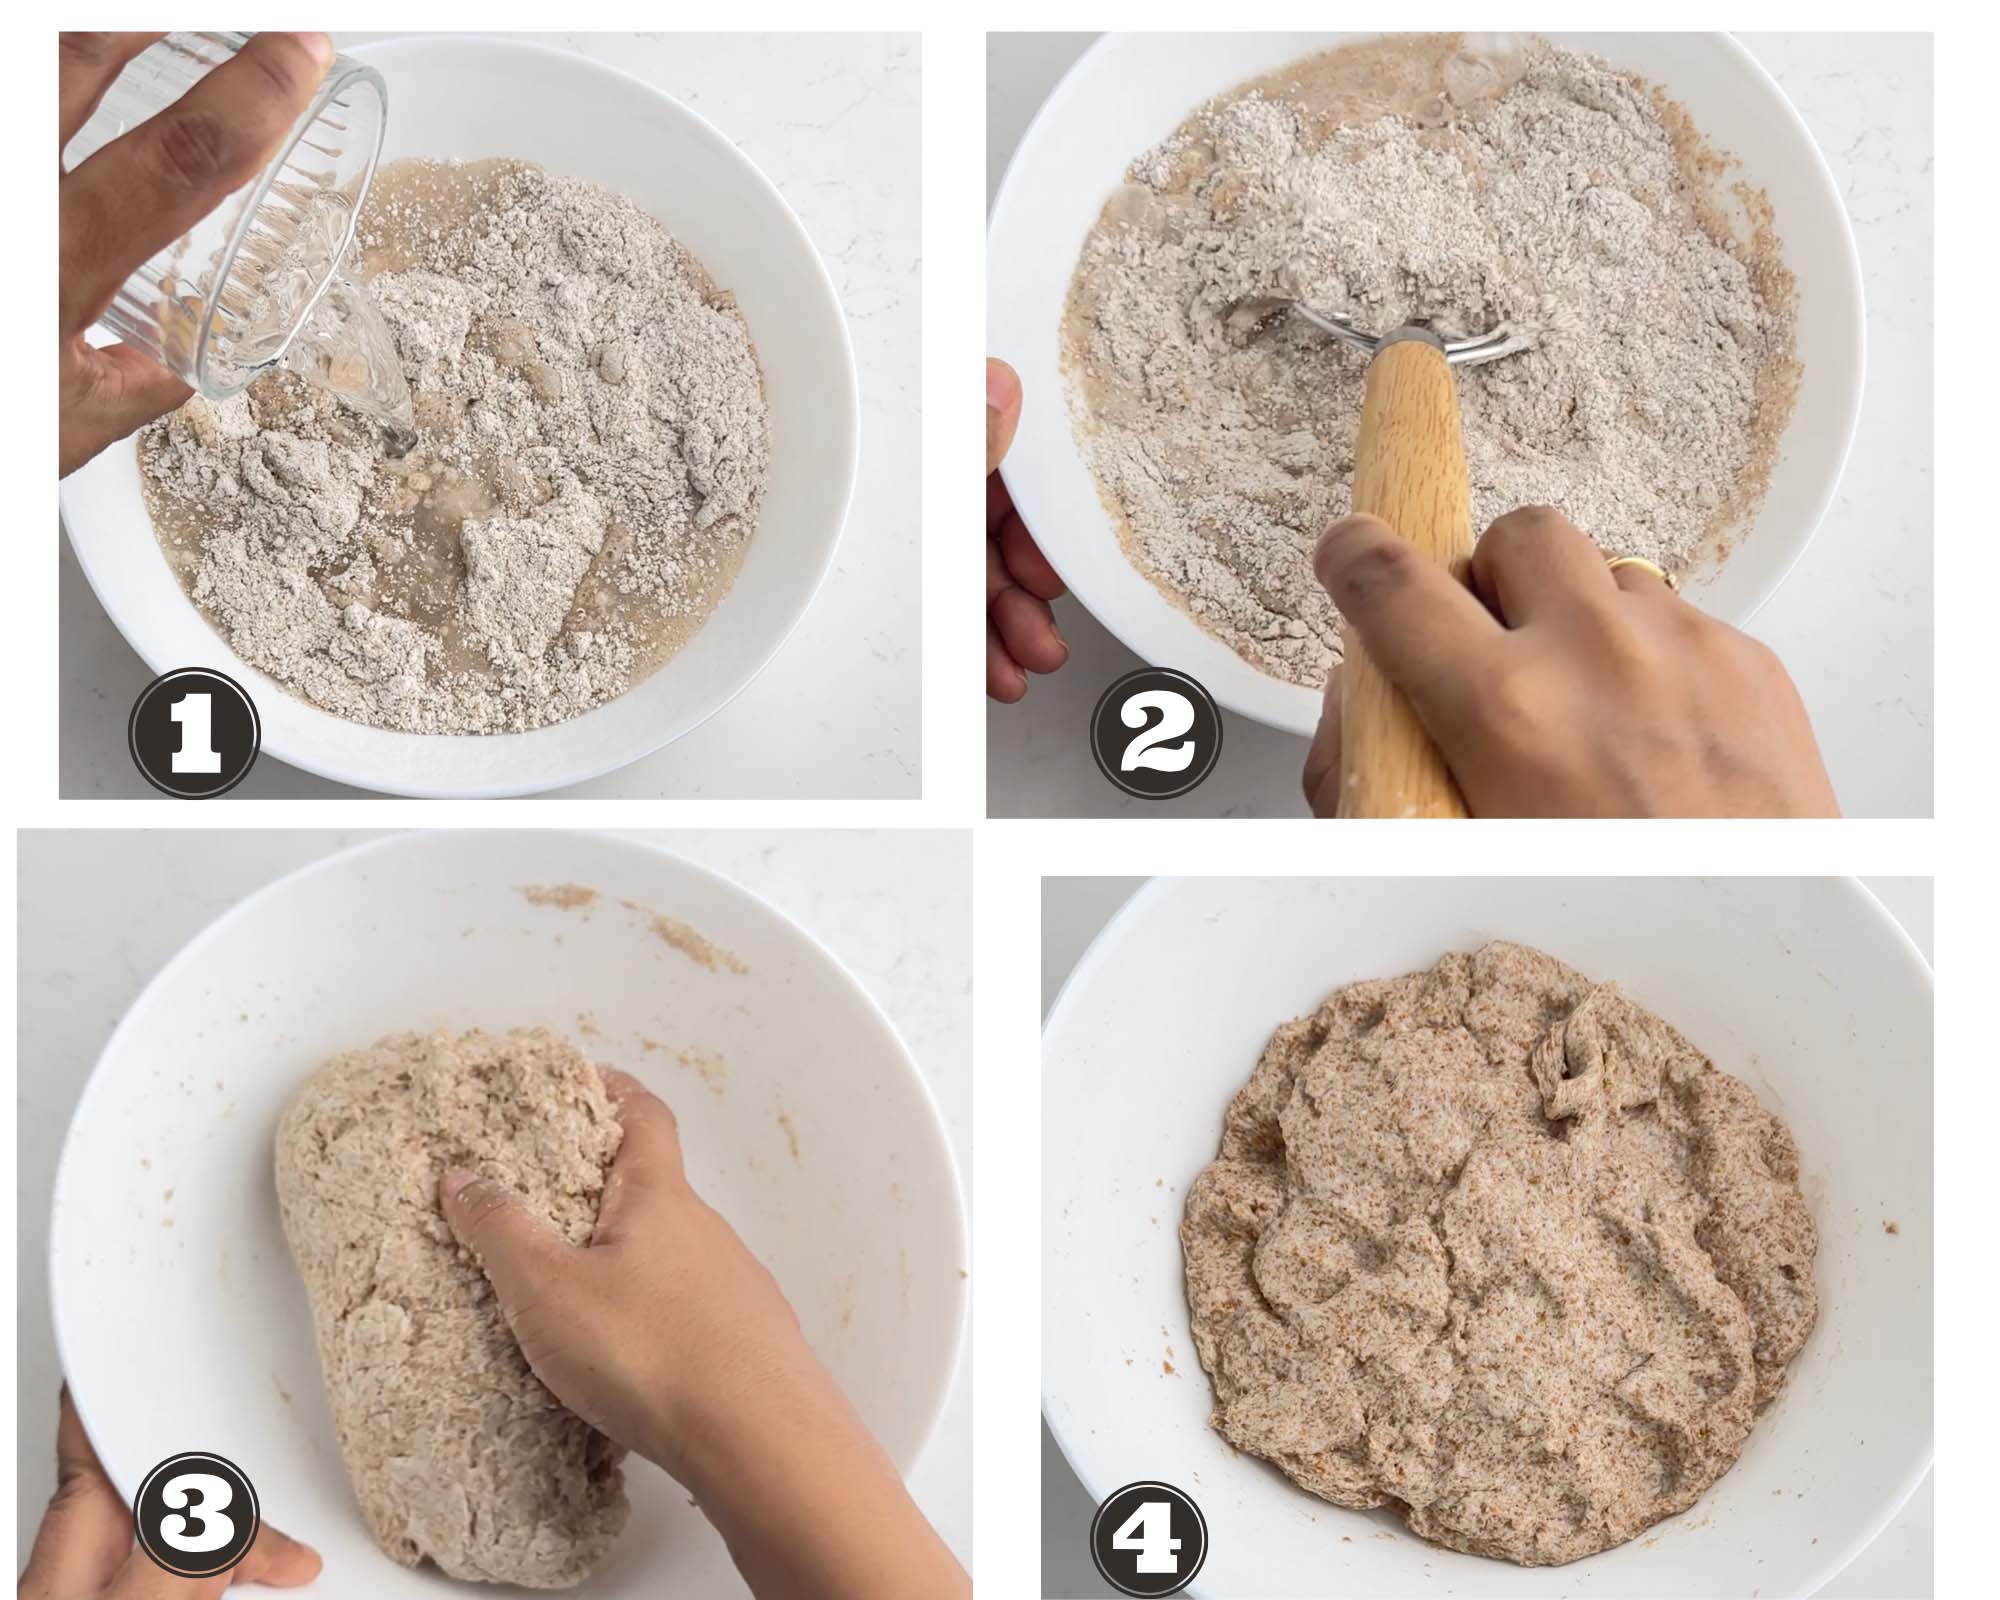
Let the mixture sit covered for 45 minutes to 1 hour. This rest period allows the flour to absorb water and begin gluten development. Autolyse makes the dough easier to work with and improves the final bread texture.
3. Adding the Sourdough Starter
After autolyse, incorporate the active sourdough starter into the dough. Use your hands to gently fold and pinch until fully combined. This is when fermentation really begins, so make sure your starter is bubbly and active.
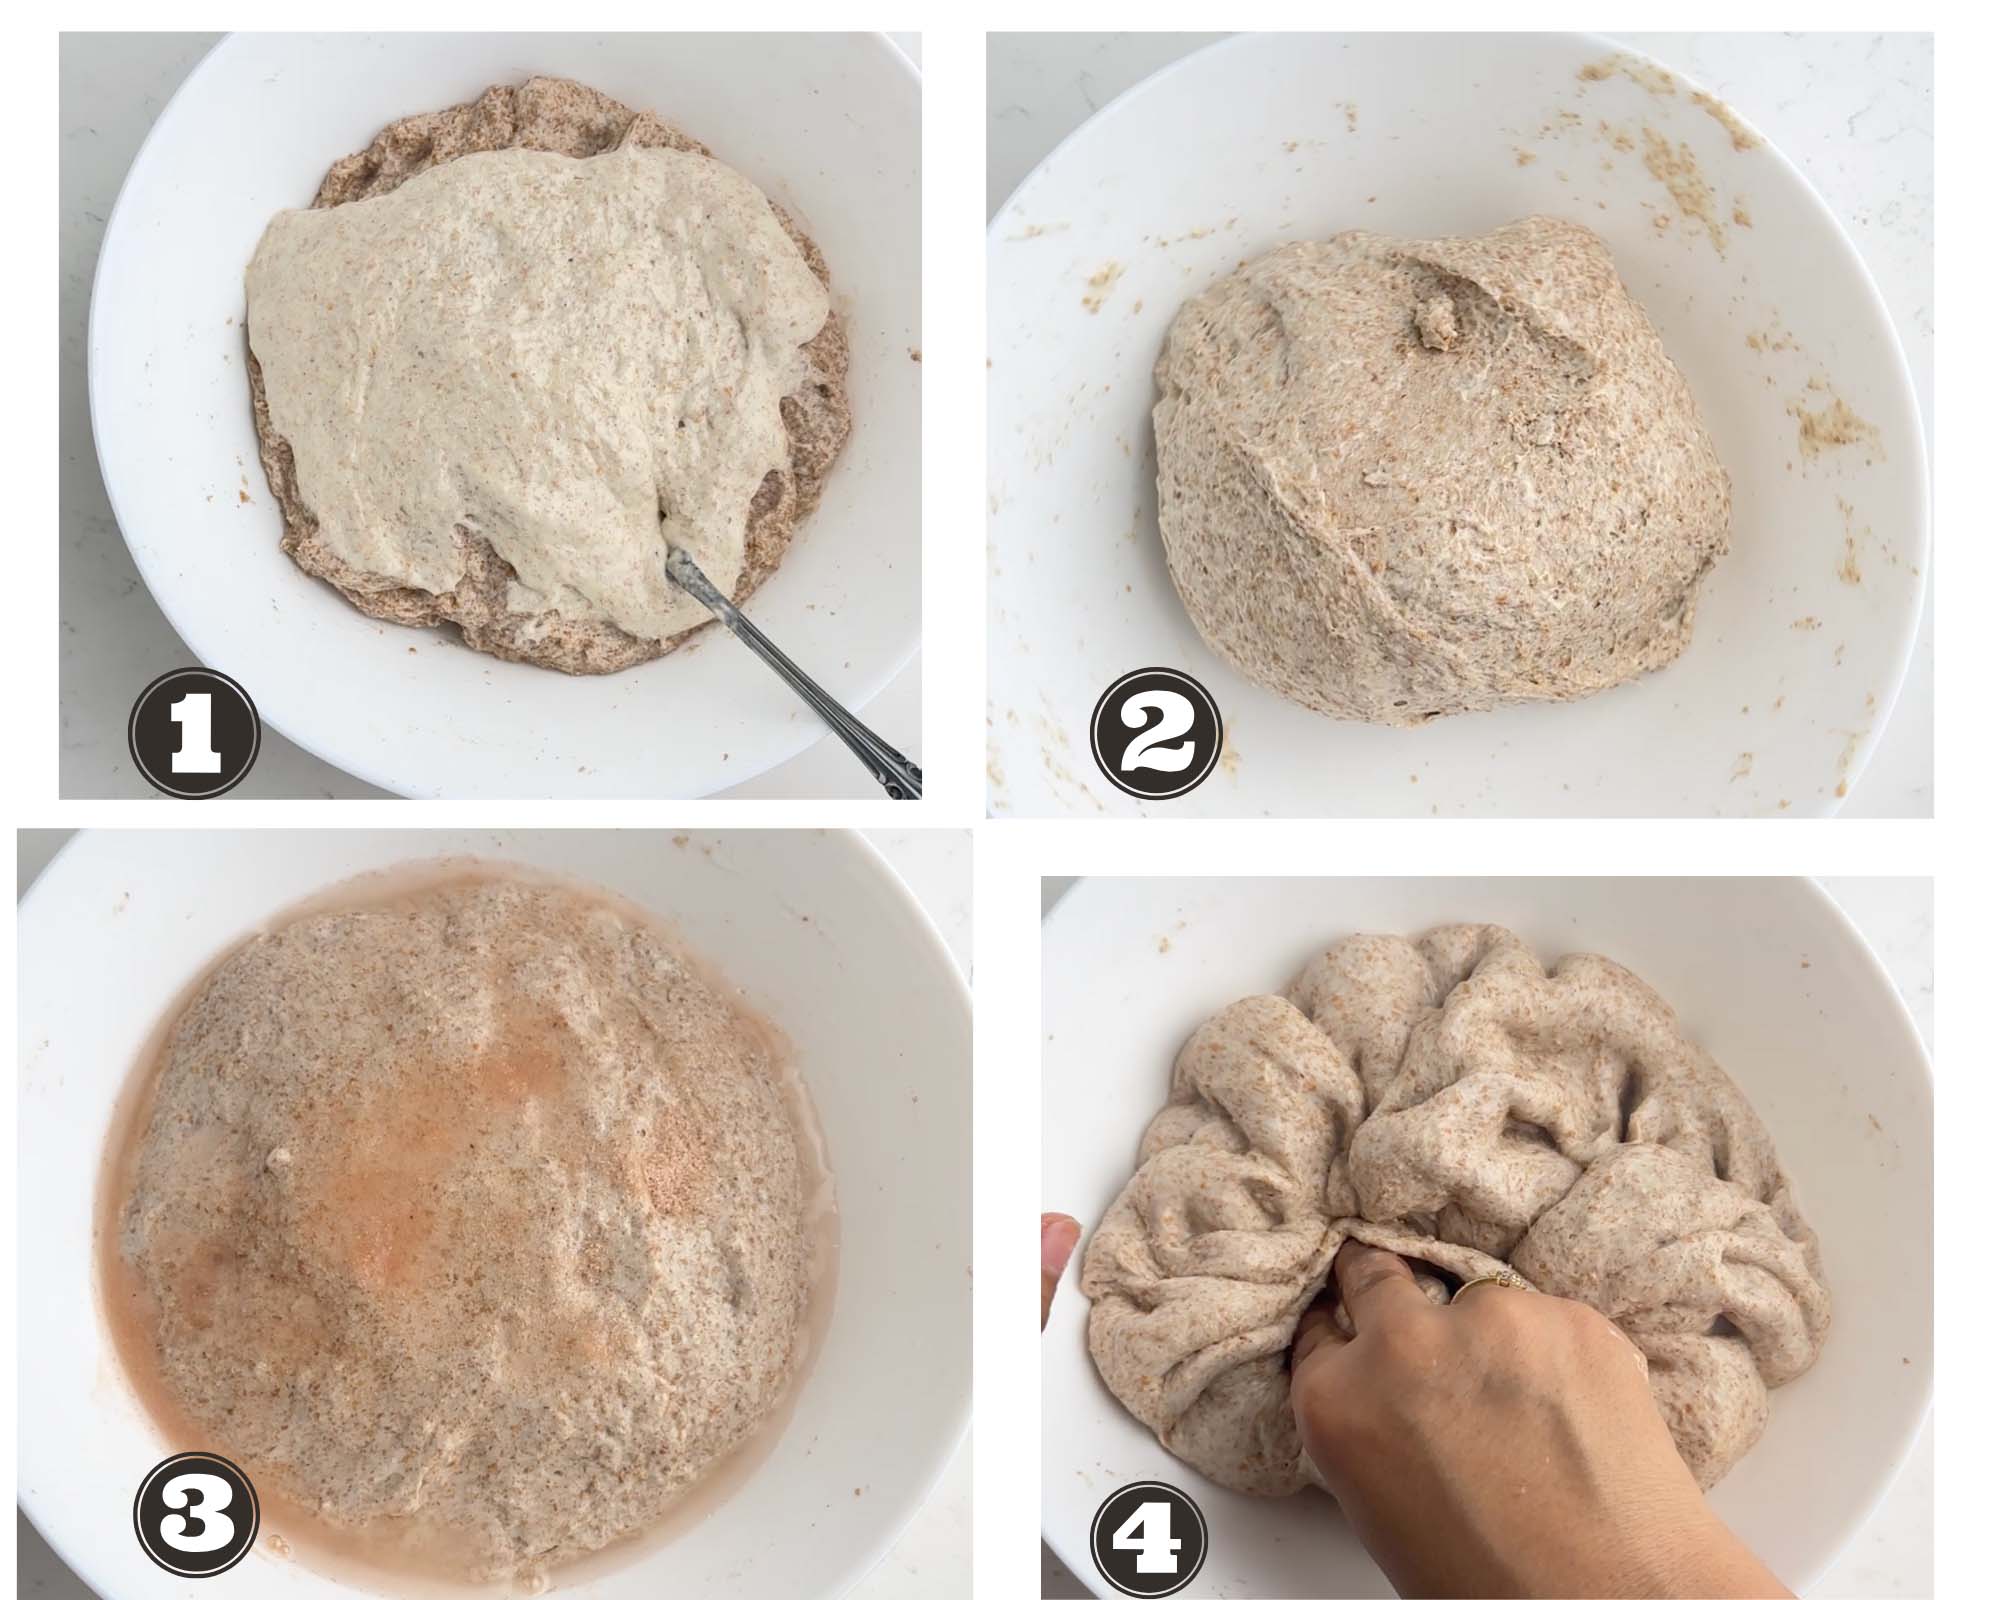
4. Adding Salt (Bassinage Method)
Dissolve salt in a small amount of water and gently work it into the dough. This is called bassinage, a method that strengthens the dough and improves hydration. The bread dough may feel slack at first, but it will tighten up with folding.
5. Stretch and Fold
Perform 3–4 sets of stretch and folds over the next 2 hours. Let the dough rest 30 minutes between each set. This strengthens the gluten and builds structure without kneading.
6. Bulk Fermentation
Cover and leave the dough to bulk ferment at room temperature in a warm spot for 4–6 hours or until it has risen by about 50% and feels airy. If your kitchen is cold, fermentation may take longer. Look for signs of activity rather than just time.
7. Shaping
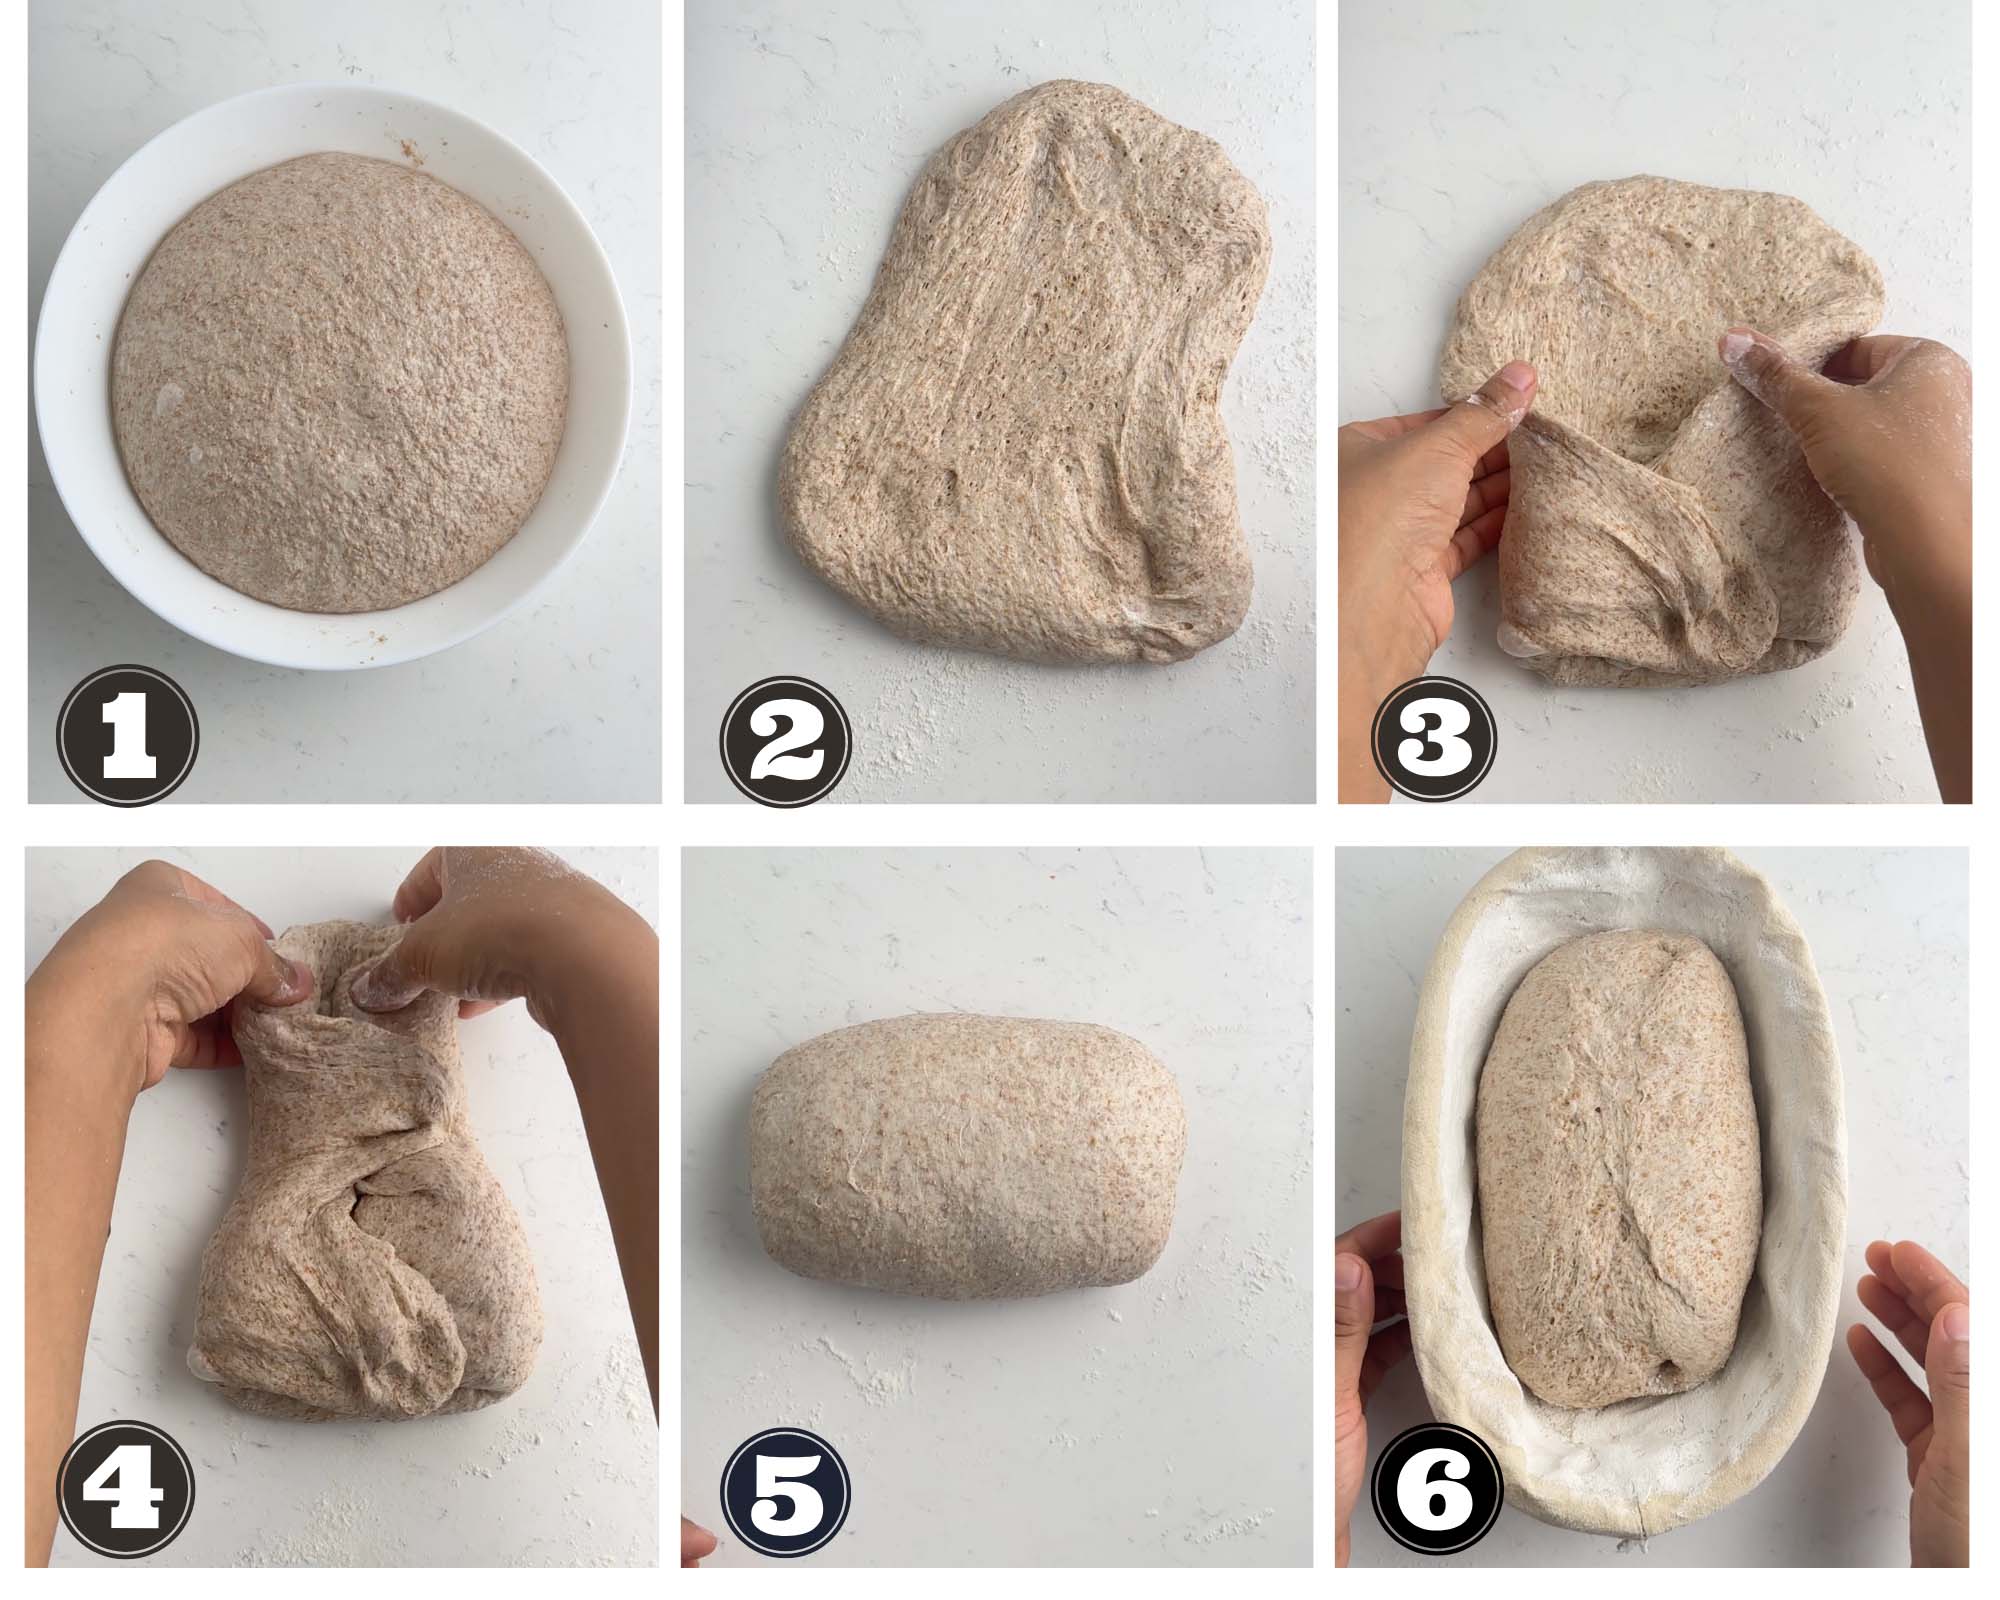
Turn the dough onto a lightly floured surface. Shape into a tight loaf by folding and rolling it gently. Use a bench scraper if needed to help shape. Place in a floured banneton or bowl seam-side up.
8. Proofing (Cold Retard Optional)
Let the shaped dough sit at room temperature for 30–60 minutes, then cover and refrigerate for 8–12 hours for a cold retard. This slows fermentation, improves flavor, and helps develop a strong crust.
9. Baking (Scoring and Dutch Oven Baking)

Preheat your oven to 500°F (260°C). with a Dutch oven inside. When ready to bake, remove the dough from the fridge, score the top using a sharp blade or lame, and place it into the hot Dutch oven using parchment paper. Bake covered for 20 minutes, then uncovered for another 25–30 minutes at 450°F (230°C) until deep brown and crusty.
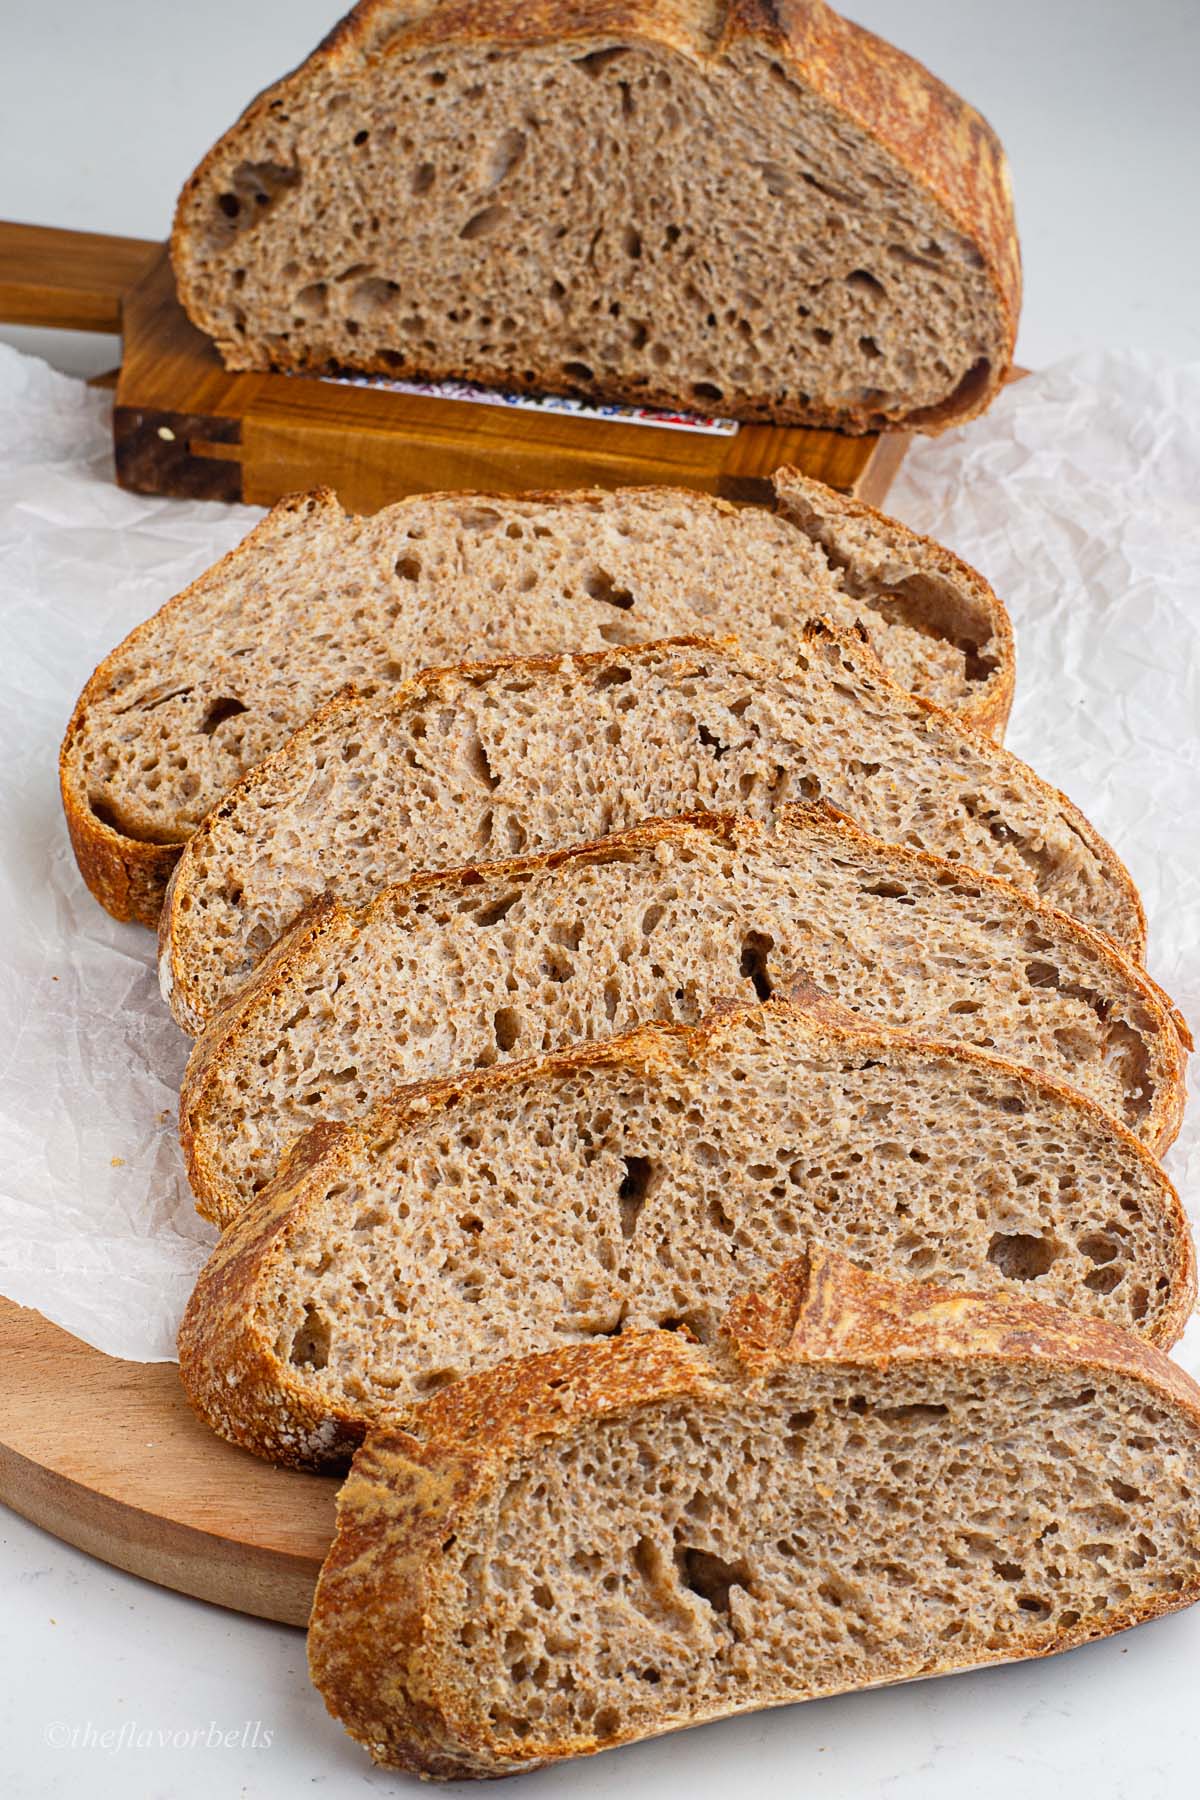
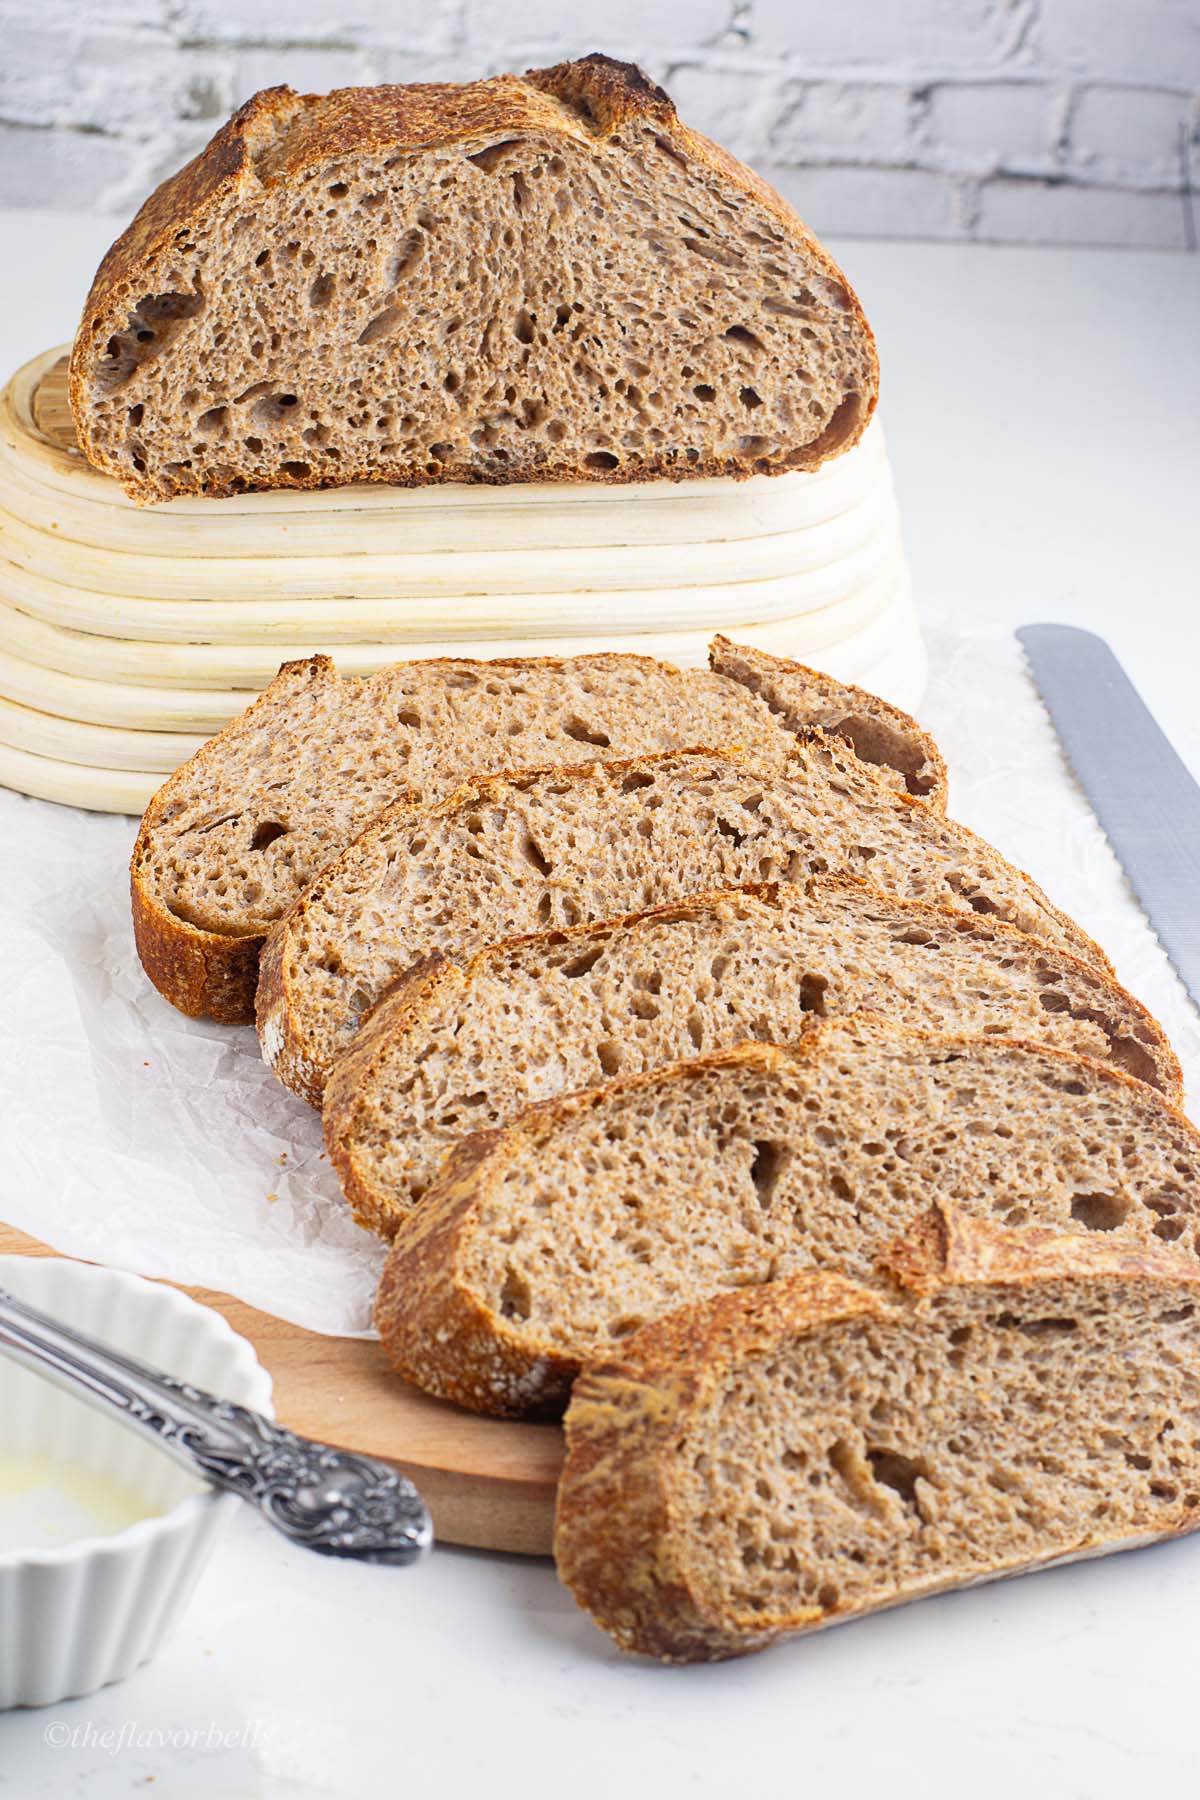
10. Cooling and Slicing
Let the whole wheat loaf cool completely on a wire rack—at least 2 hours. Slicing too early can make the crumb gummy. Once cool, slice and enjoy your best whole wheat sourdough bread yet!
⏰Baking Schedule: Sourdough Whole Wheat Bread Recipe
| Day & Time | Instructions |
| Day 1 – 9:00 AM | Combine Dough: Mix whole wheat flour + water until no dry bits remain. Cover. |
| Day 1 – 9:00–10:00 AM | Autolyse: Rest covered for 45–60 minutes. |
| Day 1 – 10:00 AM | Add Starter: Incorporate active sourdough starter, fold and pinch until combined. |
| Day 1 – 10:15 AM | Add Salt (Bassinage): Dissolve salt in water, mix into dough. |
| Day 1 – 10:30 AM – 12:30 PM | Stretch & Fold: Perform 3–4 sets every 30 minutes. (10:30, 11:00, 11:30, 12:00). |
| Day 1 – 12:30 PM – 4:30 PM | Bulk Fermentation: Rest the dough 4–6 hours until risen ~50% and becomes airy. |
| Day 1 – 4:30 PM | Bulk Fermentation: Rest the dough 4–6 hours until risen ~50% and airy. |
| Day 1 – 5:00 PM | Proofing: Rest 30–60 min at room temperature. |
| Day 1 – 6:00 PM – Overnight (up to 12 hrs) | Cold Retard (Optional): Cover and refrigerate 8–12 hrs. |
| Day 2 – 7:00 AM | Preheat Oven: Heat Dutch oven at 475°F (245°C) for 30–45 minutes. |
| Day 2 – 7:30 AM | Bake: Score dough, bake 20 min covered + 25–30 min uncovered until golden brown. |
| Day 2 – 8:30 AM | Cooling: Place bread on a wire rack for at least 2 hours before slicing. |
| Day 2 – 10:30 AM | Slice & Enjoy! Your whole wheat sourdough bread is ready. |
📝 Recipe Notes, Tips & Troubleshooting
- If your dough feels too sticky, don’t add more flour right away—stick with it. Whole wheat absorbs water slowly.
- To enhance softness, add a teaspoon of honey or olive oil.
- If your dough isn’t rising, check if your sourdough starter is active enough. Always feed sourdough starter at least 4–6 hours before baking.
- For a more open crumb, increase hydration slightly, but this works best with strong whole wheat flour.
- A dense loaf can result from under-proofing or using cold ingredients—let your dough ferment until airy and puffy.
- Always use a sharp blade to score the dough. A deep cut helps the bread rise better in the oven.
🔗 More sourdough Bread Recipes
- Feta olive sourdough
- Sourdough hot dog buns
- Overnight no-knead sourdough bread
- Apple sourdough
- Cinnamon Sourdough
- Sourdough Discard Sandwich Bread
- Cheesy sourdough Bread
This whole wheat sourdough bread recipe is a nourishing, naturally leavened staple you’ll want to make weekly—whether you’re using fresh milled flour or store-bought flour.
I hope this guide helps you master your perfect 100% whole wheat sourdough loaf. If you tried it, let me know how it turned out in the comments below or tag me on Instagram—I’d love to see your bake!
Whole Wheat Sourdough Bread
Ingredients
- 350 g whole wheat flour (2 ¾ cups )
- 260 g water (1 cup + 2 tablespoon )
- 7 g salt (1 tsp)
- 70 g active sourdough starter
Instructions
Combine the Dough
- Mix whole wheat flour and room-temperature water until no dry bits remain. The dough will be shaggy and sticky—this ensures full hydration.
Autolyse
- Cover and rest the dough for 45–60 minutes. This allows gluten to start developing and makes the dough easier to handle.
Add the Sourdough Starter
- Incorporate bubbly, active starter into the dough by folding and pinching until fully combined. This begins fermentation. Cover and let it rest for about 15-20 minutes.
Add Salt (Bassinage Method)
- Now, dissolve salt in a little water and gently mix it into the dough. The dough may feel loose at first, but it will strengthen with folds.
Stretch and Fold
- Do 3–4 sets of stretch and folds over 2 hours, resting 30 minutes between sets. This builds gluten strength and structure.
Bulk Fermentation
- Let the dough ferment at room temperature for 4–6 hours (or until risen ~50% and airy). Fermentation timing depends on your kitchen temperature.
Shape the Dough
- Turn the dough onto a floured surface, gently fold and roll into a tight loaf, then place in a floured banneton seam-side up.
Proof (Cold Retard Optional)
- Rest 30–60 minutes at room temperature, then refrigerate 8–12 hours. Cold proofing improves flavor and crust.
Bake & Cool
- Preheat the oven to 500°F (260 oC) with a Dutch oven inside. Score dough, bake 20 minutes covered, then bring down the oven temperature to 450 OF ( 230 oC) 20–22 minutes uncovered. Cool for at least 2 hours before slicing.
Notes
- If your dough feels too sticky, don’t add more flour right away—stick with it. Whole wheat absorbs water slowly.
- To enhance softness, add a teaspoon of honey or olive oil.
- If your dough isn’t rising, check if your sourdough starter is active enough. Always feed sourdough starter at least 4–6 hours before baking.
- For a more open crumb, increase hydration slightly, but this works best with strong whole wheat flour.
- A dense loaf can result from under-proofing or using cold ingredients—let your dough ferment until airy and puffy.
- Always use a sharp blade to score the dough. A deep cut helps the bread rise better in the oven.
Nutrition
🫙Storage and Reheating Instructions
Once cooled, store your whole wheat sourdough loaf in a paper bag or bread box for up to 3 days at room temperature. Avoid plastic unless you live in a dry climate, as it can make the crust soggy.
For longer storage:
- Freeze slices in a freezer-safe bag for up to 2 months. Toast directly from frozen or warm in a 350°F oven for 10–12 minutes.
- Revive a day-old loaf by spritzing it lightly with water and baking for 5–7 minutes in a hot oven to restore the crust.
❓Frequently Asked Questions
Absolutely! While freshly milled flour retains more nutrients and has a stronger aroma and flavor, store-bought whole wheat flour is a convenient and reliable substitute. Just make sure it’s not too old—flour can go rancid. Look for stone-ground or organic whole wheat flour when possible. If you’re just starting out with sourdough, this is a great way to practice the method without investing in a grain mill.
With whole wheat, judging proofing can be tricky. The dough should feel soft, slightly domed, and show bubbles on the surface. One test is the poke test—gently press the dough; it should spring back slowly and not fill in immediately. Over-proofed dough will deflate, while under-proofed dough bakes up tight. After a few bakes, you’ll start recognizing the sweet spot during bulk fermentation and cold proofing.


Leave a Reply