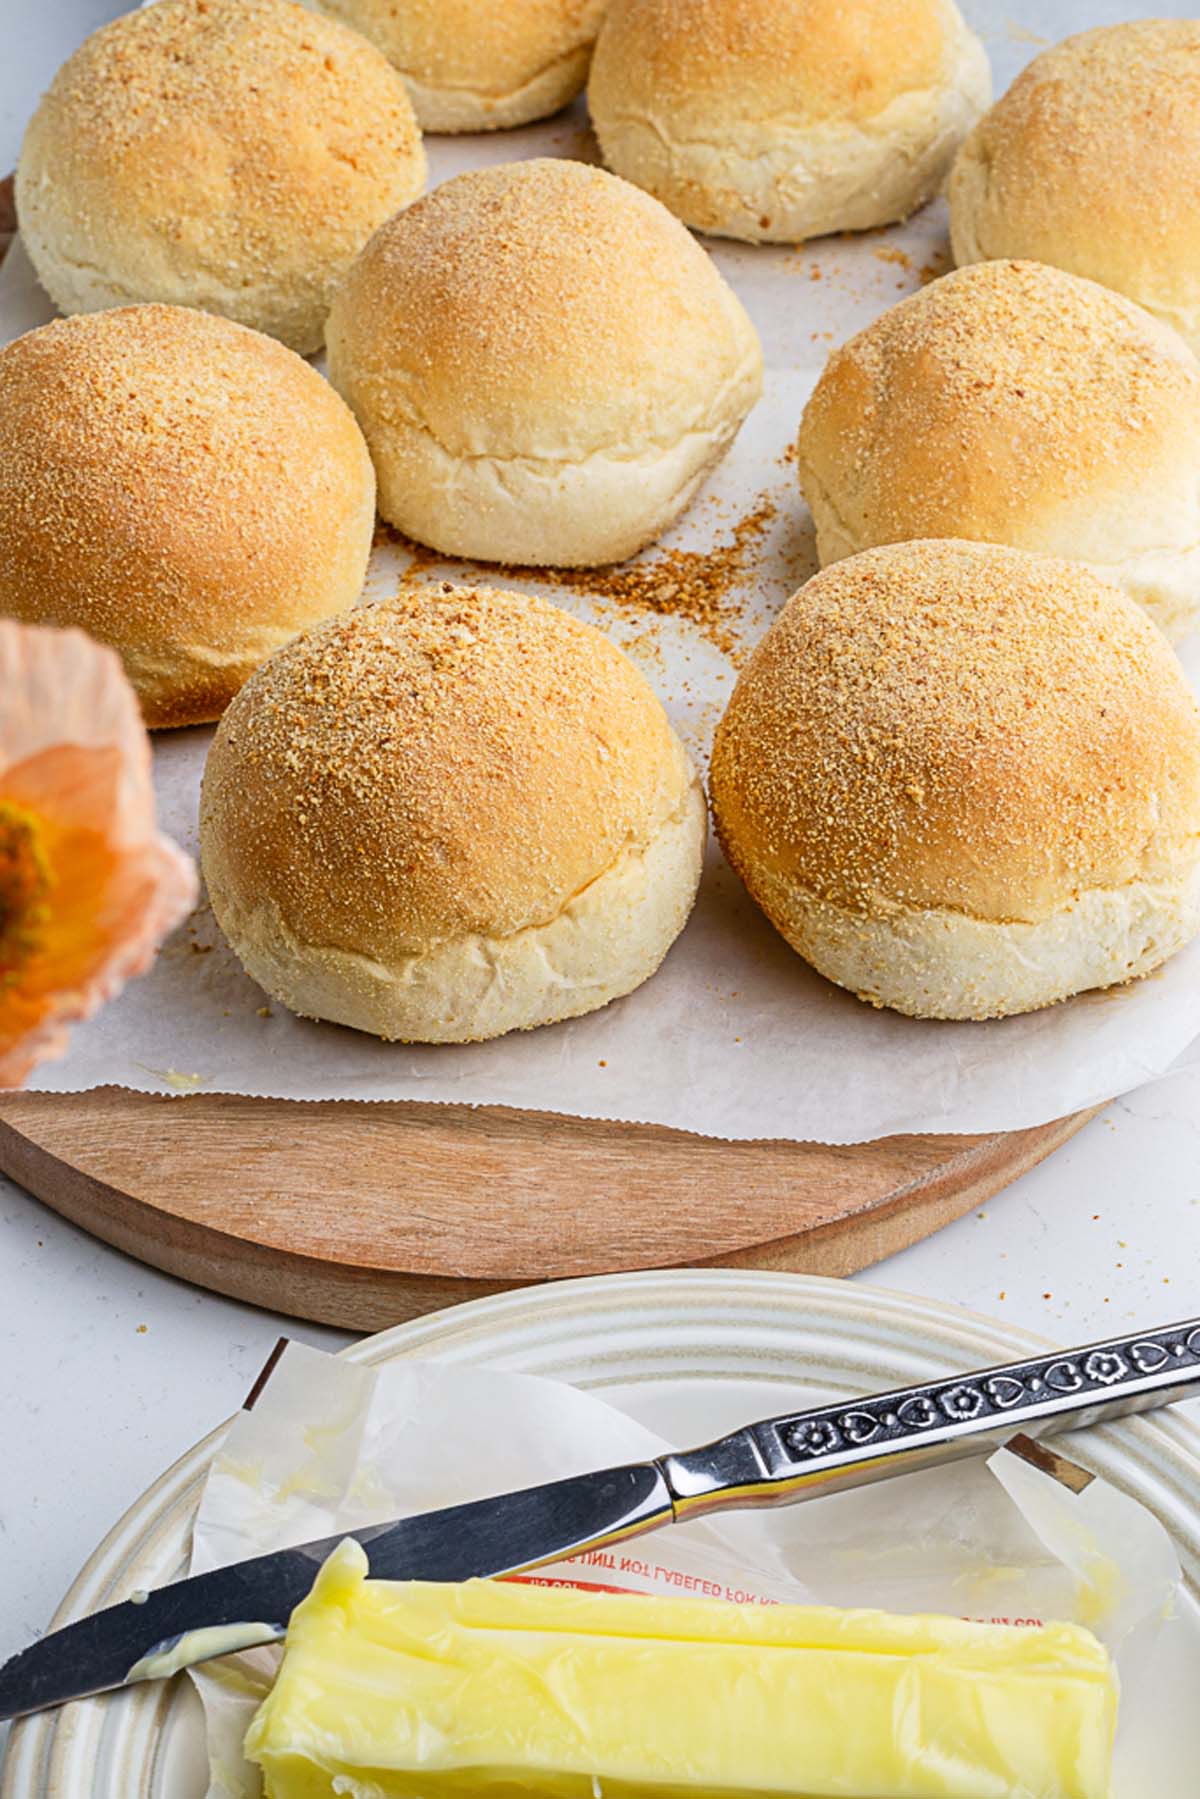
This pandesal recipe, made without eggs, captures everything you love about the beloved Filipino bread roll—soft, pillowy, and gently sweet but without a single egg in sight. One bite, and you’ll swear it came straight from a neighborhood panaderia. And that aroma? Your kitchen will smell like a Filipino bakery at dawn, warm and nostalgic!
This recipe is more of a classic pandesal recipe. The only deviation is that I am going to skip the eggs and use milk to enrich the dough.
Jump to:
- 👩🏽🍳Why You’ll Love This Recipe
- 🧂Egg-Free Pandesal Ingredient Notes
- 🔪 Step-by-Step Instructions for making Pandesal
- 📝Recipe Notes for Egg-Free Pandesal Recipe
- 🔗 More Bread Rolls recipes
- Pandesal Recipe Without Eggs
- 🍽️ How to Serve Pandesal
- 🫙Storage & Reheating Instructions
- ❓Frequently Asked Questions About Pandesal Recipe
👩🏽🍳Why You’ll Love This Recipe
- No eggs, no problem! This easy pandesal recipe is perfect for those with egg allergies, dietary restrictions, or simply out of eggs—but still want soft, fluffy bread.
- Authentic taste and texture. Despite being eggless, it delivers that signature slightly sweet, pillowy goodness of traditional Filipino pandesal.
- Simple pantry ingredients. No fancy items—just everyday staples you likely already have at home.
- Beginner-friendly. Whether you’re new to bread making or a seasoned baker, the step-by-step process makes it easy to follow and foolproof.
- Customizable. Make these Filipino Bread Rolls dairy-free, vegan, or even stuff it with your favorite filling—the possibilities are endless!
🧂Egg-Free Pandesal Ingredient Notes
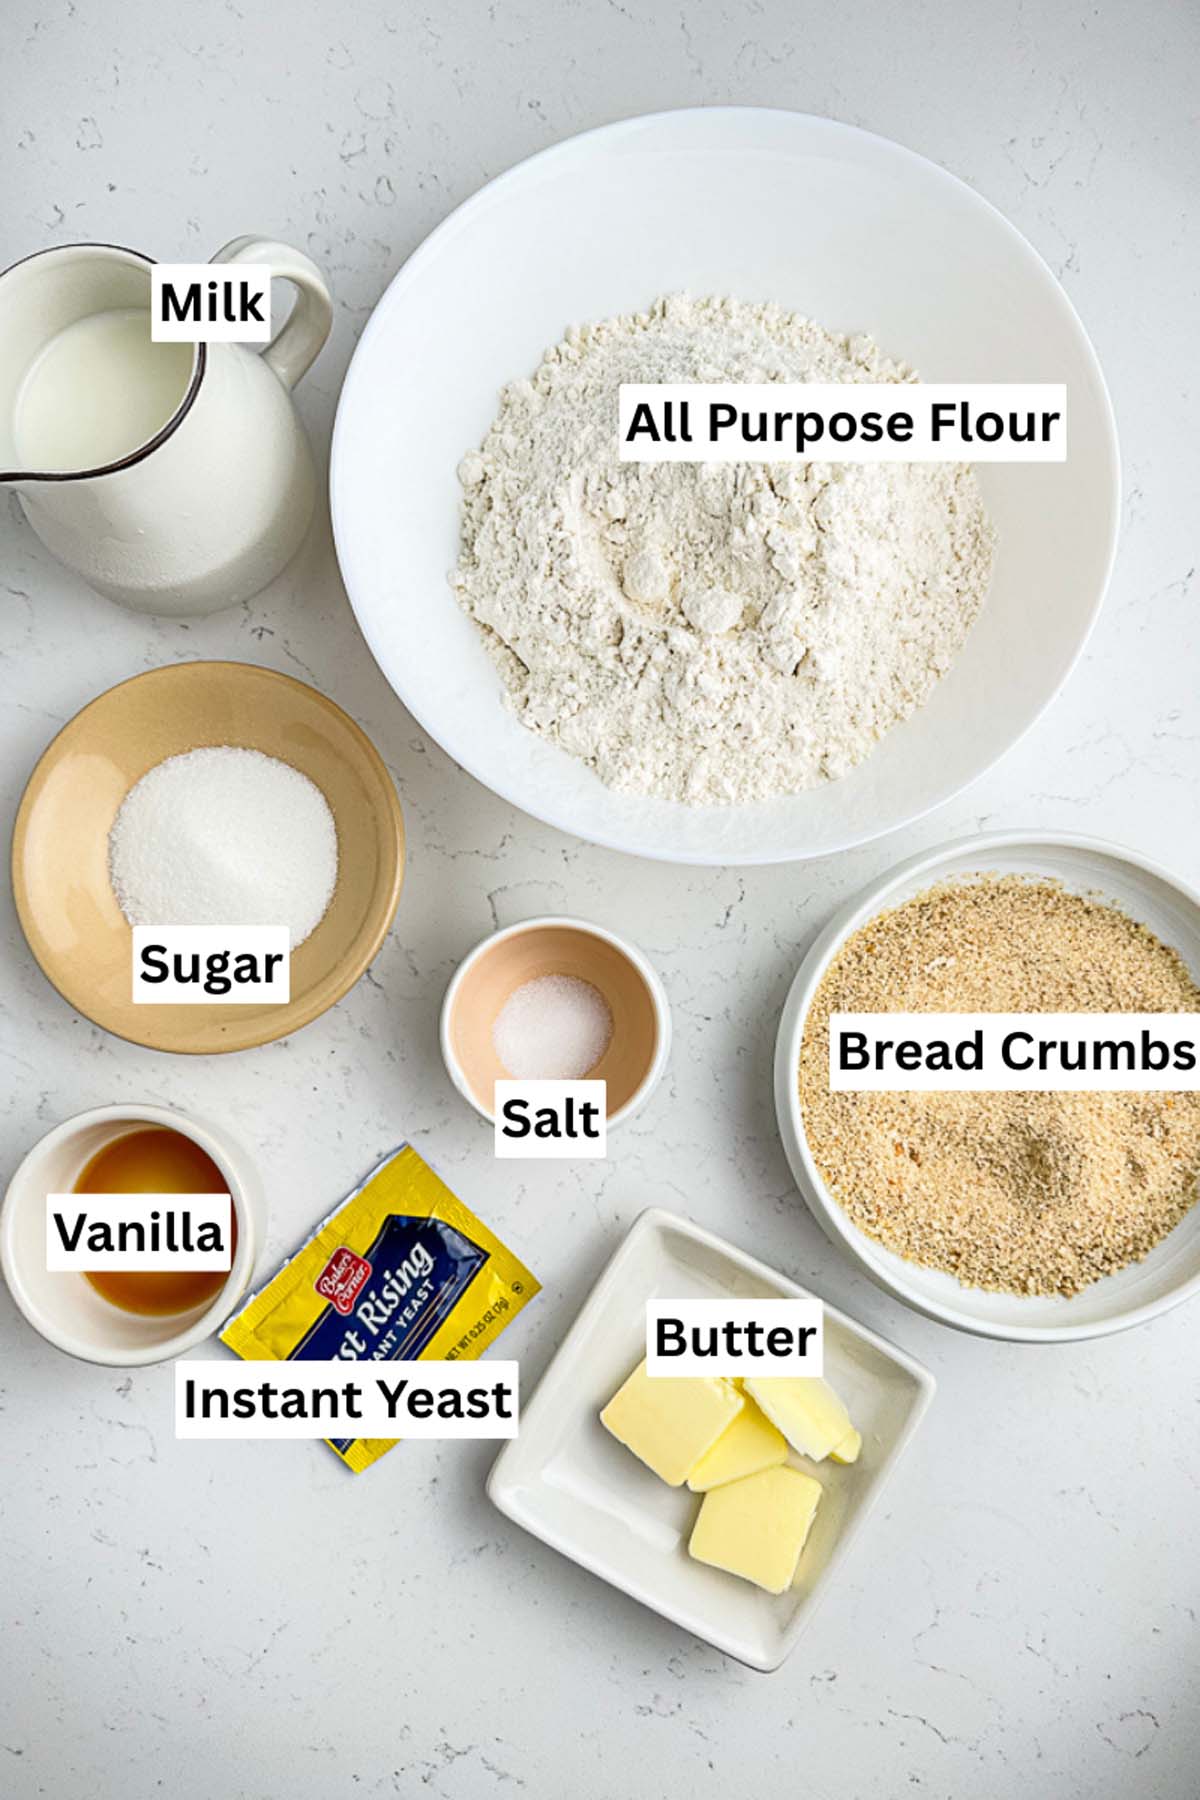
- All-Purpose Flour
Easily available in most grocery stores, all-purpose flour gives pandesal its classic soft yet slightly chewy texture. You can also use bread flour if you prefer a slightly chewier roll, but avoid cake flour—it’s too light for this recipe. - Whole Milk
Whole milk adds richness and helps keep the egg free pandesal soft. For a dairy-free version, feel free to substitute with oat milk or soy milk, which perform best in baking. If you're looking for a vegan pandesal recipe, this is the first swap to make. - Vanilla Extract
A touch of vanilla adds a subtle warmth to the dough. If unavailable, you can skip it or use almond extract for a different aromatic twist. Look for pure vanilla extract rather than synthetic ones for the best flavor. - Instant Yeast
Also known as rapid-rise yeast, this is key to making your pandesal fluffy and airy. It doesn’t need to be activated in water—just mix it directly with your dry ingredients. You can find this in most baking aisles or buy it in bulk online for better value. If you're using active dry yeast, use the same amount but dissolve it in warm milk first and let it sit for 5–10 minutes until foamy. - Unsalted Butter
Butter adds richness and flavor. You can substitute with margarine or a vegan butter alternative if you're aiming for a dairy-free eggless pandesal. Coconut oil can work too, though it adds a mild coconut flavor. - Sugar
Sugar feeds the yeast and balances the salt. You can adjust the sweetness depending on your taste, or try coconut sugar for a more natural alternative. - Salt
Essential for flavor balance. Regular table salt is fine, but sea salt or kosher salt can add a cleaner, less harsh saltiness. - Plain Bread Crumbs
The signature coating on pandesal! Use plain, dry breadcrumbs—avoid seasoned ones. If you don’t have store-bought, just toast and blend stale bread to a fine crumb. For a gluten-free option, use gluten-free breadcrumbs to suit your needs.
🔪 Step-by-Step Instructions for making Pandesal
Step 1: Making the Dough
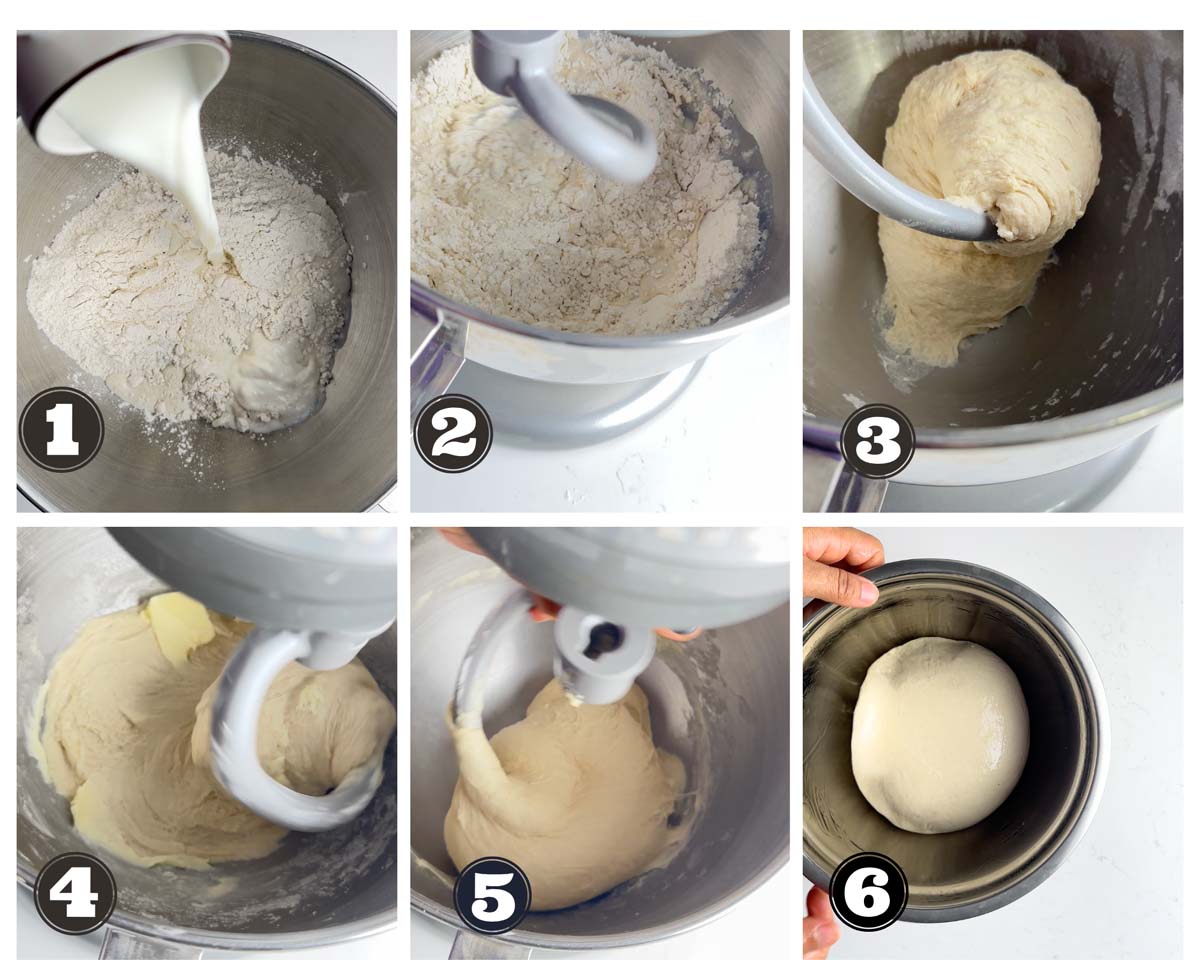
To start your eggless pandesal dough, combine the dry ingredients—flour, sugar, salt, and instant yeast—in a large mixing bowl. If you’re using a stand mixer, use the dough hook attachment and slowly pour in the warm milk mixed with vanilla. Mix on low until a shaggy dough forms, then increase to medium speed and knead for about 8–10 minutes, adding the softened butter halfway through. The dough should become smooth, soft, and slightly tacky.
No stand mixer? No problem! Mix the ingredients in a bowl using a wooden spoon or spatula until the dough starts to come together. Transfer it to a lightly floured surface and knead by hand for 10–12 minutes, incorporating the butter a little at a time. Don’t rush it—kneading helps develop gluten, which gives pandesal its signature soft texture.
Step 2: Bulk Fermentation
Once your dough is nice and elastic, form it into a ball and place it in a lightly greased bowl. Cover it with a clean kitchen towel or plastic wrap and let it rest in a warm, draft-free place for 1 to 1.5 hours, or until it’s doubled in size. This is the bulk fermentation stage, where the yeast works its magic to create airy, pillowy rolls.
Tip: If your kitchen is cold, place the bowl inside a turned-off oven with the light on—it creates the perfect cozy environment for your dough to rise.
Step 3: Shaping the Pandesal

Once your dough has risen beautifully, gently punch it down to release excess gas. Transfer it to a floured surface and divide it into equal portions—you can go by eye or weigh them for consistency. For larger pandesal divide the dough into 9 equal parts of about 86 grams each. That is what I have done here. But you can also make 10-12 small pandesal using this recipe
Roll each dough piece into a smooth ball, or oval shapes, which is the traditional shape for pandesal.
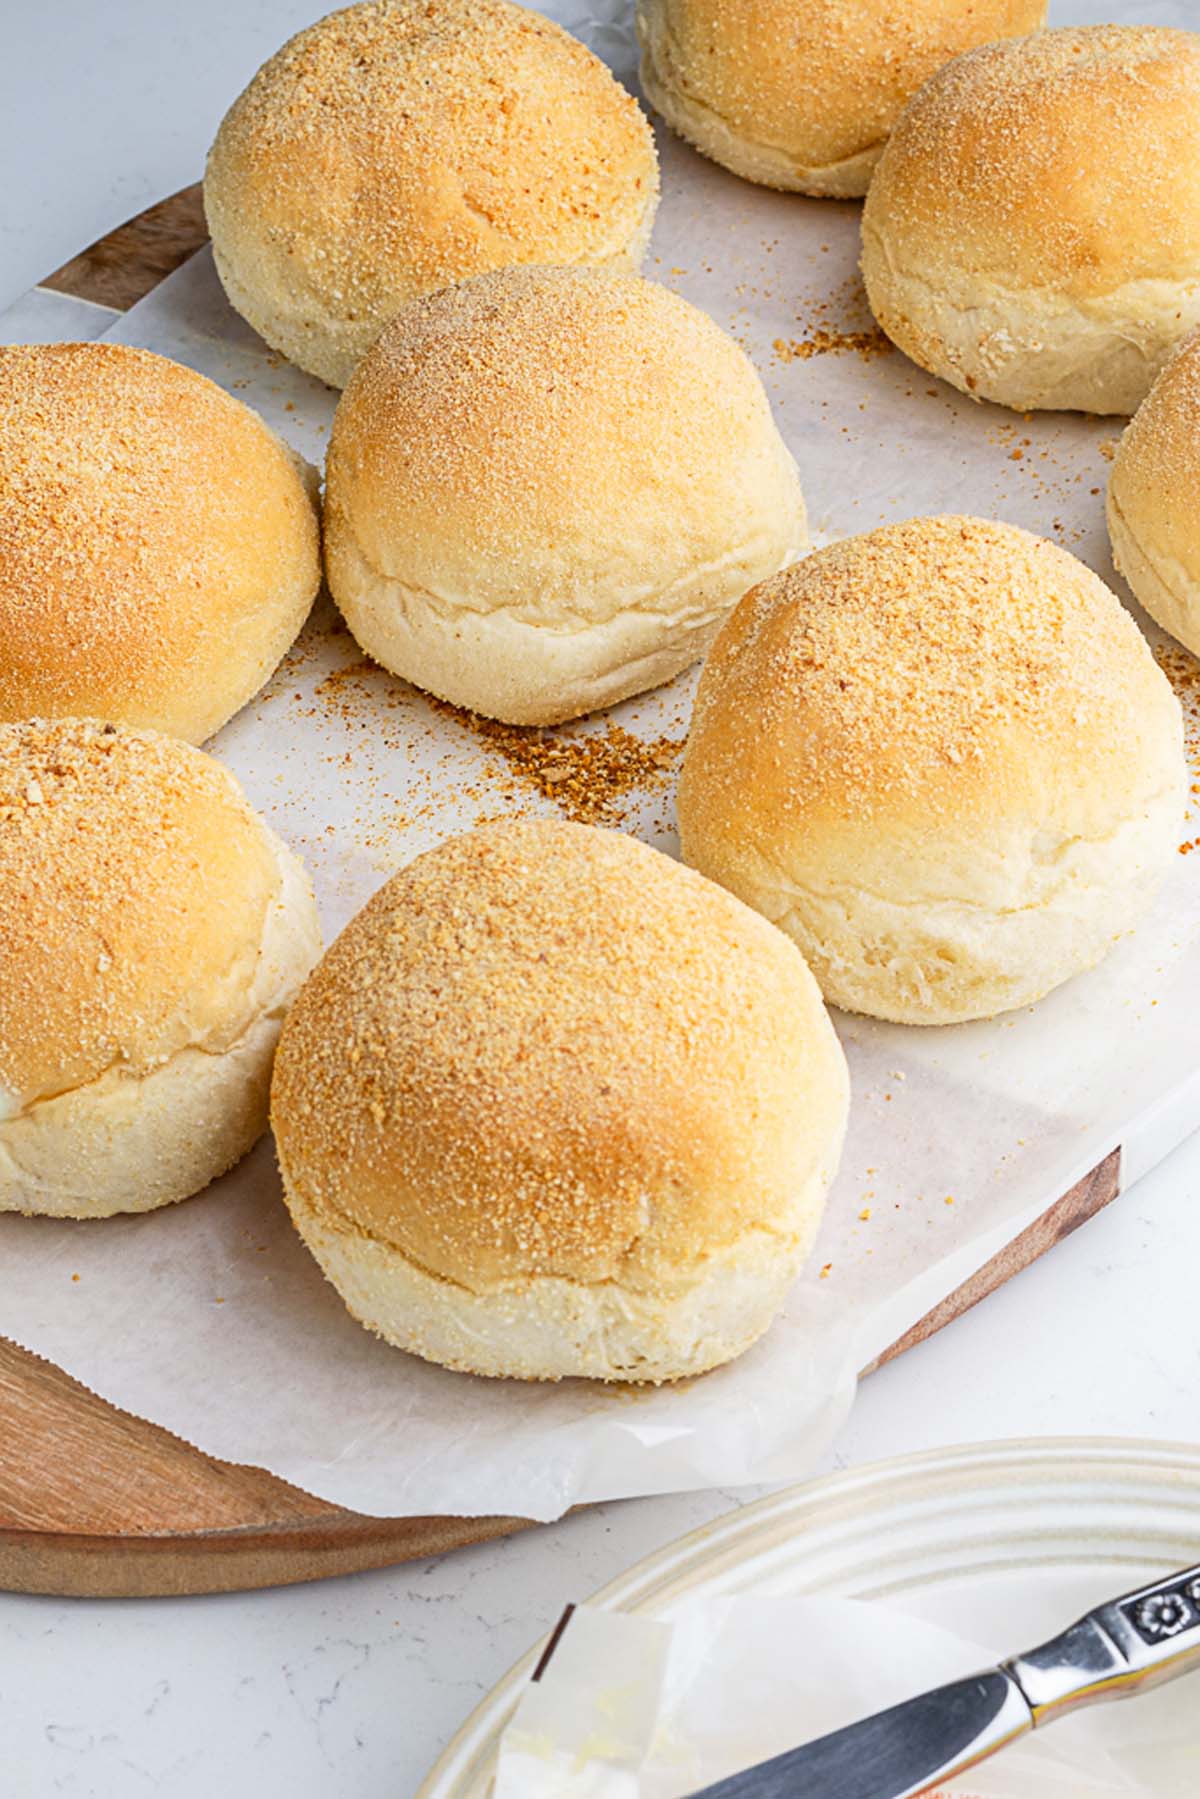
Next, roll each shaped dough piece in plain breadcrumbs until fully coated. The crumbs give pandesal that iconic outer texture and golden finish.
Step 4: Proofing
Place your breadcrumb-coated bread rolls on a baking sheet lined with parchment paper, leaving a little space between each. Cover the tray loosely with a towel or plastic wrap and let them proof for 40–50 minutes, or until puffy and noticeably risen.
This second rise ensures the pandesal turns out light and airy. Try not to overproof, or they may collapse while baking.
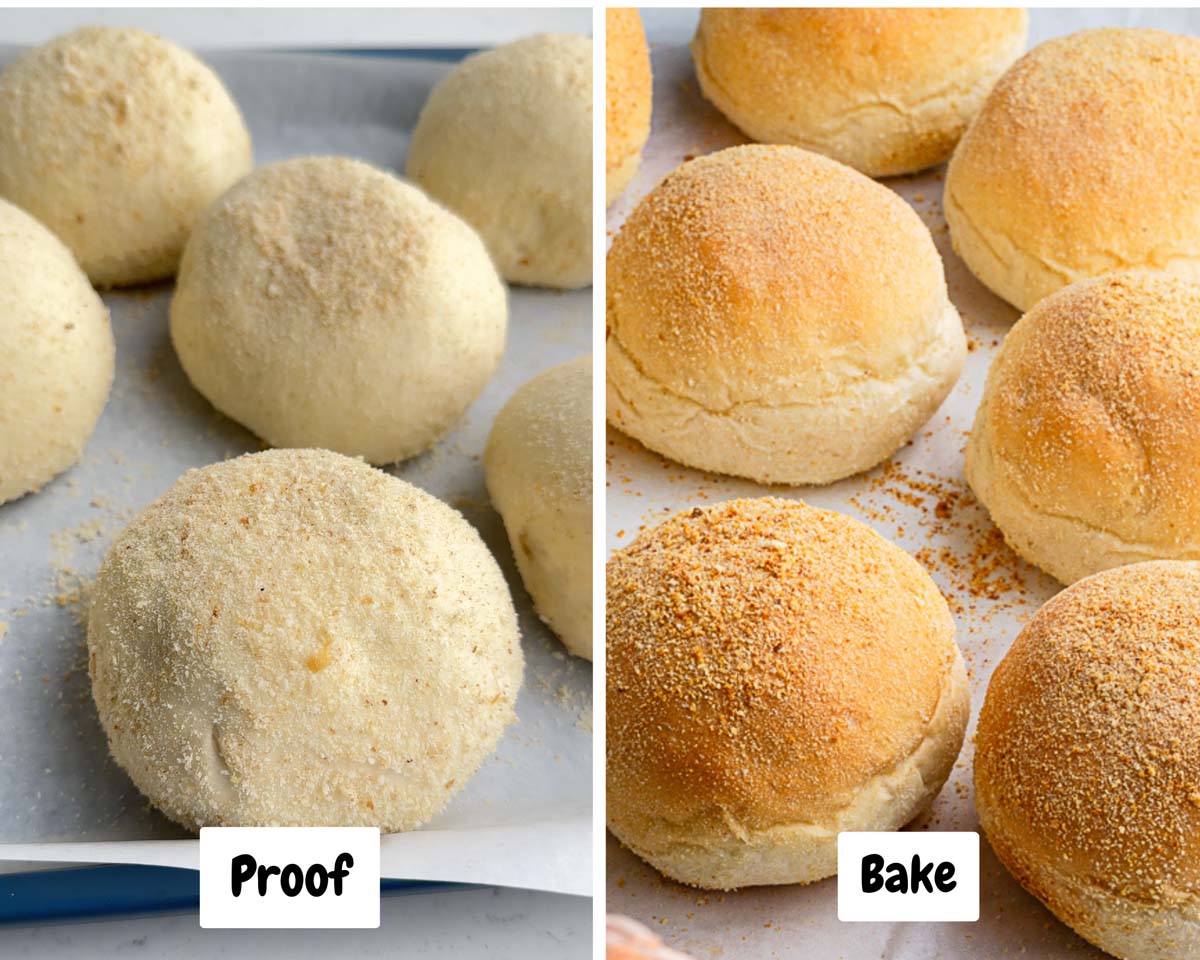
Step 5: Baking
Preheat your oven to 380°F (193°C) while the pandesal is proofing. Once ready, pop the tray into the oven and bake for 12-14 minutes, or until the tops are lightly golden and the rolls sound hollow when tapped on the bottom.
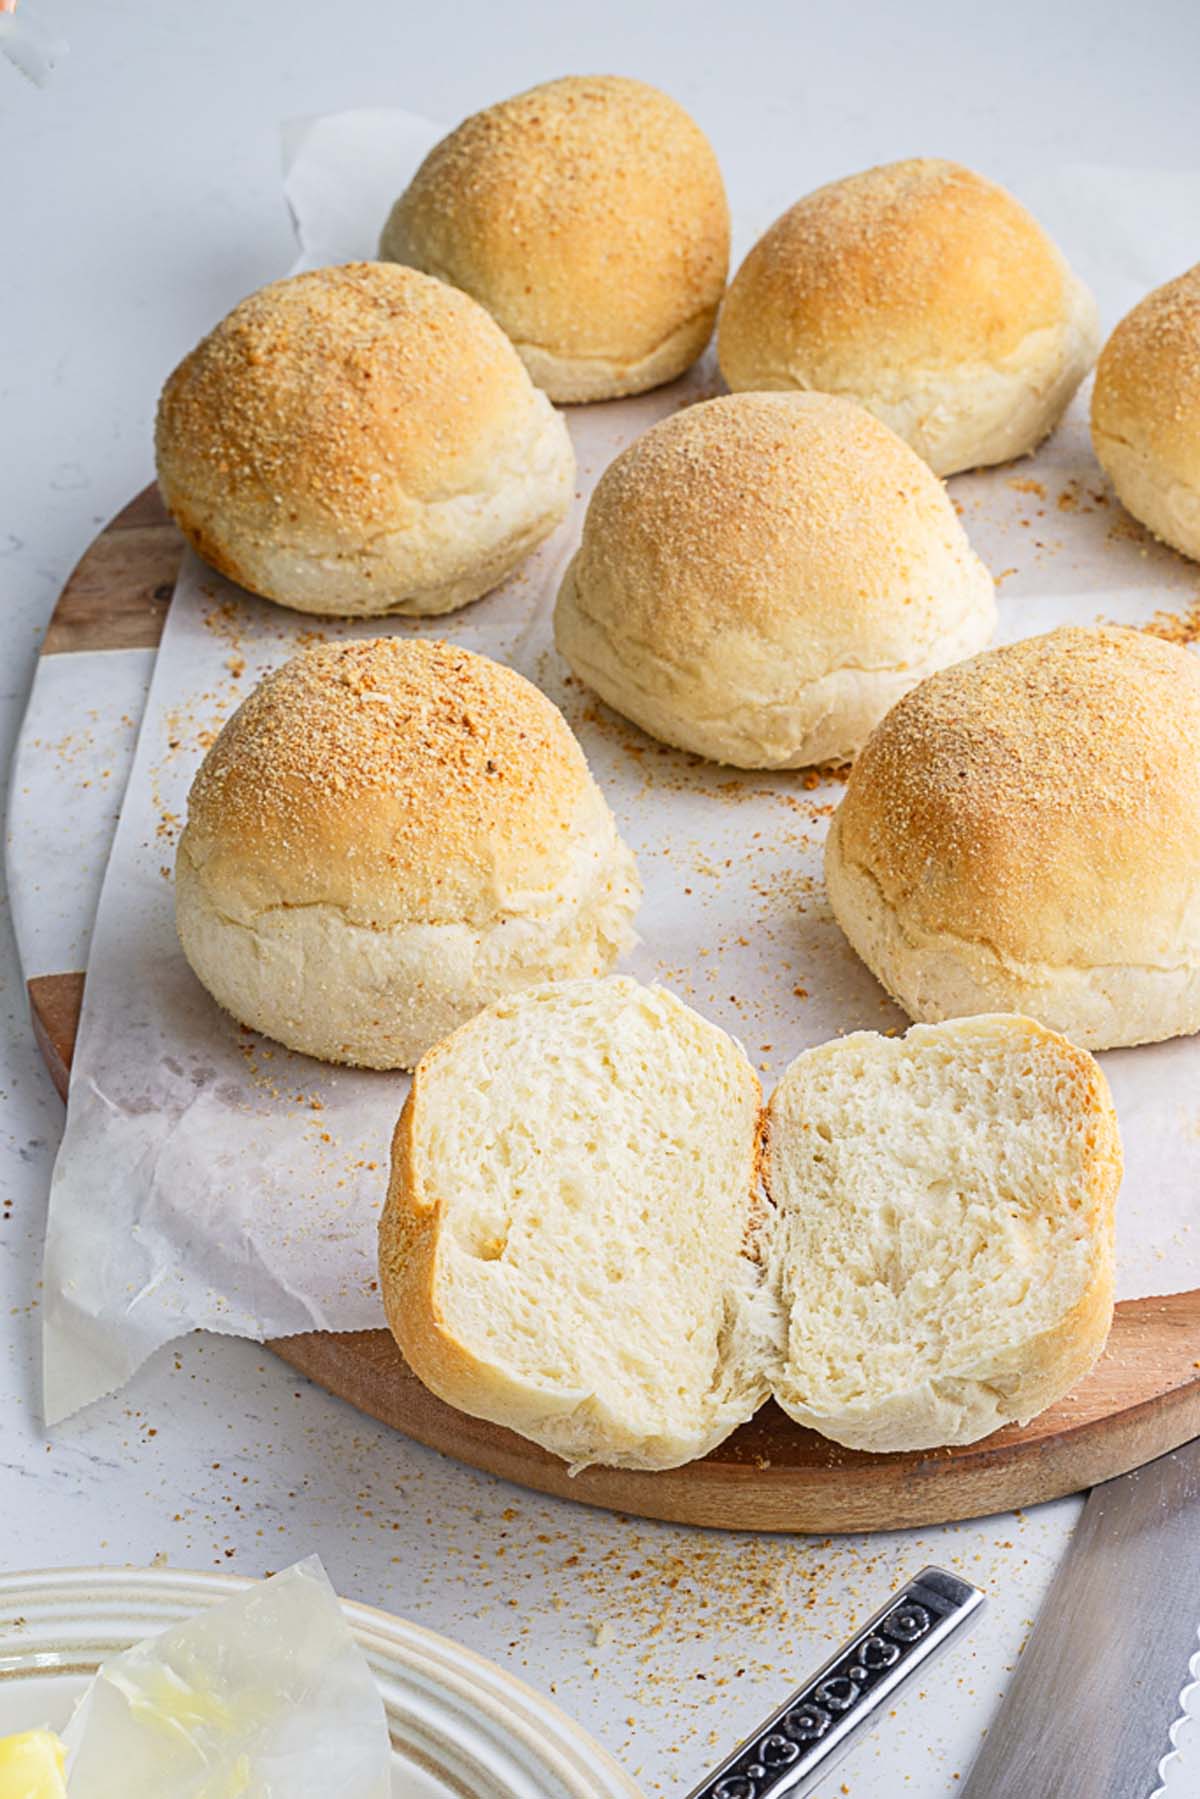
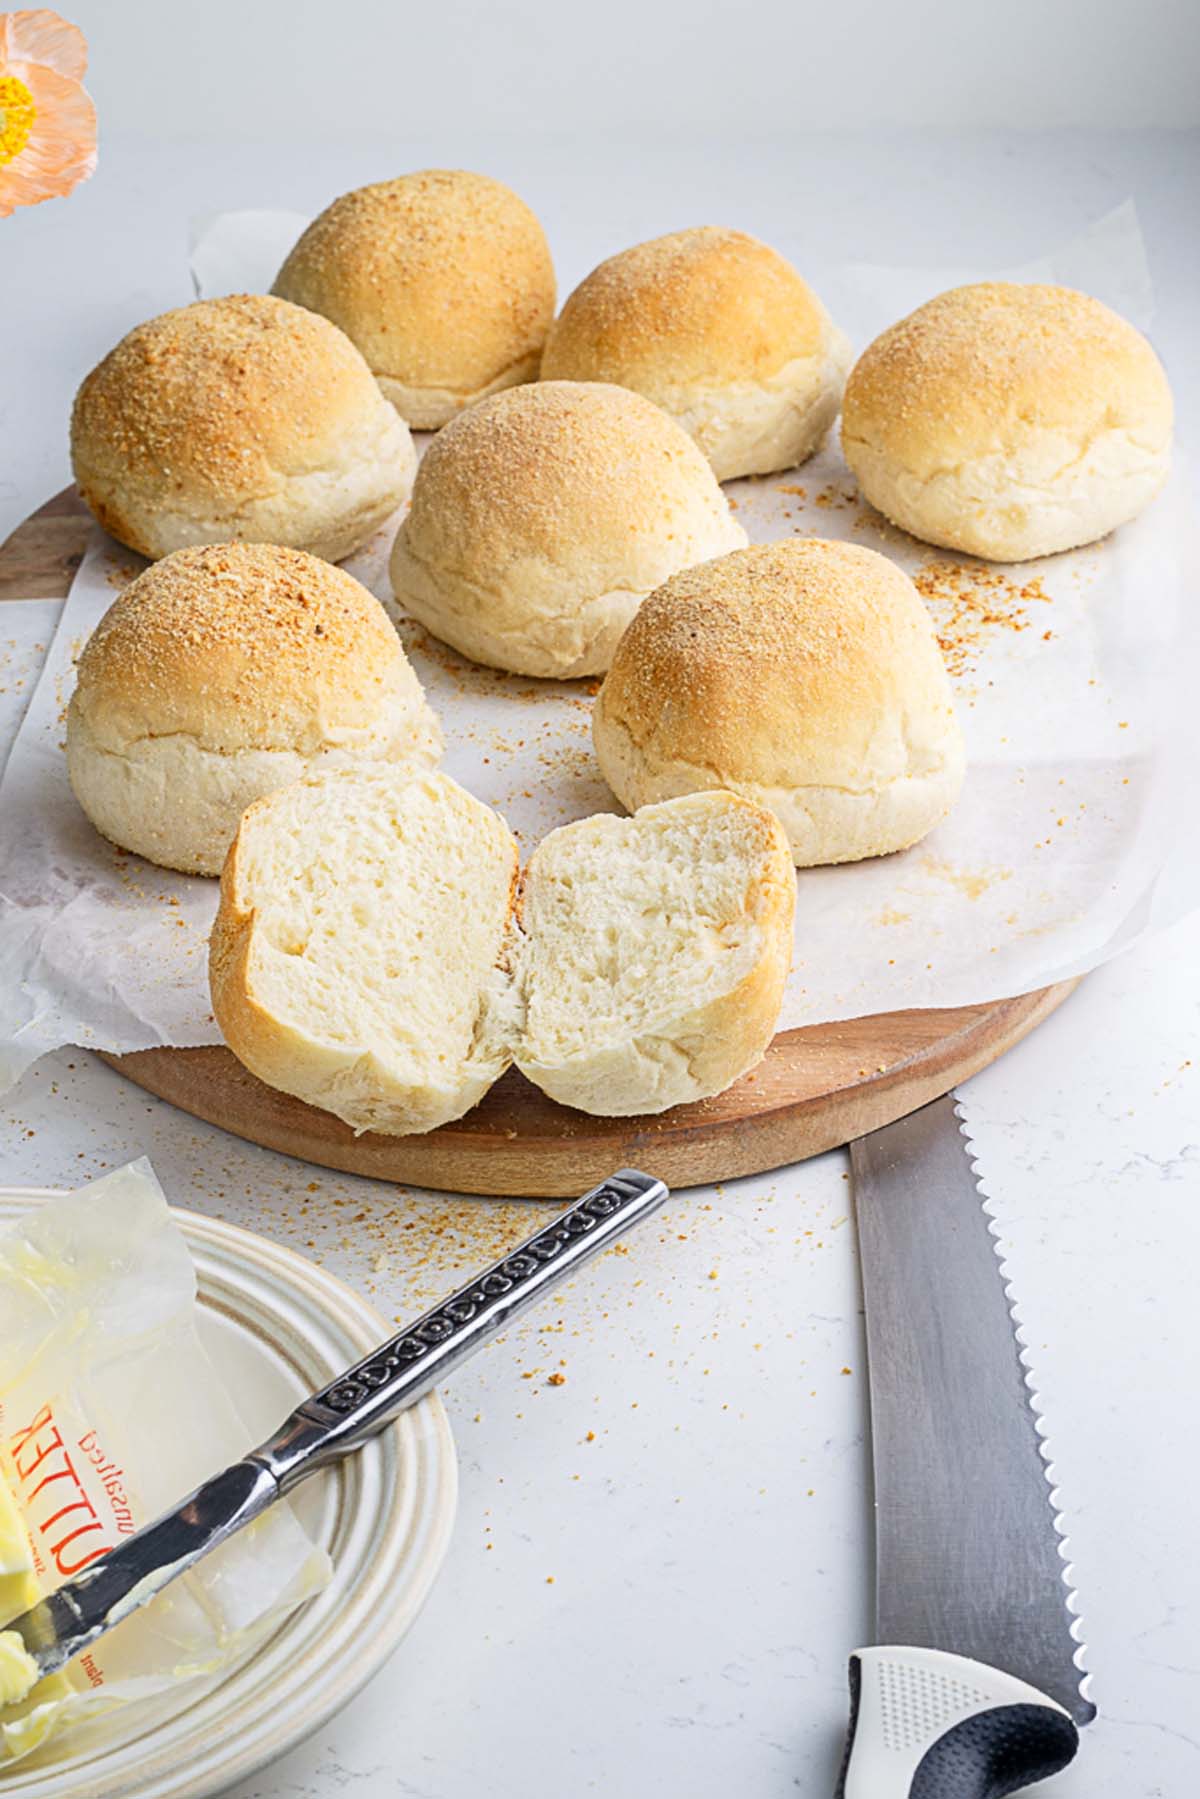
Let your freshly baked pandesal cool slightly before serving. They’re best enjoyed warm with butter, jam, or a hot cup of tea or coffee. Soft, fluffy, and so comforting—you won’t even miss the eggs!
📝Recipe Notes for Egg-Free Pandesal Recipe
- When making homemade eggless pandesal, always make sure your yeast is fresh and active—expired or improperly stored yeast can lead to dense, flat rolls. If you're using active dry yeast instead of instant yeast, don’t forget to bloom it in warm milk (not hot!) for 5–10 minutes until it’s frothy.
- The dough should be soft and slightly sticky, not dry or overly wet. If it sticks too much to your hands, resist the urge to over-flour—just lightly oil your hands or work surface instead. Over-flouring can lead to heavy rolls.
- For a dairy-free version of egg-free pandesal, simply use plant-based milk like oat or soy, and swap butter with vegan butter or margarine. These alternatives still give you that soft, fluffy crumb without changing the flavor drastically.
- Make sure not to overproof your dough during the second rise—overproofed pandesal can deflate in the oven and turn out flat. You’ll know it’s ready when it looks puffed and springs back slowly when gently pressed.
- Finally, roll your dough balls in plain breadcrumbs to get that traditional pandesal crust. Avoid seasoned or oily breadcrumbs—they can affect the flavor and texture of your finished rolls.
🔗 More Bread Rolls recipes
- Senorita Bread
- Danish Buns
- Banh Mi Rolls recipe
- Easter Rolls
- Coconut buns
- Ube Rolls
- Chocolate Buns
- Tiger Rolls
I hope this egg-free pandesal recipe brings the same warmth and comfort to your kitchen as it does to mine. If you try it, don’t forget to leave a comment or tag me—I’d love to see your soft, fluffy creations!
Pandesal Recipe Without Eggs
Ingredients
- 400 g All purpose flour (3 ¼ cups)
- 275 g Whole milk (about 1 cup + 2 tbsp)
- 1 teaspoon vanilla
- 6 g instant yeast (about 2 tsp)
- 20 g butter unsalted (about 1 ½ tbsp)
- 4 teaspoon sugar
- 1 teaspoon salt
- ½ cup bread crumbs (plain)
Instructions
Step 1: Making the Dough (With Stand Mixer or by Hand)
- Combine flour, sugar, salt, and instant yeast in the bowl of a stand mixer.
- Stand mixer method: o Use the dough hook attachment.o Slowly pour in warm milk mixed with vanilla.o Mix on low until a shaggy dough forms, then knead on medium for 8–10 minutes, adding softened butter halfway through.o Dough should be smooth, soft, and slightly tacky.
- By hand:o Mix with a spoon or spatula until it comes together.o Knead on a floured surface for 10–12 minutes, adding butter gradually.o Proper kneading is key for gluten development and soft texture.
Step 2: Bulk Fermentation
- Form dough into a ball and place in a lightly greased bowl.
- Cover with a clean towel or plastic wrap.
- Let rise in a warm, draft-free spot for 1 to 1.5 hours, or until doubled in size.
- If your kitchen is cold, place the bowl in a turned-off oven with the light on to create a cozy proofing environment.
Step 3: Shaping the Pandesal
- Gently punch down the risen dough to release air.
- Transfer to a floured surface and divide into equal portions:o For large rolls: 9 pieces, about 86g each.o For smaller rolls: divide into 10–12 pieces.
- Shape each piece into smooth balls or oval shapes (traditional).
- Roll each piece in plain breadcrumbs until fully coated for that iconic texture.
Step 4: Proofing
- Arrange breadcrumb-coated dough on a parchment-lined baking sheet, leaving enough space between each.
- Cover loosely and proof for 40–50 minutes, or until puffy and visibly risen.
- Avoid overproofing to prevent collapse during baking.
Step 5: Baking
- Preheat oven to 380°F (193°C) during the final proof.
- Bake for 12–14 minutes, until tops are golden. Rotate the baking tray at the 8 minutes mark for even baking. When done, they would become golden brown in color and the bottoms should sound hollow when tapped.
- Let cool slightly and enjoy warm with butter, jam, or tea—you won’t miss the eggs at all!
Notes
- That golden crust you love? It comes from rolling the shaped dough in plain breadcrumbs before baking. Stick to unseasoned ones—flavored or oily varieties can throw off the taste and texture of your rolls.
- Don’t let your dough overproof! If it rises too long in the second stage, the rolls can collapse in the oven. A good test? Gently press the side of a roll—if it springs back slowly, it’s ready to bake.
- If your dough feels too sticky to handle, avoid piling on extra flour. That can weigh it down and make your pandesal heavy. Instead, oil your hands or the surface lightly to keep things smooth and easy.
- Using active dry yeast instead of instant? No worries—just remember to activate it first. Mix it with warm (not hot!) milk and let it sit for 5–10 minutes until it’s bubbly and foamy before adding it to your dough.
- Want to make your pandesal dairy-free and vegan-friendly too? Swap out the milk for a plant-based option like oat or soy, and use vegan butter or margarine in place of regular butter. You’ll still get that soft, tender crumb without sacrificing flavor.
Nutrition
🍽️ How to Serve Pandesal
For eating pandesal you can keep it simple or turn it into a meal!
- Classic with butter – Serve warm with a generous smear of butter that melts right into the soft, fluffy crumb. It's a timeless Filipino favorite, perfect with coffee or hot chocolate.
- Jam or condensed milk – For a sweet touch, spread your favorite jam or drizzle with condensed milk for a nostalgic treat many grew up with.
- Savory fillings – Slice the roll and stuff it with cheese, peanut butter, or even plant-based deli slices for a hearty snack. Pandesal makes a great base for breakfast sandwiches too.
- Dunked in coffee or tsokolate – Just like in a traditional Filipino breakfast, try dunking your pandesal into hot coffee or tablea tsokolate—it soaks up the flavor beautifully.
- Make it a mini sandwich – Use egg-free pandesal as sliders or buns for small sandwiches during brunch or merienda (afternoon snack).
🫙Storage & Reheating Instructions
Egg-free pandesal is best enjoyed fresh on the day it’s baked, but it stores well too! Once cooled completely, place the rolls in an airtight container or zip-top bag and store them at room temperature for up to 2 days. For longer storage, you can freeze them for up to a month. Just wrap each roll individually in cling film and place them in a freezer-safe bag or container to keep them soft and prevent freezer burn.
To reheat eggless pandesal, simply pop them in a preheated oven at 160°C (320°F) for 5–7 minutes, or until warmed through. For frozen rolls, let them thaw at room temperature before reheating. You can also use the microwave—wrap one roll in a damp paper towel and heat for 15–20 seconds for that just-baked softness. Avoid overheating, as it can dry them out.
❓Frequently Asked Questions About Pandesal Recipe
You can make fluffy pandesal without eggs, and it still turns out soft, pillowy, and delicious. Eggs typically enrich bread dough and add a touch of richness, but in this recipe, that role is beautifully replaced by whole milk and butter, which help keep the crumb tender and moist.
The key to achieving that light texture is in the kneading and proofing—developing gluten and allowing proper fermentation lets the dough rise well, even without eggs. Using instant yeast and giving the dough time to double in size ensures airiness. You’ll be surprised how satisfying and authentic the results are, even with this egg-free version of traditional pandesal recipe.
To make a vegan eggless pandesal, you can easily swap out the dairy ingredients without sacrificing texture or taste. Instead of whole milk, use a plant-based milk like unsweetened soy milk, oat milk, or almond milk—soy and oat tend to work best in baking due to their fat and protein content.
Replace the butter with vegan butter or margarine, or even refined coconut oil if you don’t mind a slight coconut flavor. Make sure your breadcrumbs are also dairy-free and not pre-seasoned. These simple swaps will help you bake soft and fluffy vegan pandesal without eggs or dairy, making it a great option for plant-based diets or those with allergies.
If your eggless pandesal dough is too sticky or too dry, it’s usually due to flour type, measuring inconsistencies, or environmental factors like humidity. A sticky dough means it may have too much liquid or the gluten hasn’t developed enough yet—try kneading a bit longer before adding more flour. If it still doesn’t come together, add a tablespoon of flour at a time until it’s soft but manageable.
On the other hand, if it’s too dry, your flour may have absorbed too much moisture from the air, or you may have added slightly less liquid—add a splash of milk and knead it in gradually. The ideal dough should be soft, smooth, and slightly tacky but not wet or dry. Getting this consistency right is essential for fluffy, well-risen pandesal.


Leave a Reply