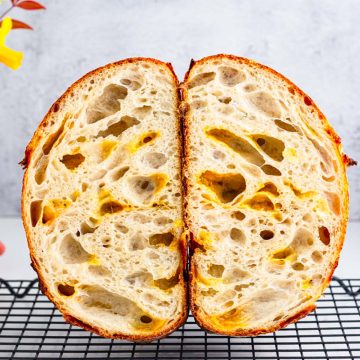
CHEESY SOURDOUGH BREAD
If you’ve ever dreamed of baking a loaf that’s crispy on the outside, soft and cheesy on the inside, and utterly irresistible, this cheesy sourdough recipe is for you. It’s not just bread; it’s a warm, comforting experience that fills your kitchen with the most incredible aroma. This recipe is a game-changer.
Ingredients
- 350 g Bread Flour (2 ¾ cups)
- 70 g sourdough starter about ¼ cup
- 260 g water divided (250+10) ( 1 cup +1 tbsp)
- 7 g Salt 1 tsp
- ⅓ Cup Cheese Cheddar Cheese + Mozzarella ( grated or finely cubed)
Instructions
Mix and Develop the Dough
- In a stand mixer with a dough hook, combine bread flour and most of the water (reserving a small amount for later). Mix on low speed until a rough, shaggy dough forms.
- Increase the speed slightly and knead for about 5-7 minutes until the dough becomes elastic.
- Cover with a damp towel and let it autolyse for 40 minutes—this allows the flour to absorb water and jumpstarts gluten development.
- If mixing by hand, combine flour and water in a large bowl and use your hands to mix thoroughly, working the dough a bit to develop gluten.
- After autolyse, add the sourdough starter and use the pincer method—pinching and folding the dough repeatedly to distribute it evenly.
- Dissolve salt in the remaining water (bassinage) and slowly incorporate it into the dough, ensuring even hydration while maintaining strength.
- Once everything is well mixed, move on to bulk fermentation.
Coil Folds or Stretch and Folds
- Transfer the dough to a rectangular dish or box.
- Perform four rounds of coil folds or stretch and folds at 30-minute intervals to build gluten strength.
- Stretch and fold method: Grab one side of the dough, stretch it upwards, then fold it over itself. Rotate the bowl and repeat on all sides.
- Coil fold method: Lift the dough from the center with both hands, allowing the edges to tuck under as it folds onto itself.
- By the final round, the dough should be smooth, elastic, and well-structured.
Incorporating the Cheese
- Add the cheese after the final stretch and fold.
- Add cheese mix into the dough now by spreading the cheese over the surface and performing a gentle coil fold. As you fold, the cheese will naturally distribute throughout the dough, embedding itself into the structure without disrupting the gluten development.
- Be careful not to overwork the dough at this stage—handling it too much can cause the cheese to break down or release excess moisture, which could affect the final texture of your bread.*
- Be careful not to overwork the dough—this can weaken its structure and prevent a good rise.
Bulk Fermentation
- Cover the bowl and let the dough ferment at room temperature for 4-6 hours. It should become puffier and slightly jiggly when moved.
- Warmer environments speed up fermentation, while cooler ones slow it down.
- If you prefer a deeper sourdough flavor, place the dough in the fridge overnight for a cold fermentation.
Shaping the Dough
- Once the dough has completed bulk fermentation, gently transfer it onto a lightly floured surface.
- Stretch the dough into a rough rectangle.
- Fold the edges toward the center, one side at a time, like wrapping a package.
- Flip it over so the seam is facing down—this creates surface tension, helping the loaf hold its shape.
- Let it rest for 20 minutes, then perform a final shaping to ensure a well-risen loaf with a good open crumb. You can shape it as a batard or a boule.
Proofing the Dough
- Place the shaped dough into a floured banneton (proofing basket) or a bowl lined with a floured kitchen towel.
- Cover and refrigerate for an overnight cold proof—this enhances flavor and makes scoring easier. (If baking the same day, let the dough proof at room temperature for 1-2 hours until it looks slightly puffy.)
Preheating the Oven and Scoring
- Preheat the oven to 500°F (260°C) for at least 50 minutes with a Dutch oven inside.
- Once ready, carefully transfer the dough onto a piece of parchment paper.
- Use a sharp blade or lame to score the top—this helps control how the bread expands in the oven.
- Lightly spray the dough with water before transferring it to the Dutch oven.
Baking
- Place the dough into the hot Dutch oven, cover with the lid, and bake for 20 minutes.
- Remove the lid and bake for another 15-20 minutes at 450°F (232°C) until the crust is deep golden brown and crisp.
- To check for doneness, tap the bottom of the loaf—it should sound hollow.
Cooling and Enjoying
- Once baked, transfer the loaf to a wire rack and let it cool for at least 1 hour before slicing.
- This resting time allows the texture to set properly and prevents steam from making the bread gummy.
- Slice, enjoy, and savor the melty, cheesy pockets in every bite!
Notes
- Preheat your oven well in advance to ensure a strong rise and a crispy, golden crust of the sourdough cheese bread. A properly heated oven makes all the difference in achieving that perfect bake.
- Make sure your sourdough starter is lively and active before using it. A weak starter can result in dense bread, so feed it about 4-6 hours before mixing your dough for the best results.
- Choose the right cheese—cheddar, mozzarella, and Gouda melt beautifully, while oily cheeses may make the dough greasy.
- Experiment with cheese varieties if you don’t have cheddar. Monterey Jack, Swiss, or even a mix of Parmesan and mozzarella can create a unique flavor twist.
- If bread flour isn’t available, all-purpose flour can be used, though the texture may be slightly softer. For added nutrition, replace up to 20% of the flour with whole wheat.
- Customize your loaf! Add-ins like garlic powder, dried herbs, or even cooked bacon bits can elevate the flavor profile of your cheesy sourdough.
- Prevent cheese from leaking out by distributing it evenly within the dough and sealing it well. Chilling the shaped loaf for 20 minutes before baking can also help the cheese stay in place.
- *If you prefer larger, more distinct cheese pockets in your baked loaf, you can incorporate the cheese during shaping instead. To do this, roll or stretch your dough out into a thin rectangle, then evenly sprinkle the cheese across the surface. Fold the dough over itself, enclosing the cheese, and then shape it into a round boule or oval batard. This method creates pockets of gooey, melty cheese throughout the bread, giving every slice a rich, cheesy bite.
📋Nutrition Facts
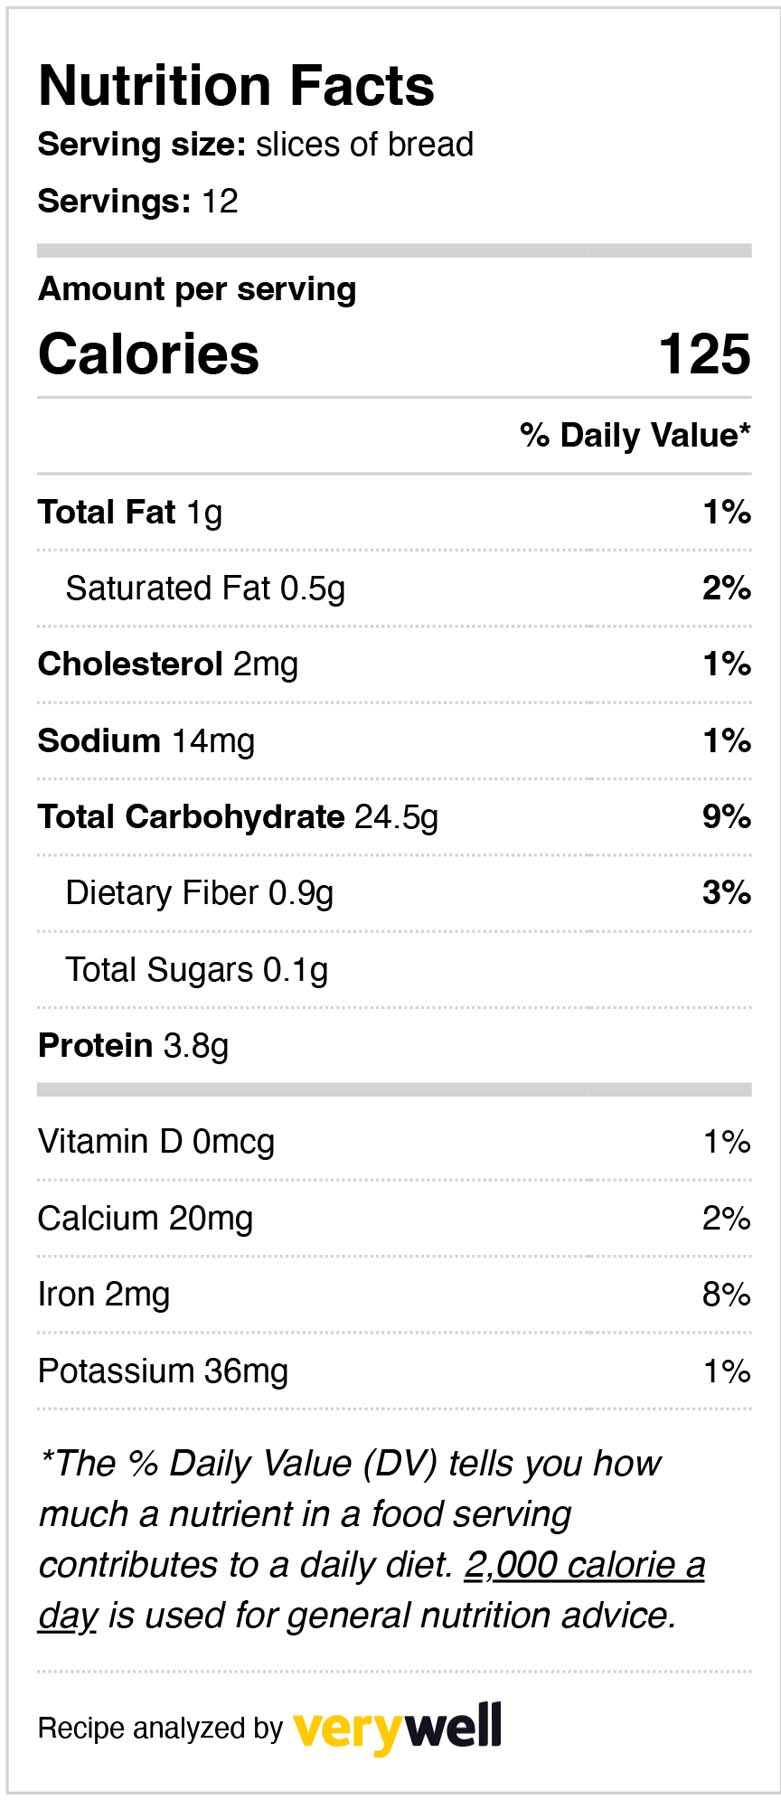
Nutrition
Calories: 125kcal
Tried this recipe?Let us know how it was!